- 82 - - 83 -
Advanced print functions Advanced print functions
4
1
2
3
5
4
1
2
3
5
Convenient print
functions
Appendix Index
Checking and
Changing Printer
Settings Using
the Control Panel
Network
Setup
Matching
Colors
Using Utility
Software
Convenient print
functions
Appendix Index
Checking and
Changing Printer
Settings Using
the Control Panel
Network
Setup
Matching
Colors
Using Utility
Software
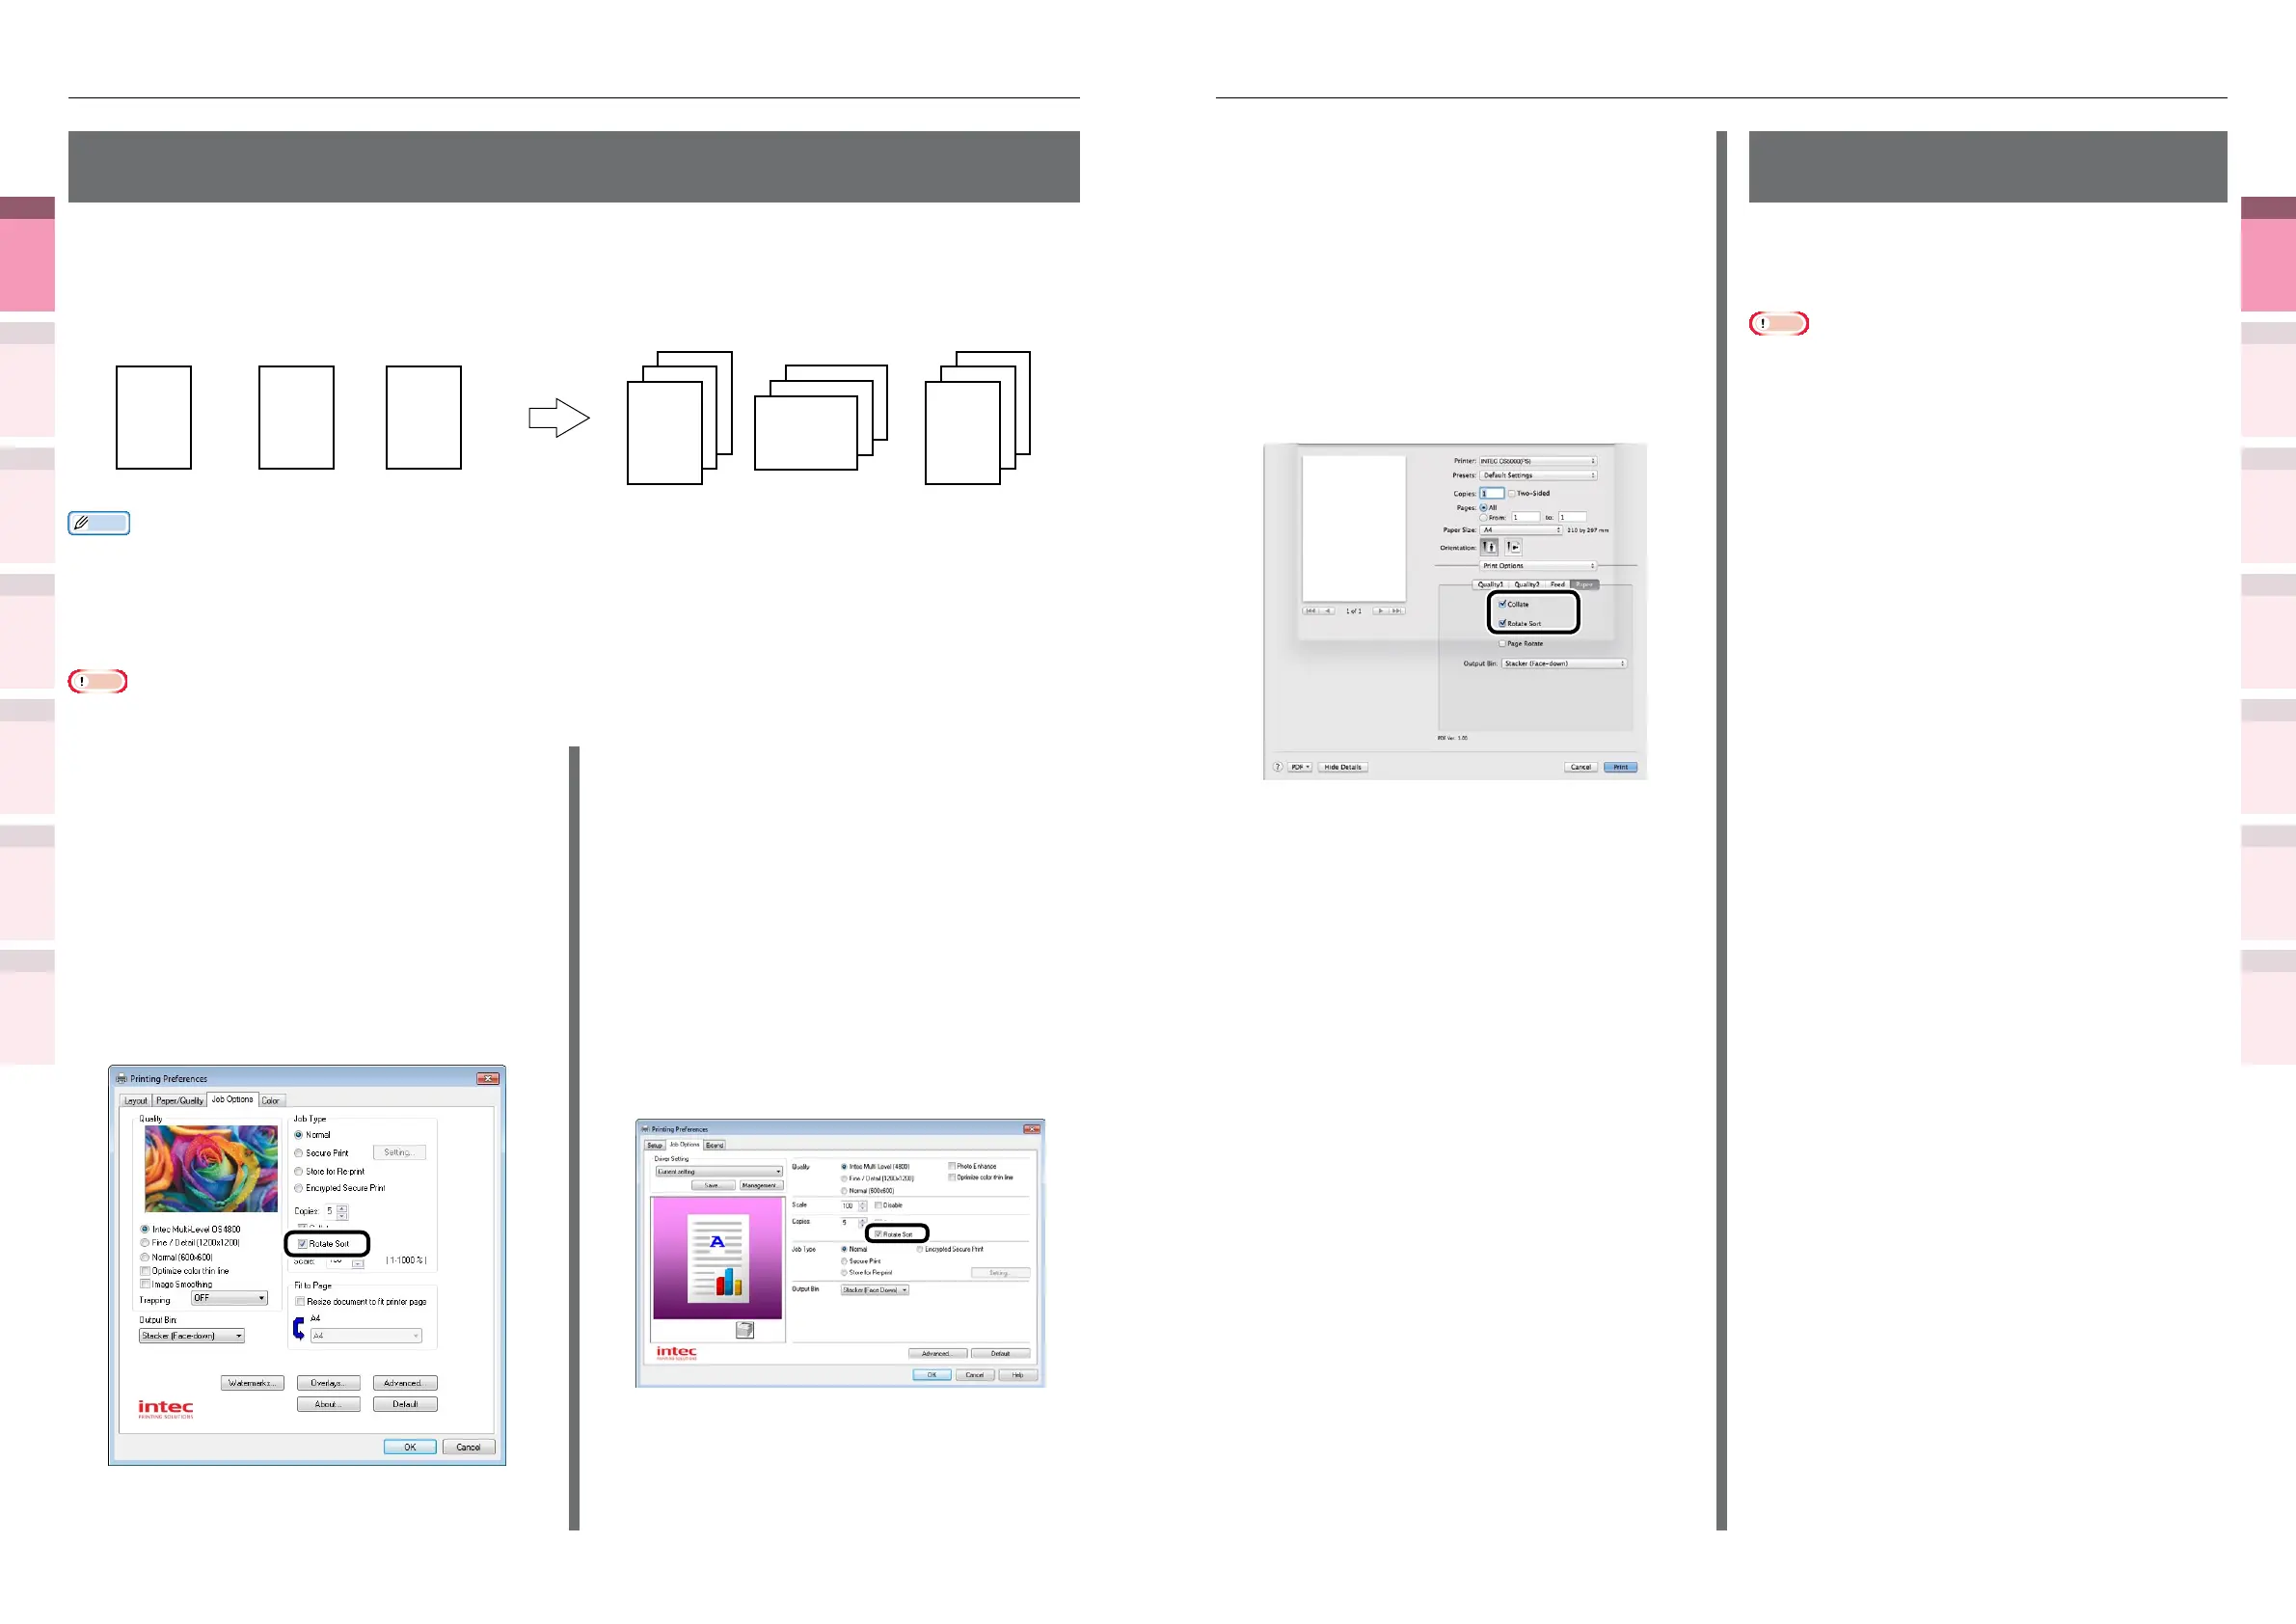
Using Mac OS X printer drivers
1
Open the le to be printed.
2
Select [Print] in the [File] menu.
3
Enter the print quantity in the print
quantity, and then click the [Paper]
button in the [Print Options] panel, and
enable the [Collate] and [Rotate Sort]
check boxes.
4
Printing will be implemented.
Saving data for repeat
printing
You can save print data to the device HDD, and
enter a password in the control panel to repeat
printing several times.
Note
z
If there is insufcient space on the built-in HDD storing
the print jobs, "File system is full" will be displayed, and
printing will be disabled.
z
Cannot be used with Mac OS X printer drivers.
1
Save the job to the printer.
(1)
Open the le to be printed.
(2)
Select [Print] in the [File] menu.
(3)
Click [Advanced] (or
[Preferences]).
Outputting portrait and landscape alternately using
batch printing
When outputting for each batch, you can output the pages in portrait and landscape orientations
alternately.
As you can output portrait and landscape alternately, it is easy to arrange print jobs with multiple
pages.
1 2 3
1
2
3
1
2
3
1
2
3
3rd 2nd 1st
Memo
z
To use the portrait and landscape output function, it is necessary to mount the (optional) HDD to the device.
z
Prepare the paper for portrait and landscape in the paper feed tray beforehand.
z
The usable paper sizes are described below.
– A4Wide, A4, A5, B5, letter, 16K (184 x 260mm), 16K (195 x 270mm), 16K (197 x 273mm)
Note
Using Windows PS printer drivers
1
Open the le to be printed.
2
Select [Print] in the [File] menu.
3
Click [Advanced] (or [Preferences]).
4
Enter the print quantity in [Copies] in [Job
Options], and enable the [Collate] check box.
5
Enable the [Rotate Sort] check box.
6
Printing will be implemented.
Using Windows PCL printer drivers
1
Open the le to be printed.
2
Select [Print] in the [File] menu.
3
Click [Advanced] (or [Preferences]).
4
Enter the print quantity in [Copies] in
the [Job Options] tab, and enable the
[Collate] check box.
5
Enable the [Rotate Sort] check box.
6
Printing will be implemented.