- 139 -
Utility software that can be used with the printer
4
5
1
2
3
Convenient print
functions
Appendix Index
Checking and
Changing Printer
Settings Using
the Control Panel
Network
Setup
Matching
Colors
Using Utility
Software
- 138 -
Utility software that can be used with the printer
4
5
1
3
2
Convenient print
functions
Appendix Index
Checking and
Changing Printer
Settings Using
the Control Panel
Network
Setup
Matching
Colors
Using Utility
Software
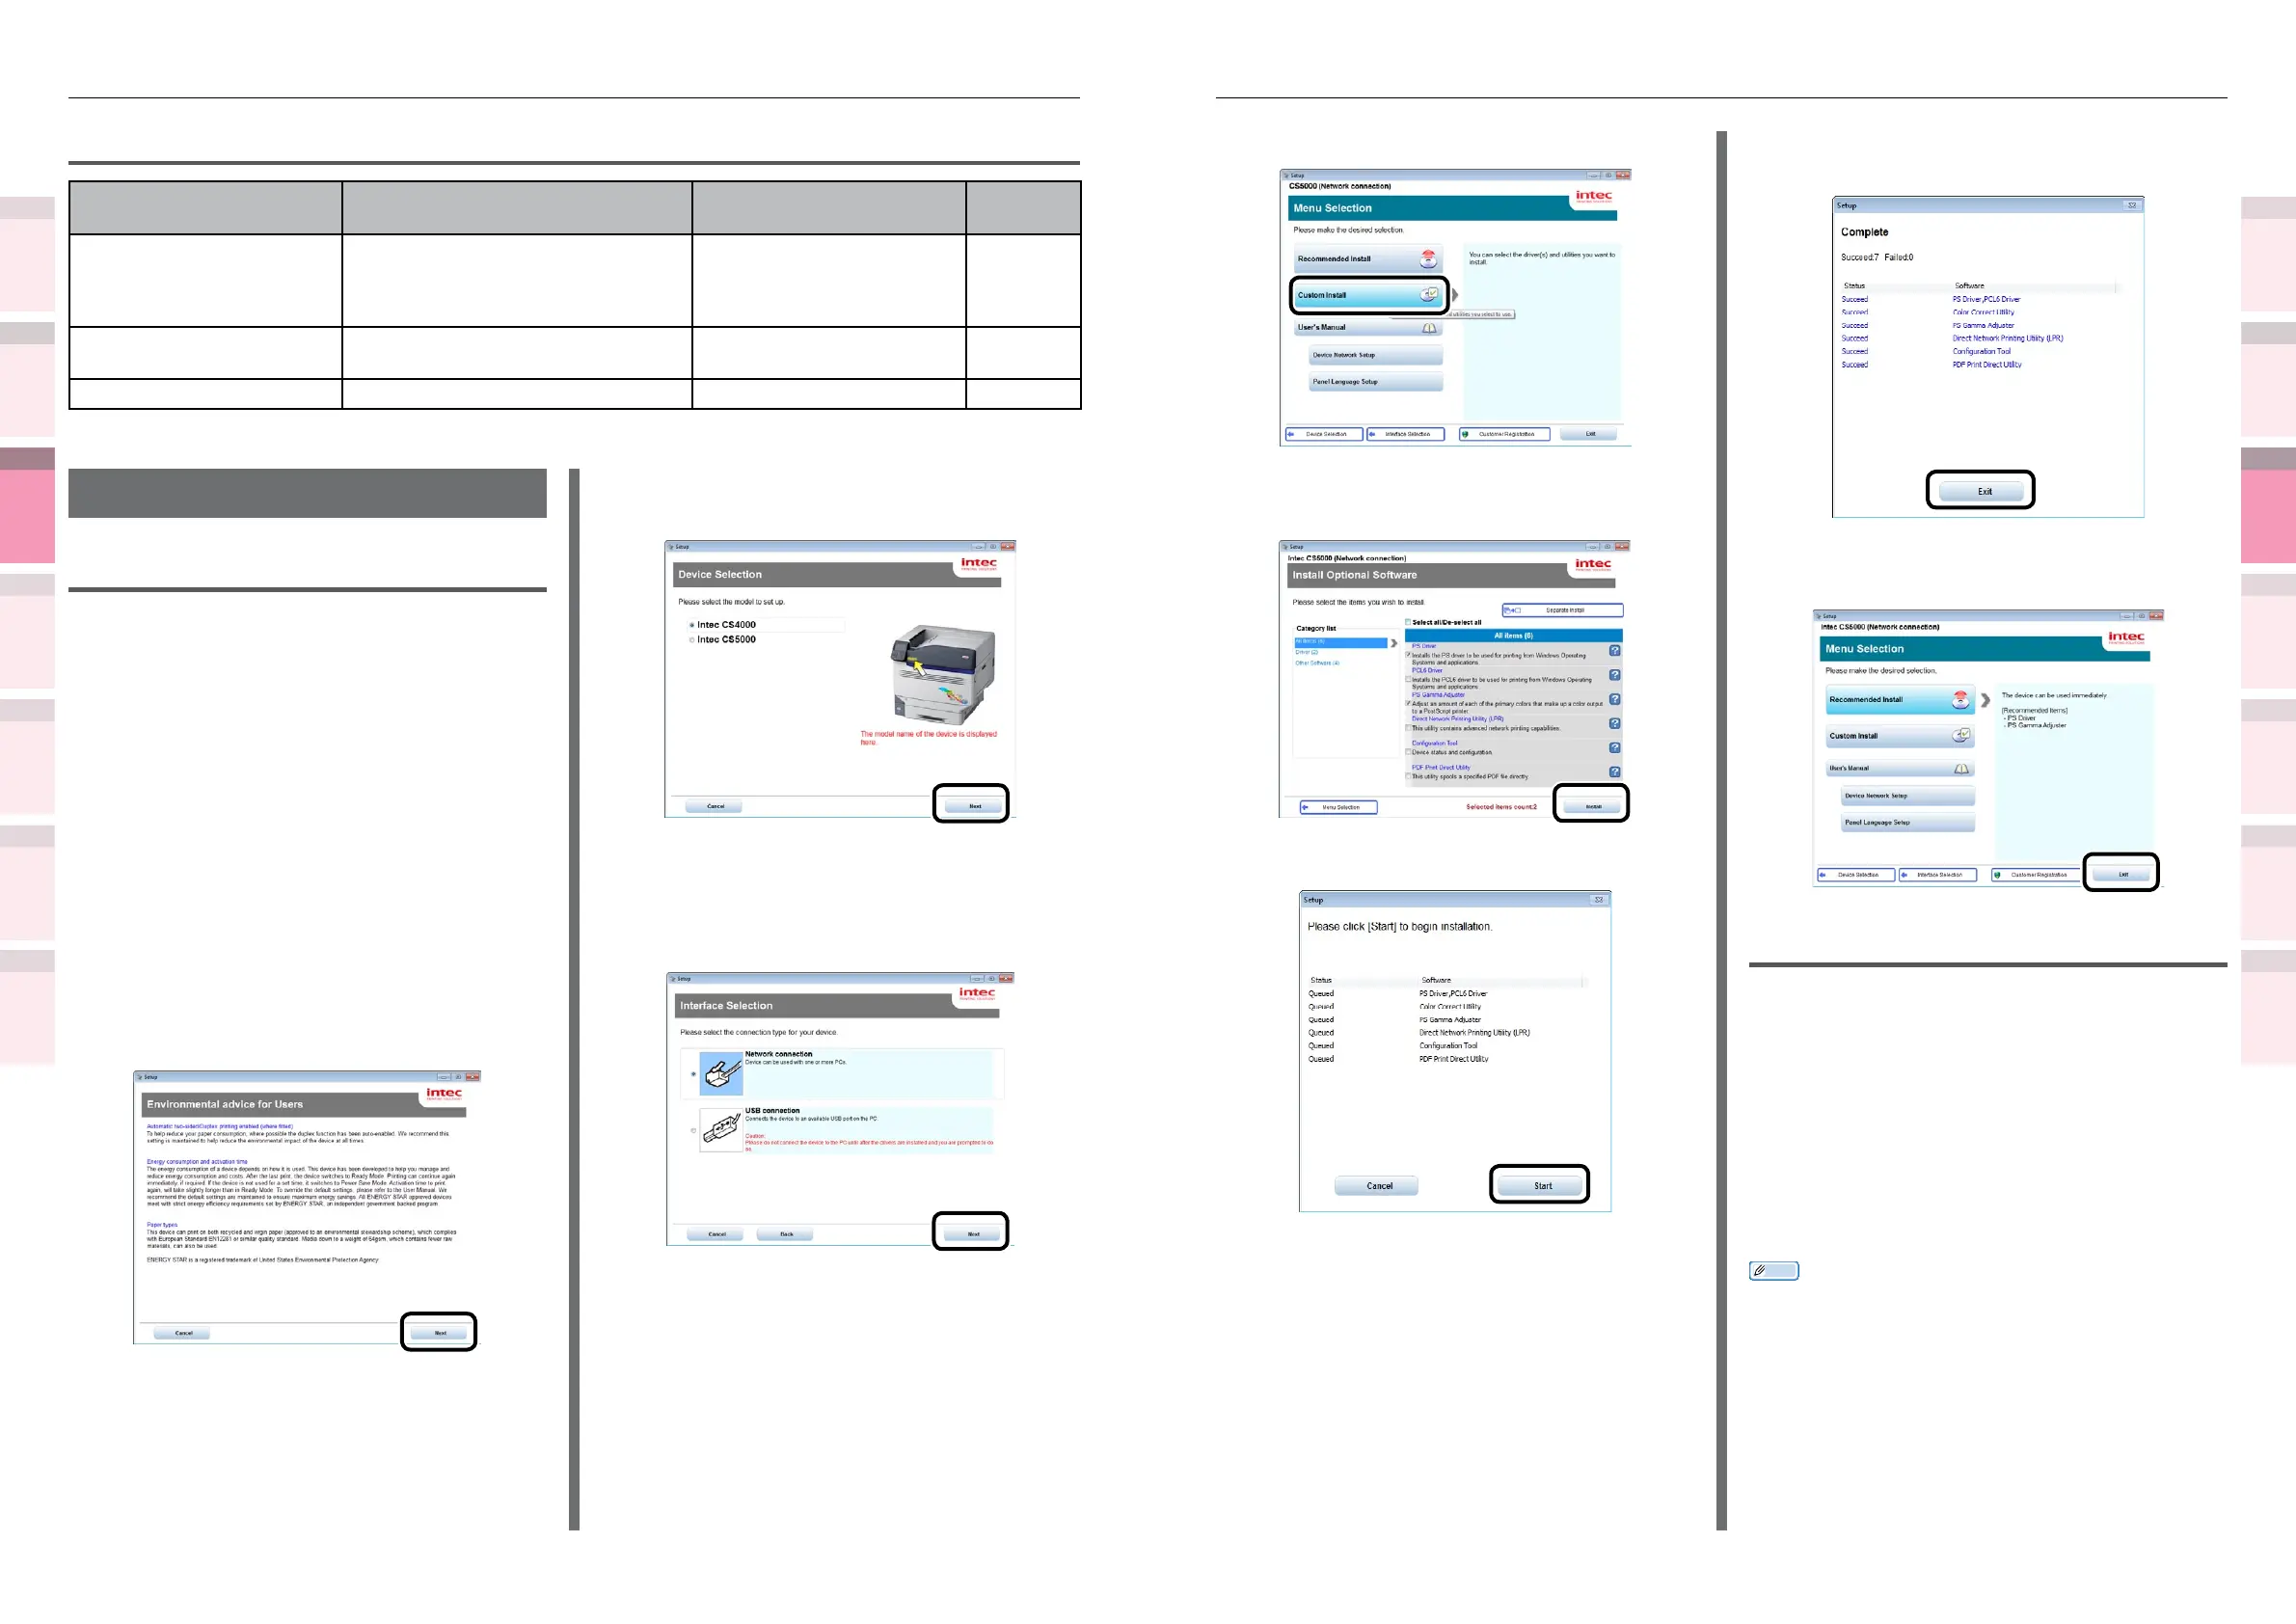
8
Click [Custom Install].
9
Enable the check box for the software
to be installed, and click [Install].
10
Check the software, and click [Start].
11
When the installation has nished, click
the [Exit] button.
12
Click the [Exit] button in the menu
window to nish.
Macintosh
Use the following procedure to install the utility
software to be used.
1
Insert the "Software DVD-ROM" in the
computer.
2
Double-click [Intec]>[Utilities] folder.
3
Drag and drop to copy the utility folder
to be installed into the desired location.
Memo
z
Double-click the utility icon in the folder to launch.
Macintosh utilities
Utility name Explanation Operations environment
Reference
pages.
Prole assistant
*1
Registers and manages ICC proles in
the device HDD. ICC proles are used
on color matching in [Graphic Pro]
mode in the drivers.
Mac OS X 10.5 to 10.8
Page 131
Panel language setup You can change the display language
of the control panel and menus.
Mac OS X 10.5 to 10.9
Page 159
NIC settings tool Enables the network setup. Mac OS X 10.5 to 10.8
Page 160
*1: Not included on the Software DVD-ROM. Download from the Intec Printing Solutions homepage.
Installing utilities
Windows
Use the following procedure to install the utility
software to be used.
1
Set the "Software DVD-ROM".
2
When the "AutoPlay" window is
displayed, click [Launch Setup.exe].
3
When the "User Account Control"
window is displayed, click the [Yes]
button.
4
Read the "Software License Agreement",
and click the [Agree] button.
5
Read the "Environmental advice for
Users", and click the [Next] button.
6
Select the printer to be used, and then
click the [Next] button.
7
Select the printer connection method,
and click the [Next] button. (In this
example, network connection is
selected.)