- 210 - - 211 -
Setting the network from the web browser Setting the network from the web browser
5
1
2
4
3
5
1
2
4
3
Convenient print
functions
Appendix Index
Checking and
Changing Printer
Settings Using
the Control Panel
Network
Setup
Matching
Colors
Using Utility
Software
Convenient print
functions
Appendix Index
Checking and
Changing Printer
Settings Using
the Control Panel
Network
Setup
Matching
Colors
Using Utility
Software
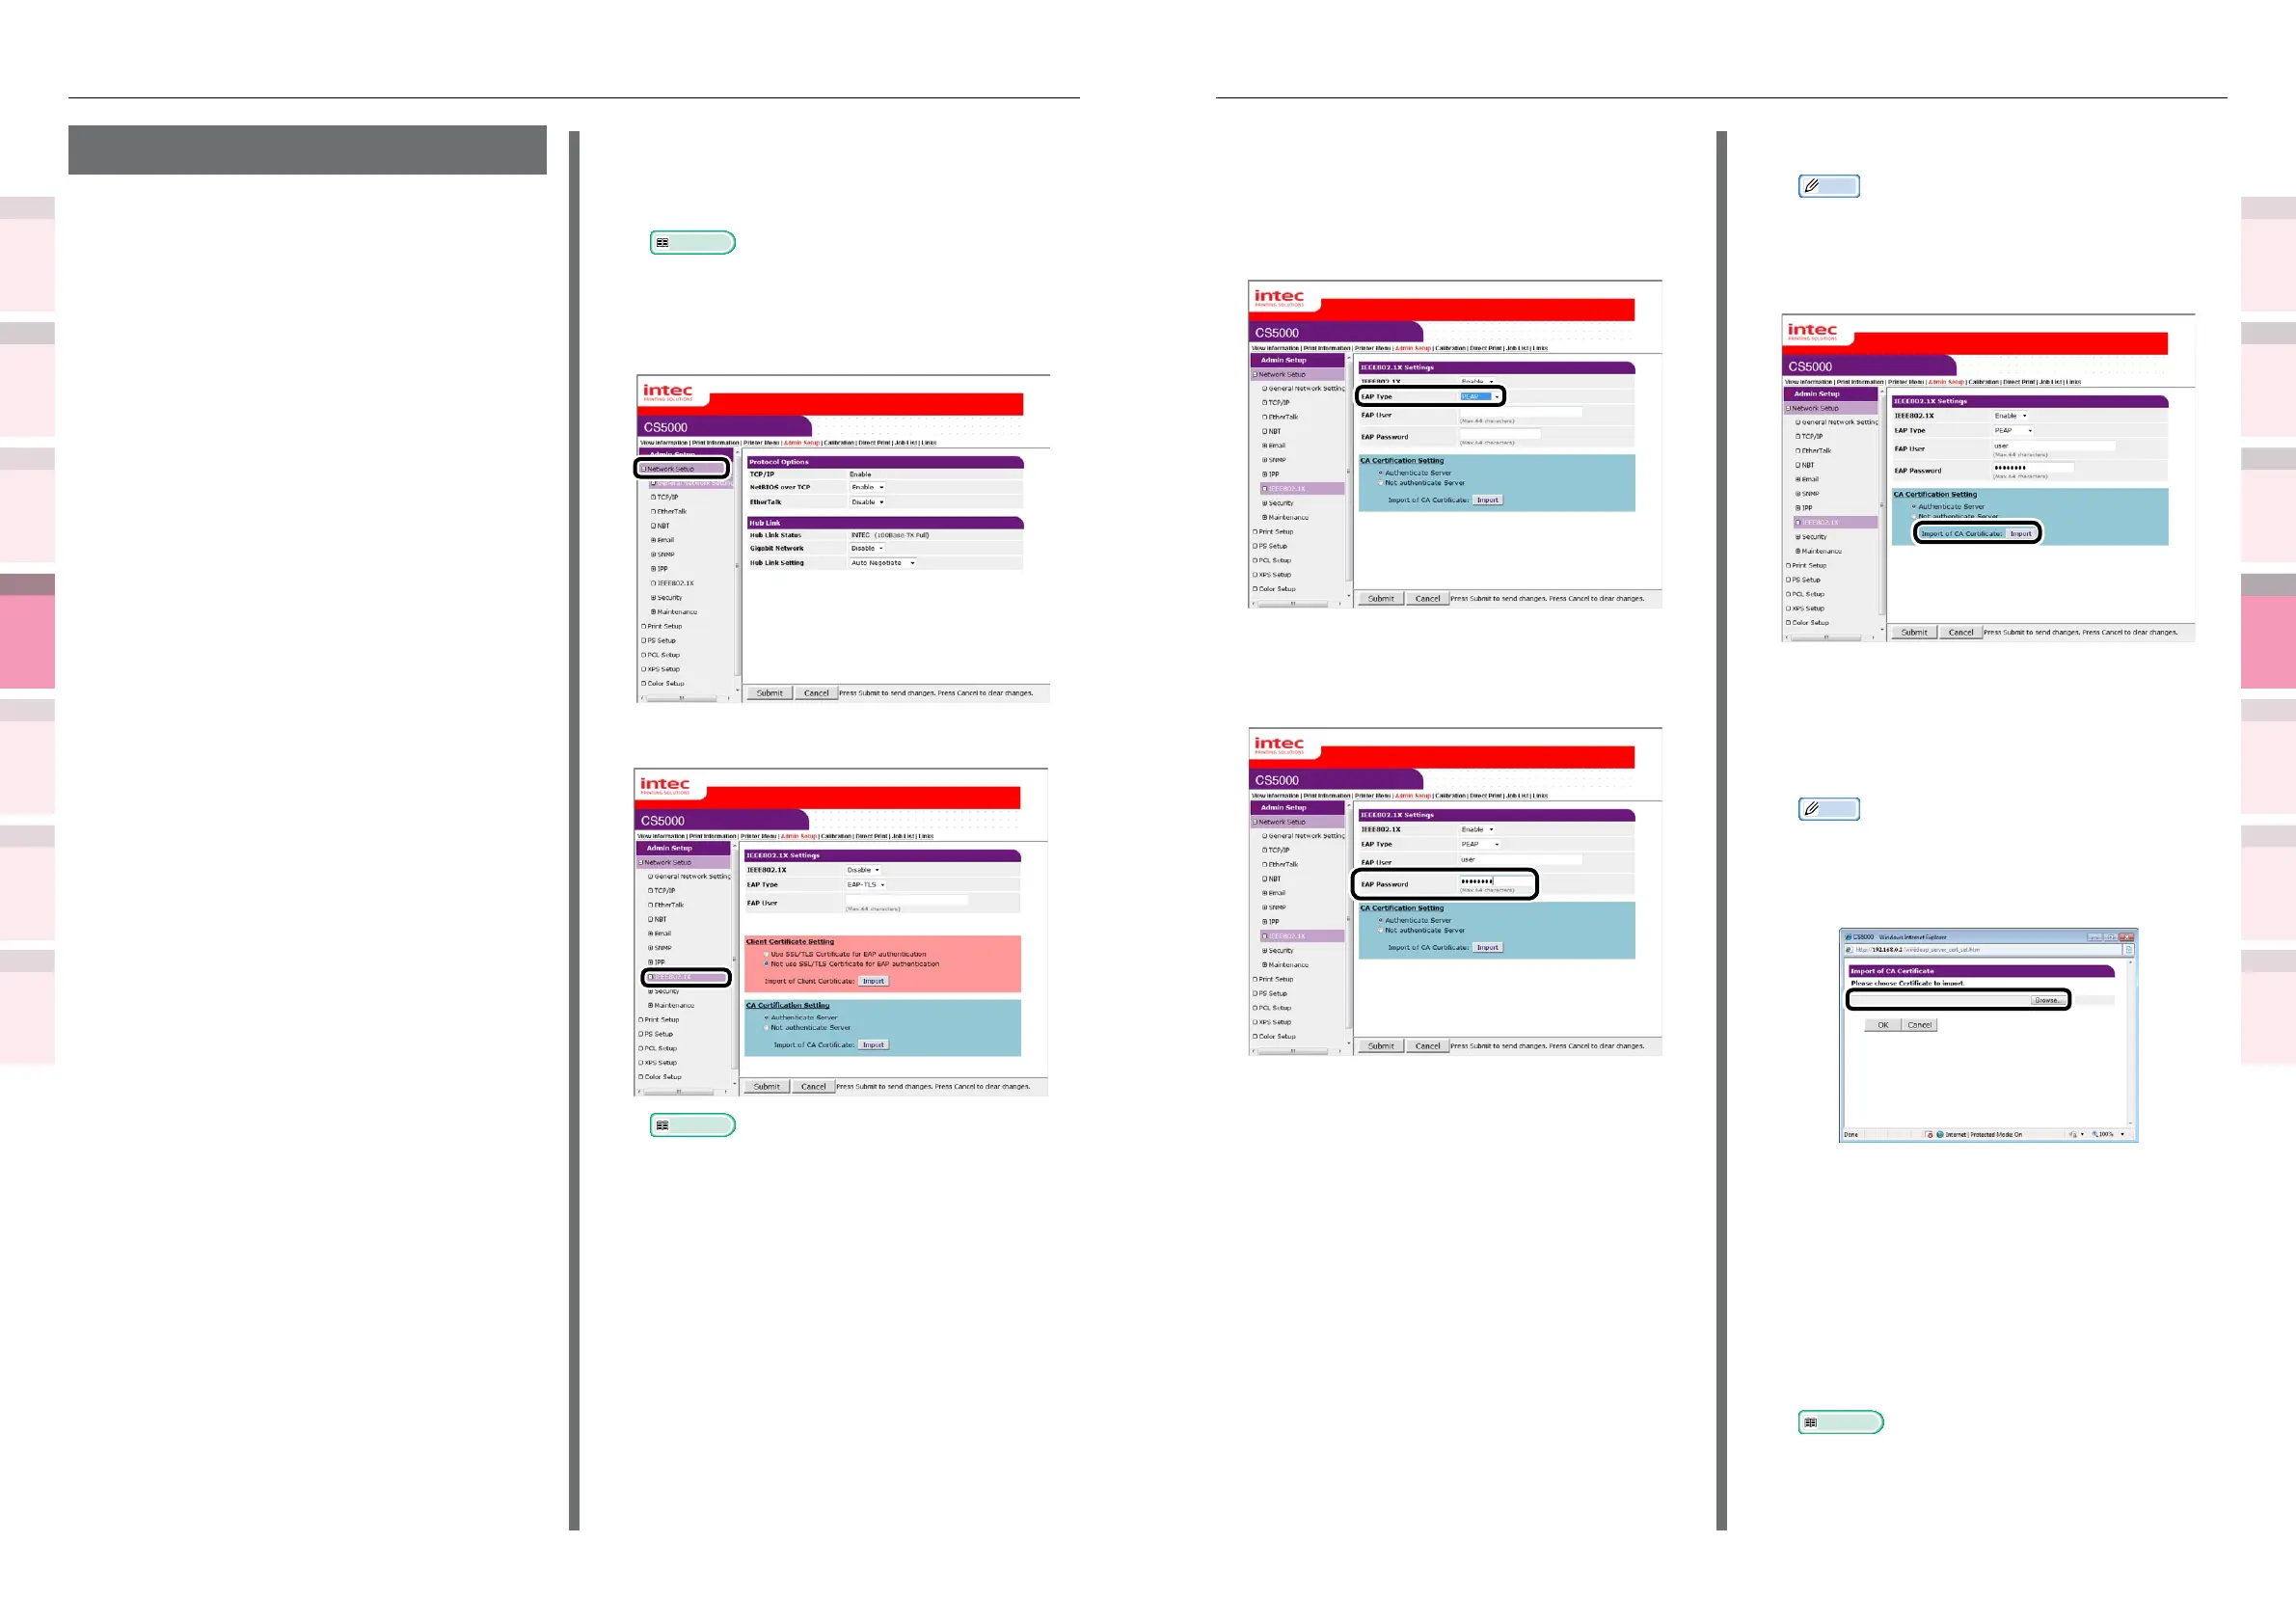
Using PEAP
4
Select [Enable] in [IEEE802.1X].
5
Select [PEAP] in [EAP Type].
6
Enter the user name in [EAP User].
7
Enter the password in [EAP Password].
8
Enable [Authenticate Server].
9
Click [Import of CA Certicate].
Memo
z
If [Not authenticate Server] is enabled, it is not
necessary to import the CA certicate.
If [Not authenticate Server] is enabled, disable
whether or not to connect to the correct
authentication server.
The "Import of CA Certicate" screen will be
displayed.
10
Enter the CA certicate le name, and
click [OK].
Memo
z
The imported CA certicate is the authenticator
certicate issued by the RADIUS server certicate.
z
Importable le formats are PEM, DER, and PKCS#7
formats.
The CA certicate will be imported to the printer.
11
Click [Submit].
12
The settings will be save in the device,
and the network functions will restart.
If the standby screen is displayed in the
control panel, turn OFF the device power
supply.
Reference
z
For how to turn OFF the power supply, see "Basic".
z
Go to “Connecting the device to the authentication
switch” (P.213).
Using IEEE802.1X
Compatible with authentication functions using
IEEE802.1X.
IEEE802.1X setup ow
To set IEEE802.1X in the device, rst connect
the device and PC for setup via a regular hub.
After completing the IEEE802.1X setup, connect
the device to the authentication switch.
1
Connect the printer and PC.
2
Set the IP address for setup in the PC.
3
Set the IP address for setup in the
printer.
For how to connect the printer and PC,
and set the printer and (Windows) PC IP
addresses, see "Basic".
4
Set IEEE802.1X in the printer.
5
Connect the printer to the
authentication switch.
Setting IEEE802.1X
1
Log in as an administrator.
Reference
z
See “Logging in as an administrator” (P.184).
2
Click [Admin Setup]>[Network Setup]
tab.
3
Click [IEEE802.1X].
Reference
z
If using PEAP, go to "
Using PEAP". If using EAP-
TLS, go to "
Using EAP-TLS".