- 70 - - 71 -
Printing print results so that people cannot see them Printing print results so that people cannot see them
4
1
2
3
5
4
1
2
3
5
Convenient print
functions
Appendix Index
Checking and
Changing Printer
Settings Using
the Control Panel
Network
Setup
Matching
Colors
Using Utility
Software
Convenient print
functions
Appendix Index
Checking and
Changing Printer
Settings Using
the Control Panel
Network
Setup
Matching
Colors
Using Utility
Software
2
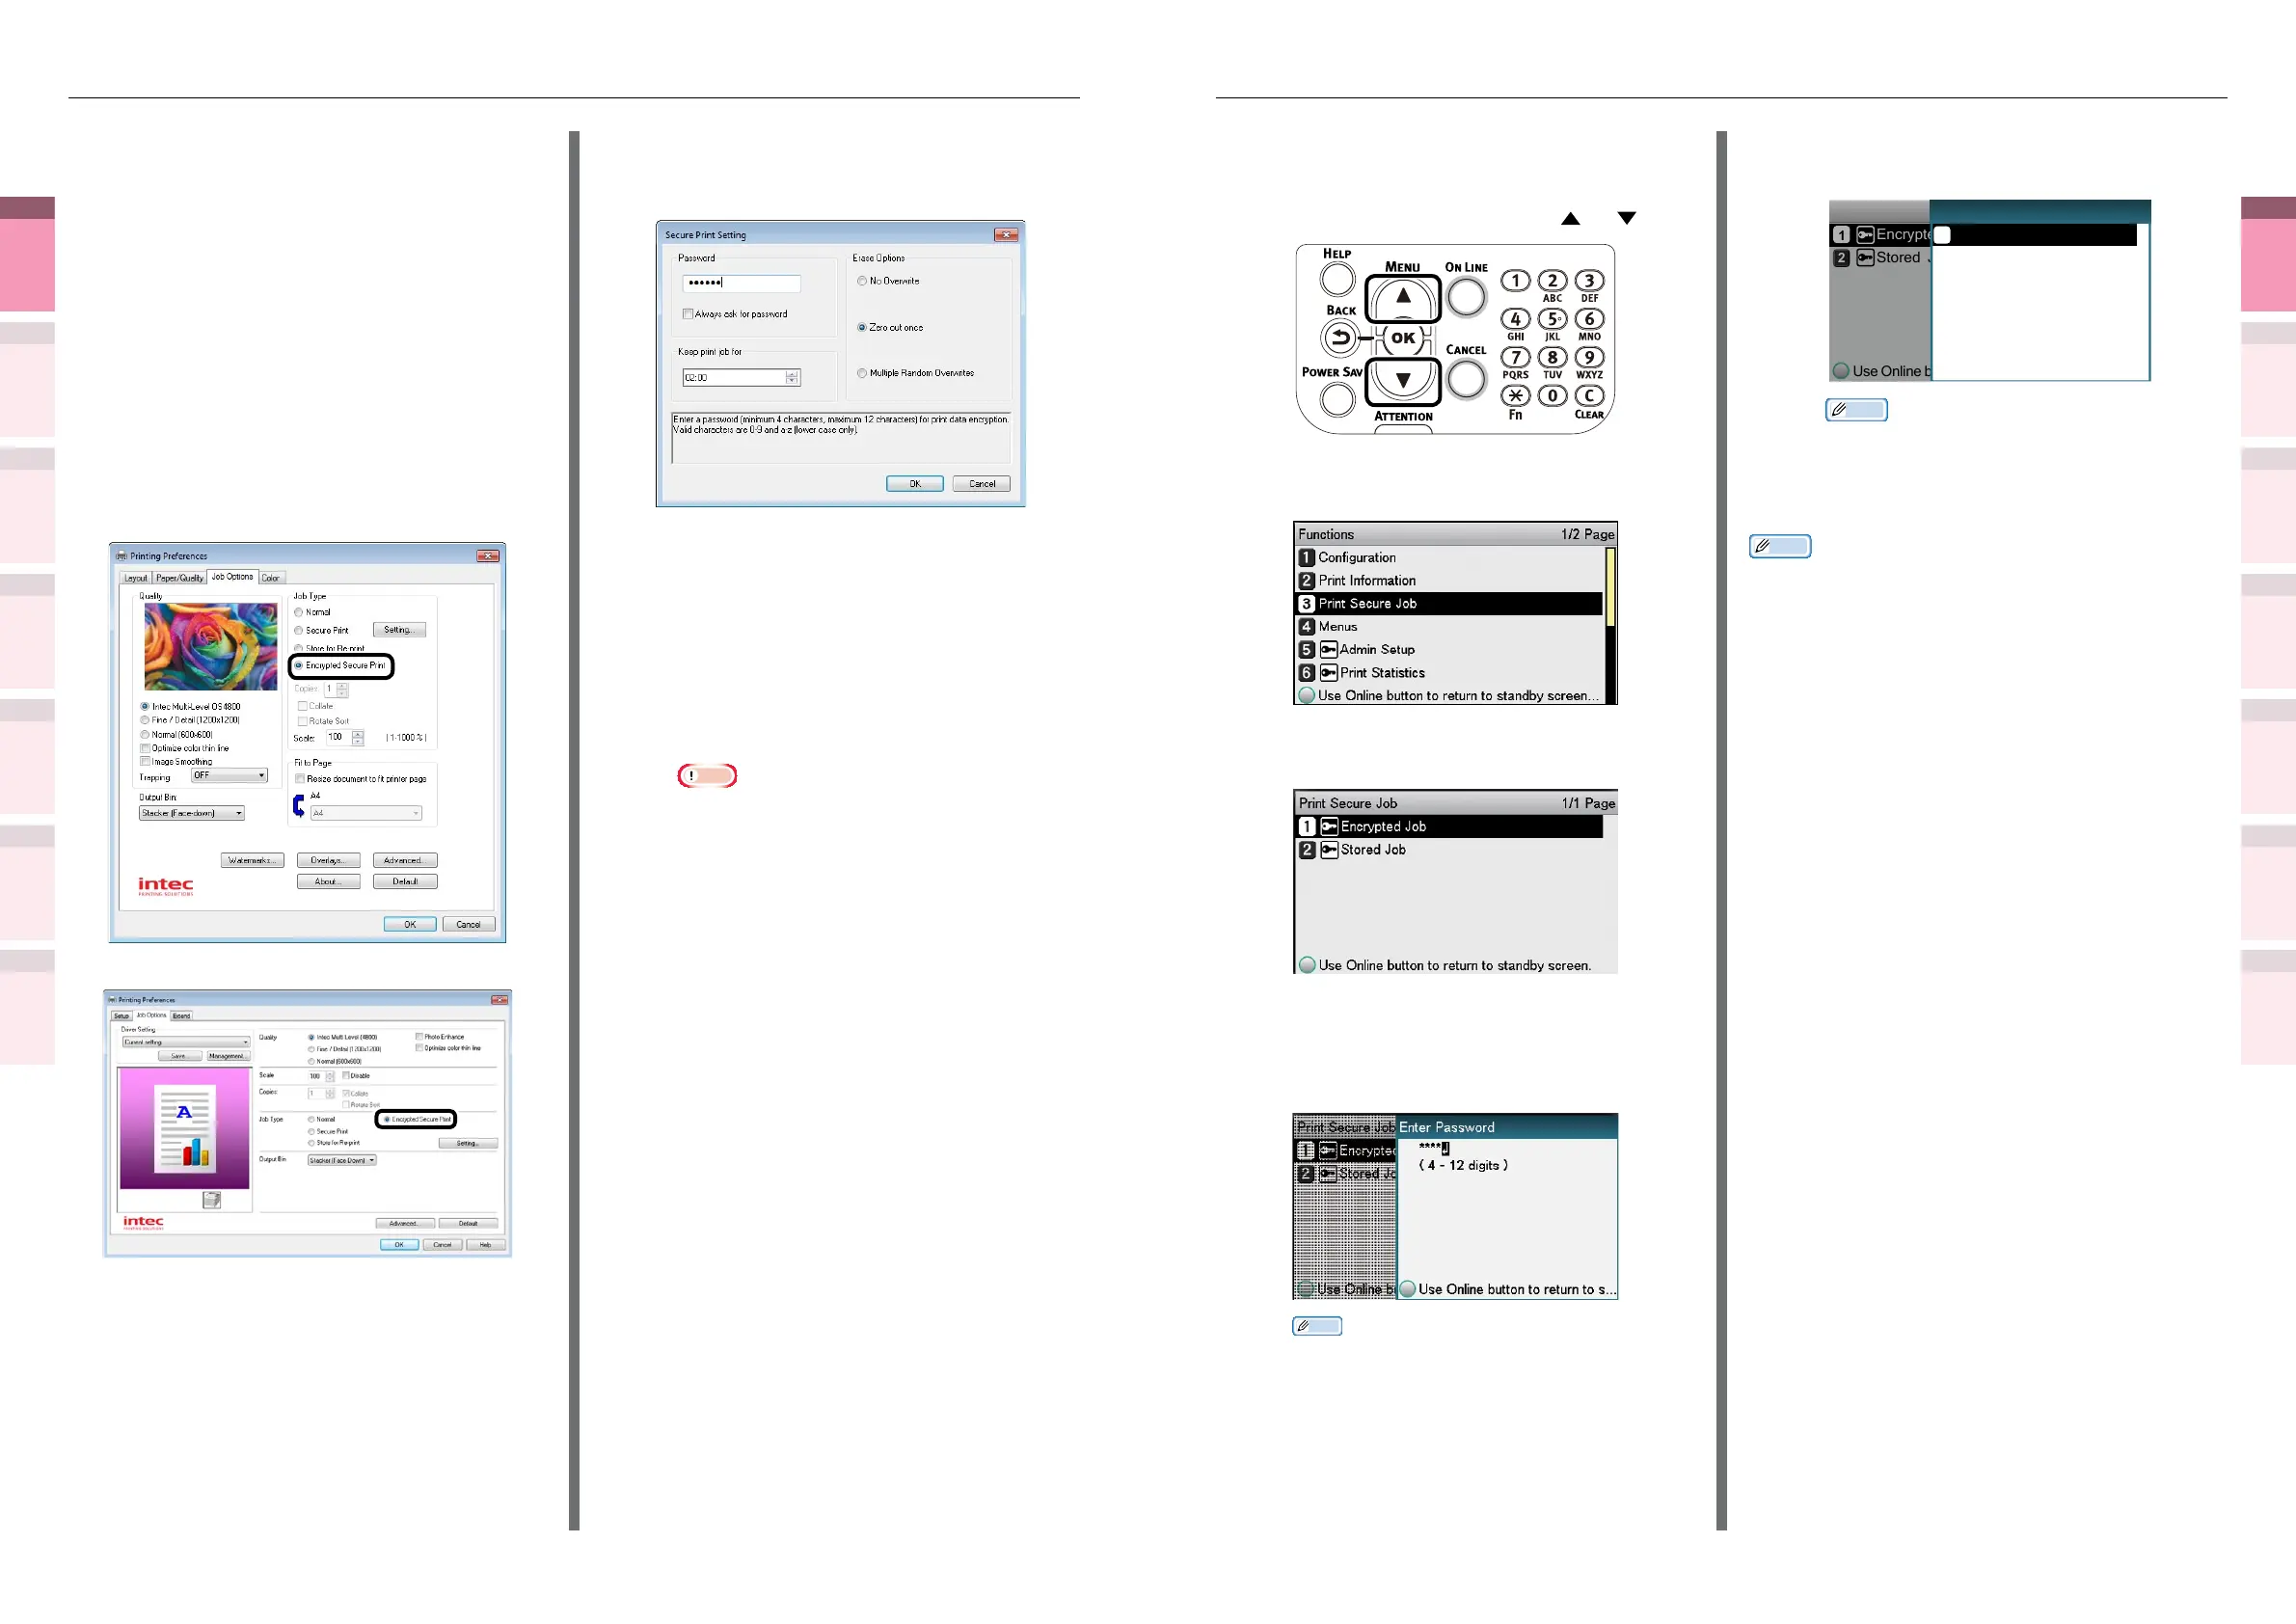
Enter the password from the control
panel to print.
(1)
Press the scroll button or .
(2)
Select [Print Secure Job], and
press the [OK] button.
(3)
Select [Encrypted Job], and press
the [OK] button.
(4)
Enter the print job password using
either the 10-key pad or the input
screen, and click the [OK] button
to start the search.
Memo
z
If the password is entered incorrectly, press the
[BACK] button, and reset.
z
Press the [CANCEL] button to cancel the search.
(5)
Select [Print], and press the [OK]
button.
Print Secure Job
Encrypted Job
Stored Job
Encrypted Job 1/1 Page
Print
Memo
z
Select [Delete], and press the [OK] button to
delete a job.
z
All jobs that match the password will be printed
in the order they are received by the device.
Memo
z
After implementing Encrypted Secure Print, the les
used in printing are deleted using the specied deletion
method. While a le is being deleted, the message
"Deleting Encrypted Job
"
will be displayed.
z
If data is lost during transfer or data falsication is
detected, the message [To turn off the display, press OK]
will be displayed.
1
Open the le to be printed, and specify
[Encrypted Secure Print].
(1)
Open the le to be printed.
(2)
Select [Print] in the [File] menu.
(3)
Click [Advanced] (or
[Preferences]).
(4)
If using PS printer drivers, select
[Encrypted Secure Print] in [Job
Type] in the [Job Options] tab.
If using PCL printer drivers, select
[Encrypted Secure Print] in [Job
Type] in the [Job Options] tab.
(Windows 7 PS printer driver screen)
(Windows 7 PCL printer driver screen)
(5)
Input the "Password" in the
"
Secure
Print Setting
"
screen, and click
[OK].
(Windows 7 PS printer driver screen)
z
Password
Set using 4 to 12 alphanumeric
characters.
z
Always ask for password
When implementing printing, the
screen to enter the password will be
displayed.
Note
z
This check box is disabled in Windows 8/
Windows 7/Windows Vista/Windows Server
2012/Windows Server 2008 R2/Windows Server
2008. Enter the password in the "JOB PIN"
screen displayed when [JOB PIN] is clicked.
z
Keep print job for
Set the period in which the print job is
stored on the device HDD from 5 mins,
to 23 hours 59 mins. Print jobs that
exceed the storage period are deleted
from the HDD automatically.
z
Erase Options
Specify the method when deleting
print jobs from the HDD.
– Easy method: Delete the print job from the le
system. This deletion method risks the print job
being recovered from the HDD, but it will delete
in the shortest time.
– Overwrite using 0x00: After overwriting the
specied data once, the print job is deleted. This
is a safer method compared to easy deletion, but
there is a risk that print jobs will be recovered
using special methods.
– Overwrite 3 times: Overwrites the print job
data 3 times before deleting. This is the safest
deletion method, but deletion takes time.
(6)
Printing will be implemented.
If [Always ask for password] is enabled, enter
the "Password" in the "Secure Print Setting"
screen, and click [OK].