- 206 - - 207 -
Setting the network from the web browser Setting the network from the web browser
5
1
2
4
3
5
1
2
4
3
Convenient print
functions
Appendix Index
Checking and
Changing Printer
Settings Using
the Control Panel
Network
Setup
Matching
Colors
Using Utility
Software
Convenient print
functions
Appendix Index
Checking and
Changing Printer
Settings Using
the Control Panel
Network
Setup
Matching
Colors
Using Utility
Software
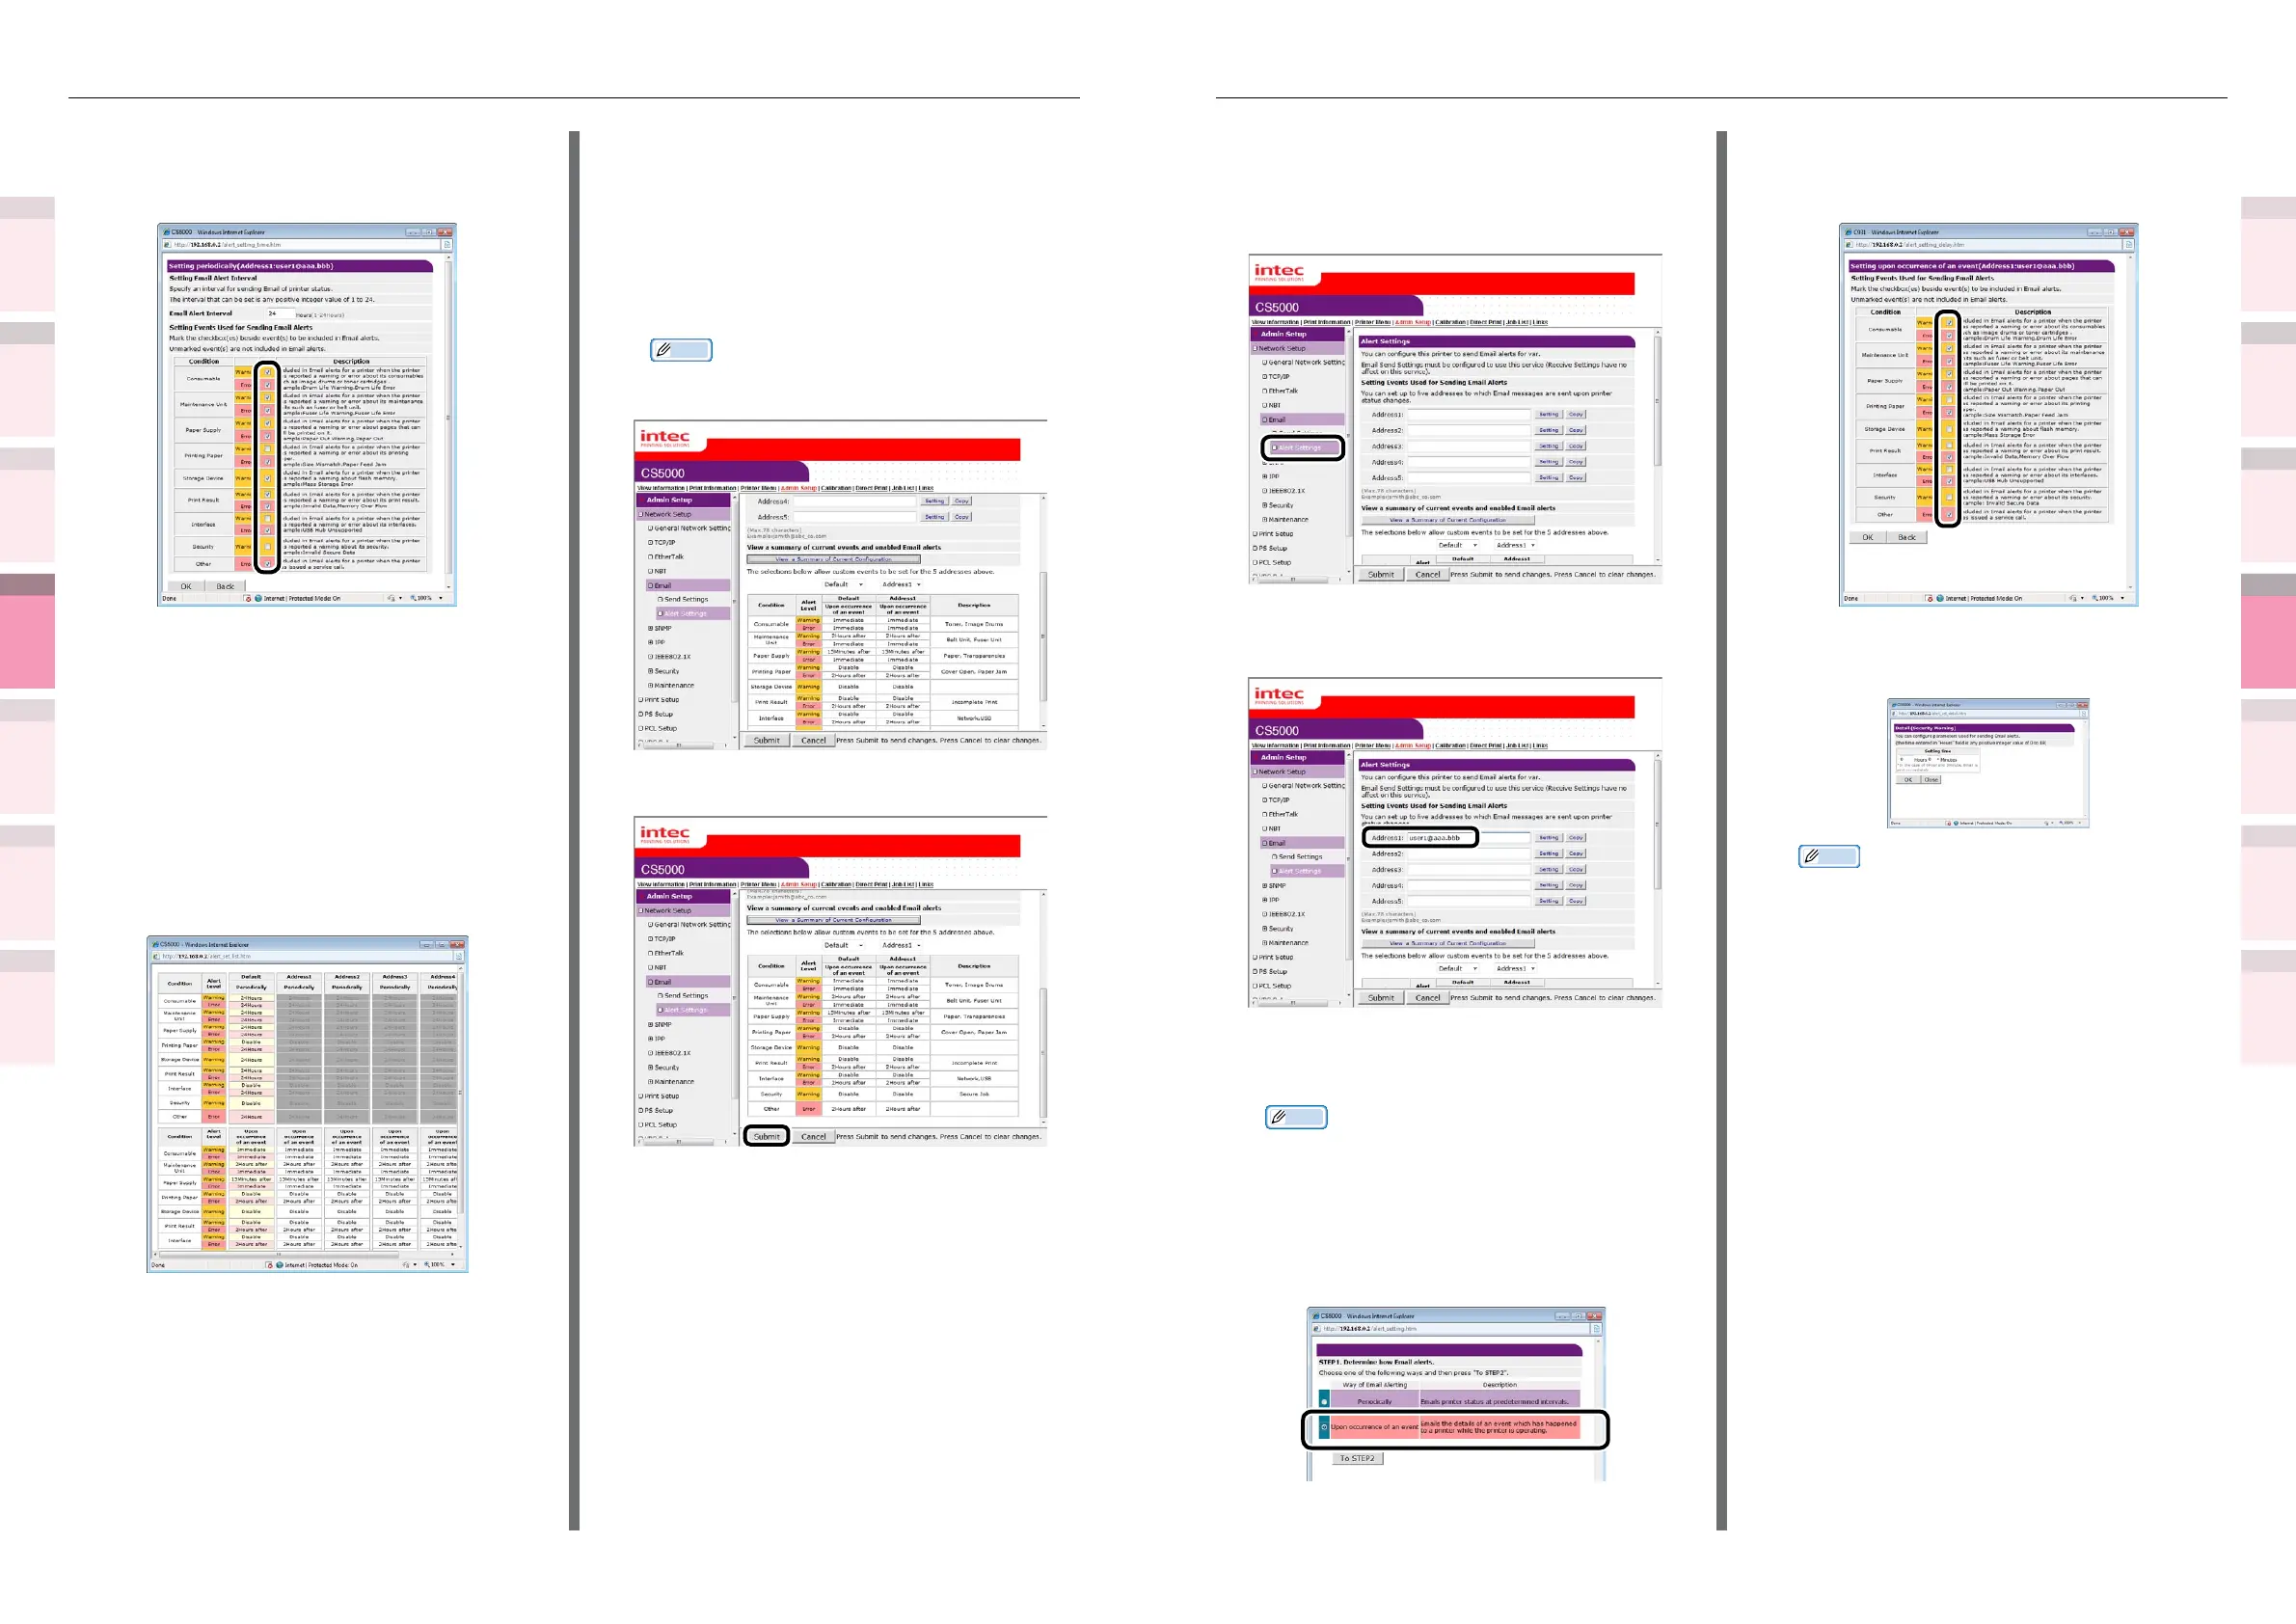
Notifying the occurrence of
malfunctions
1
Click [Email]>[Alert Settings].
2
Enter the mail address of the
malfunction notice recipient.
3
Click the [Setting] button for the e-mail
address that has been set.
Memo
z
Click the [Copy] button to copy the malfunction
notice information settings to another address. It is
convenient to set the same malfunction notication
conditions in multiple addresses.
4
Enable the [Upon occurrence of an
event] check box, and click [To STEP2].
5
Enable each error to be notied in
[Setting Events Used for Sending Email
Alerts].
6
Set the mail delay time from error
occurrence to sending.
Memo
z
You can notify only those errors who continue to
occur over a long time using the delay time settings.
z
Set the delay time to "0 Hours 0 Minutes" to send
an e-mail the instant an error occurs.
7
Click [OK].
8
Enable each error to be notied in
[Setting Events Used for Sending Email
Alerts].
9
Click [OK].
10
Check the set details of the malfunction
notications conditions.
z
Displaying tables
(1)
Click the [Show current settings
table] button.
(2)
Check the set details, and close the
window.
z
Comparing the set conditions for 2
addresses
(1)
Use the list box to select each
address to be compared.
(2)
Check the settings details that are
displayed.
Memo
z
You can change the notication condition settings
by clicking the set conditions comparison details.
11
Click [Submit].
12
The settings will be save in the printer,
and the network functions will restart.