- 110 - - 111 -
Matching colors using the control panel Matching colors using the control panel
4
3
5
1
2
4
3
5
1
2
Convenient print
functions
Appendix Index
Checking and
Changing Printer
Settings Using
the Control Panel
Network
Setup
Matching
Colors
Using Utility
Software
Convenient print
functions
Appendix Index
Checking and
Changing Printer
Settings Using
the Control Panel
Network
Setup
Matching
Colors
Using Utility
Software
(1)
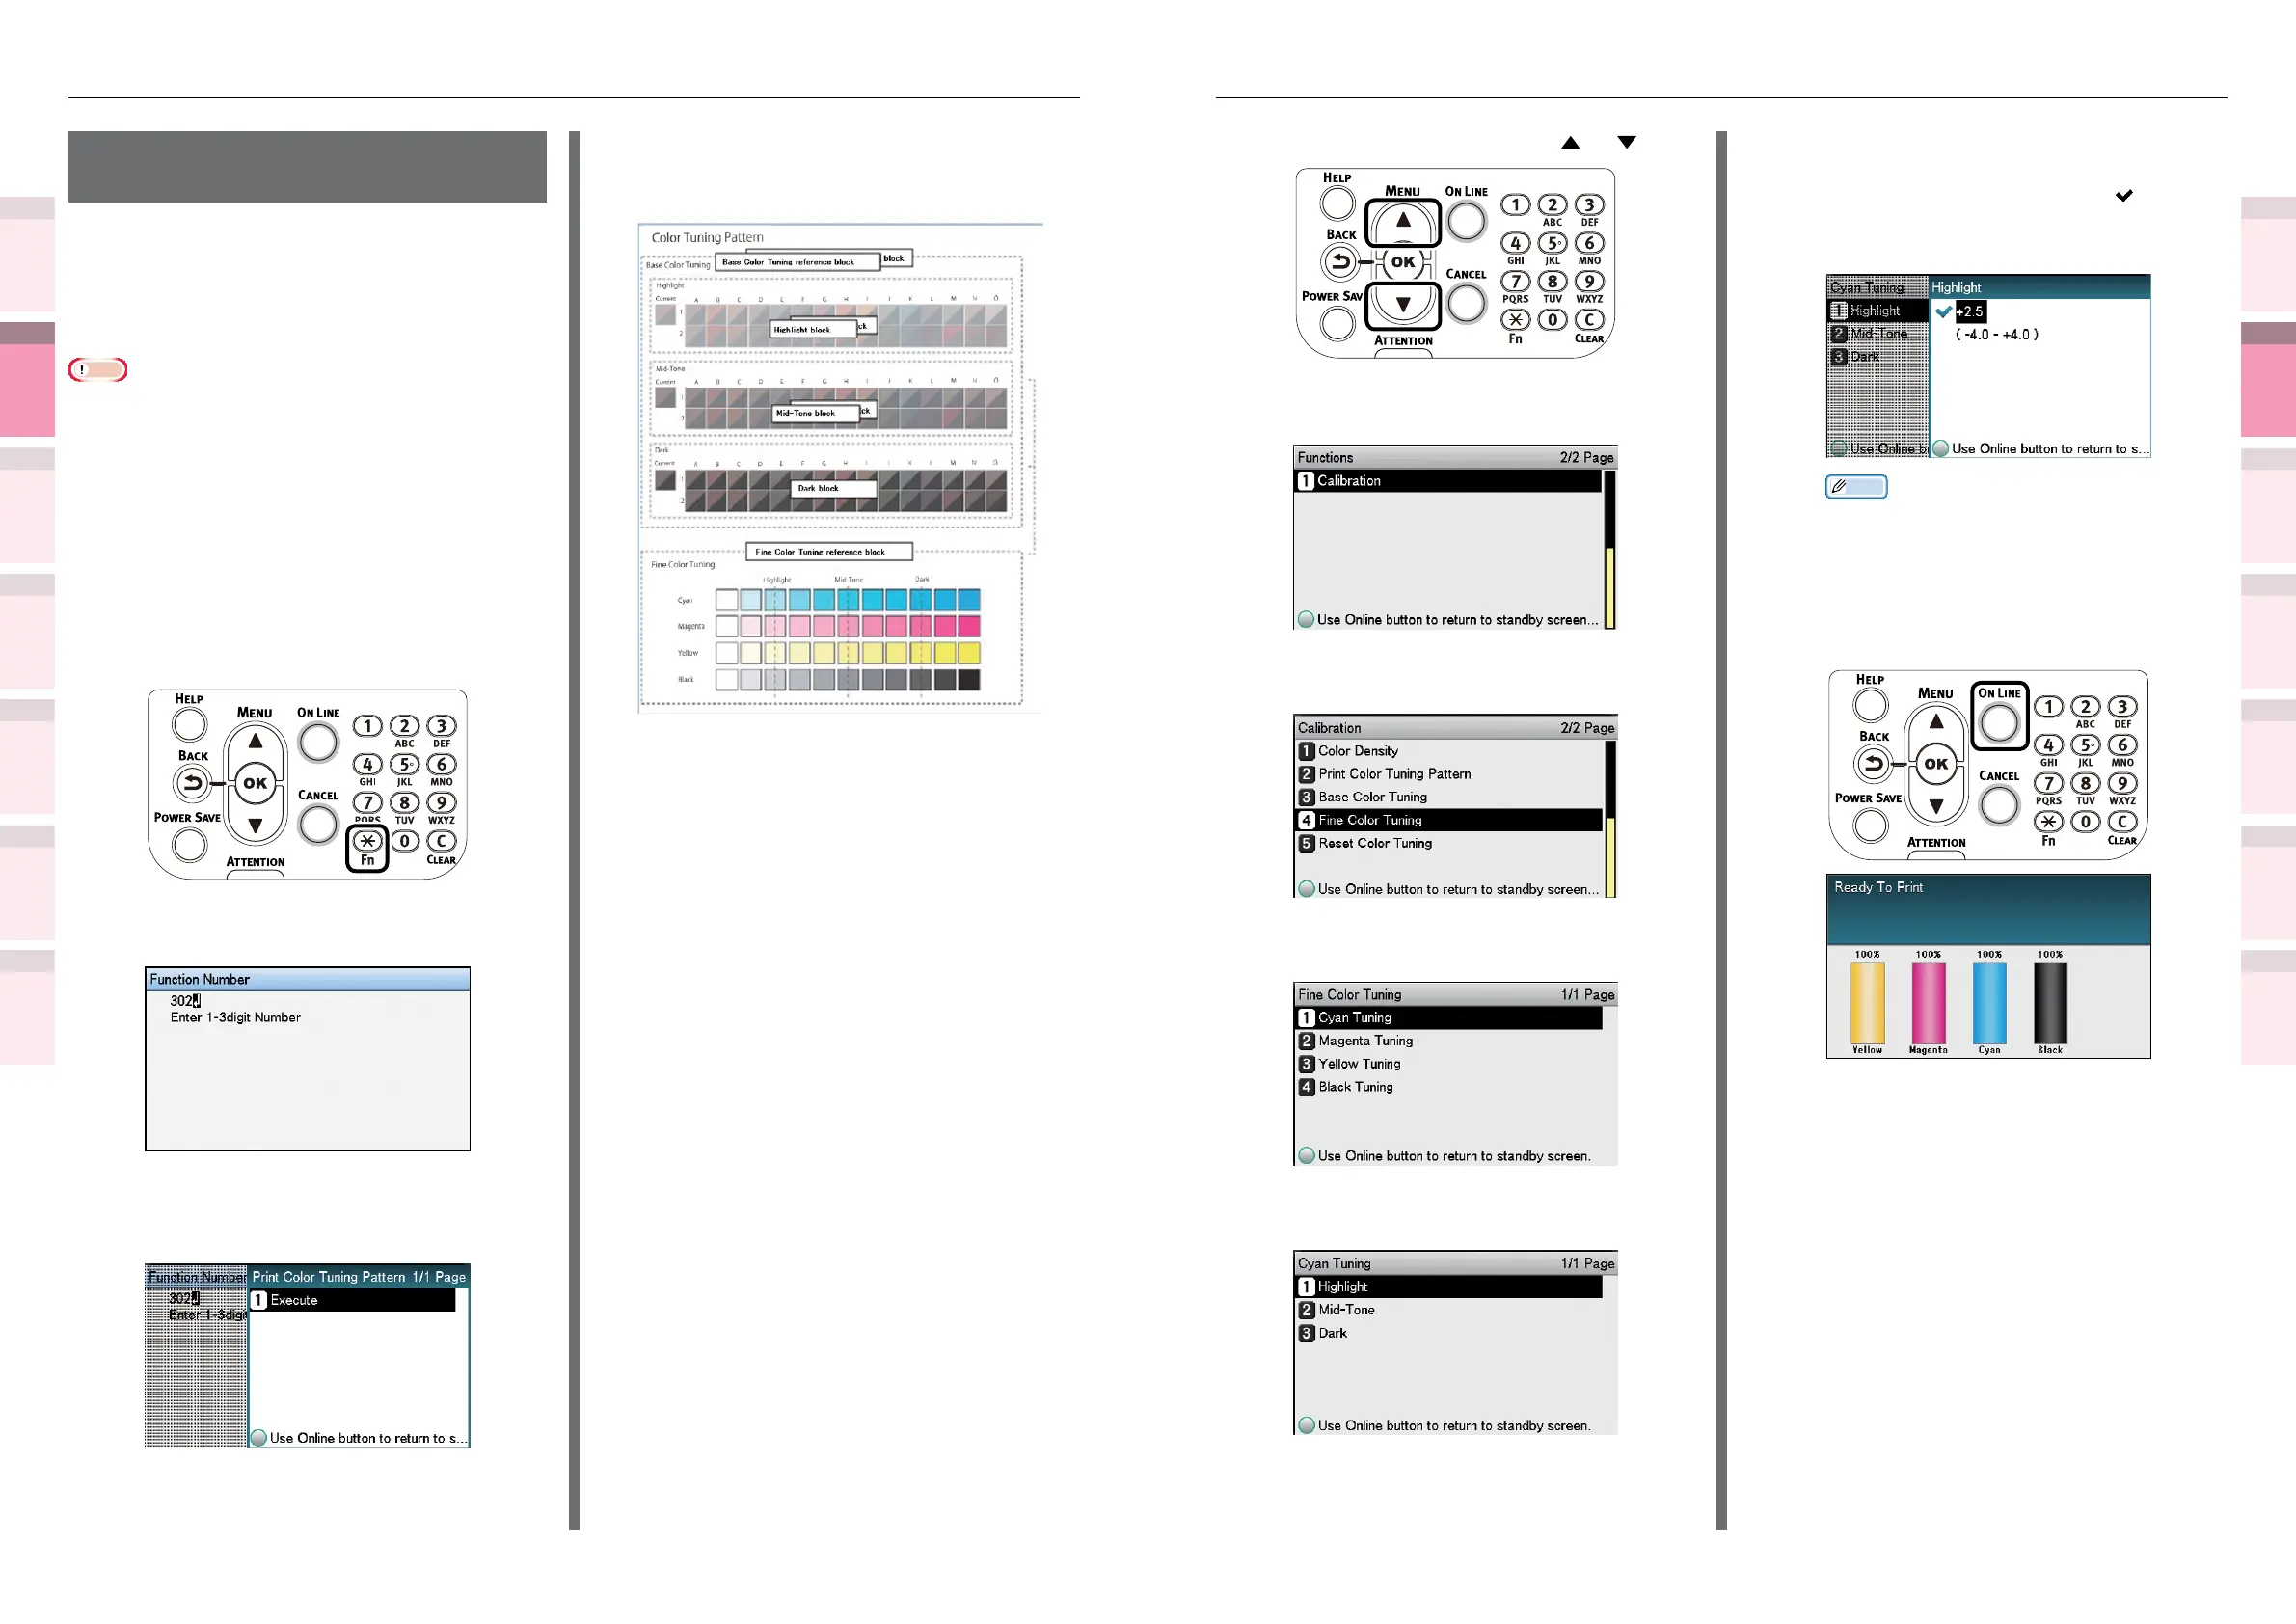
Press the scroll button or .
(2)
Select [Calibration], and press the
[OK] button.
(3)
Select [Fine Color Tuning], and
press the [OK] button.
(4)
Select [Cyan Tuning], and press
the [OK] button.
(5)
Select [Highlight], and press the
[OK] button.
(6)
Specify a larger value than the
current set value, and press the
[OK] button. Check that
is
displayed to the left of the specied
value.
Memo
z
To slightly increase the darkness, select +0.1
to +4.0, and to slightly decrease the darkness
select -0.1 to -4.0. The black adjustment range,
however, is +1 to +3.0 and -0.1 to -3.0.
(7)
Press the [ON LINE] button to
return to the standby screen.
4
Check the color balance adjustment
results.
(1)
Print the color matching patterns.
(2)
Use the print results for the color
matching pattern to check the
adjusted results.
Repeat Steps 1 to 3 according to the
checked results.
Adjusting the color
balance
The printer can implement compensation
periodically using auto density compensation
mode, but implement this adjustment to adjust
the color balance watermarks in the intervals
where auto density compensation is insufcient.
Note
z
The densities of each color are mutually dependent, so it
is necessary to repeat the adjustments several times until
the correct color balance is reached.
z
Printing is disabled if [Local print] in the (optional) print
job accounting is set to [Disable printing] or [Disable color
printing].
1
Print the color matching patterns.
(1)
Press the [Fn] key.
The numerical values input screen
will be displayed.
(2)
Press [3], [0], [2], and press the
[OK] button.
(3)
Check that [Execute] has been
selected, and press the [OK]
button.
(4)
The color matching pattern will be
printed.
2
Use the print results for the color
matching pattern to check the current
color balance.
(1)
Check the area to be referenced
using "Fine Color Tuning".
The color matching pattern frames
are arranged in four vertical
columns and 11 horizontal rows.
The four vertical columns represent
from the top cyan, magenta,
yellow, and black, and are printed
as [Cyan], [Magenta], [Yellow] and
[Black].
The 11 horizontal rows represent
the color tone, and dotted lines
are printed under each text for
[Highlight], [Mid-Tone], and [Dark].
3
Use the print results for the color
matching pattern to adjust the color
balance watermarks.
If adjusting the color balance, use
the control panel to specify the shade
(Highlight, Dark, and Mid-Tone) of each
color.
This section explains the procedure for
slightly darkening the cyan highlights.
Adjust the watermarks for colors other
than cyan in the same way.