6. Engine Removal;In
spection & Installation
6-13
good-ventilated place. (indoor
when you start the engine, ensure exhaust forced to
use dangerous or outdoor. If (when two or more people who work together, to be
on the safe side, keep remind each other.
Caution
Replace the r
emoved washer, o-rings, seals, locknuts, lock washers, steed pins,
for example, and the new version. (Check the sealing parts and the appropriate
action, regroup. (Check parts after the demolition, cleaning parts before
measurement. (Repair torque screw and torque wrench, clean oil or oil from
before. (tight repair threaded bolts, nuts and screw, then tighten according to
specified torque, from large to small, from the heart of the lateral side. (Use
special lubricants and sealants and grease. (Make sure all part of clean,
lubrication for restructuring they when specified. (The use of special tools
according to the service manual. (Place and shop disassemble parts for the
correct assembly respectively. (Use original parts or their equivalence since.
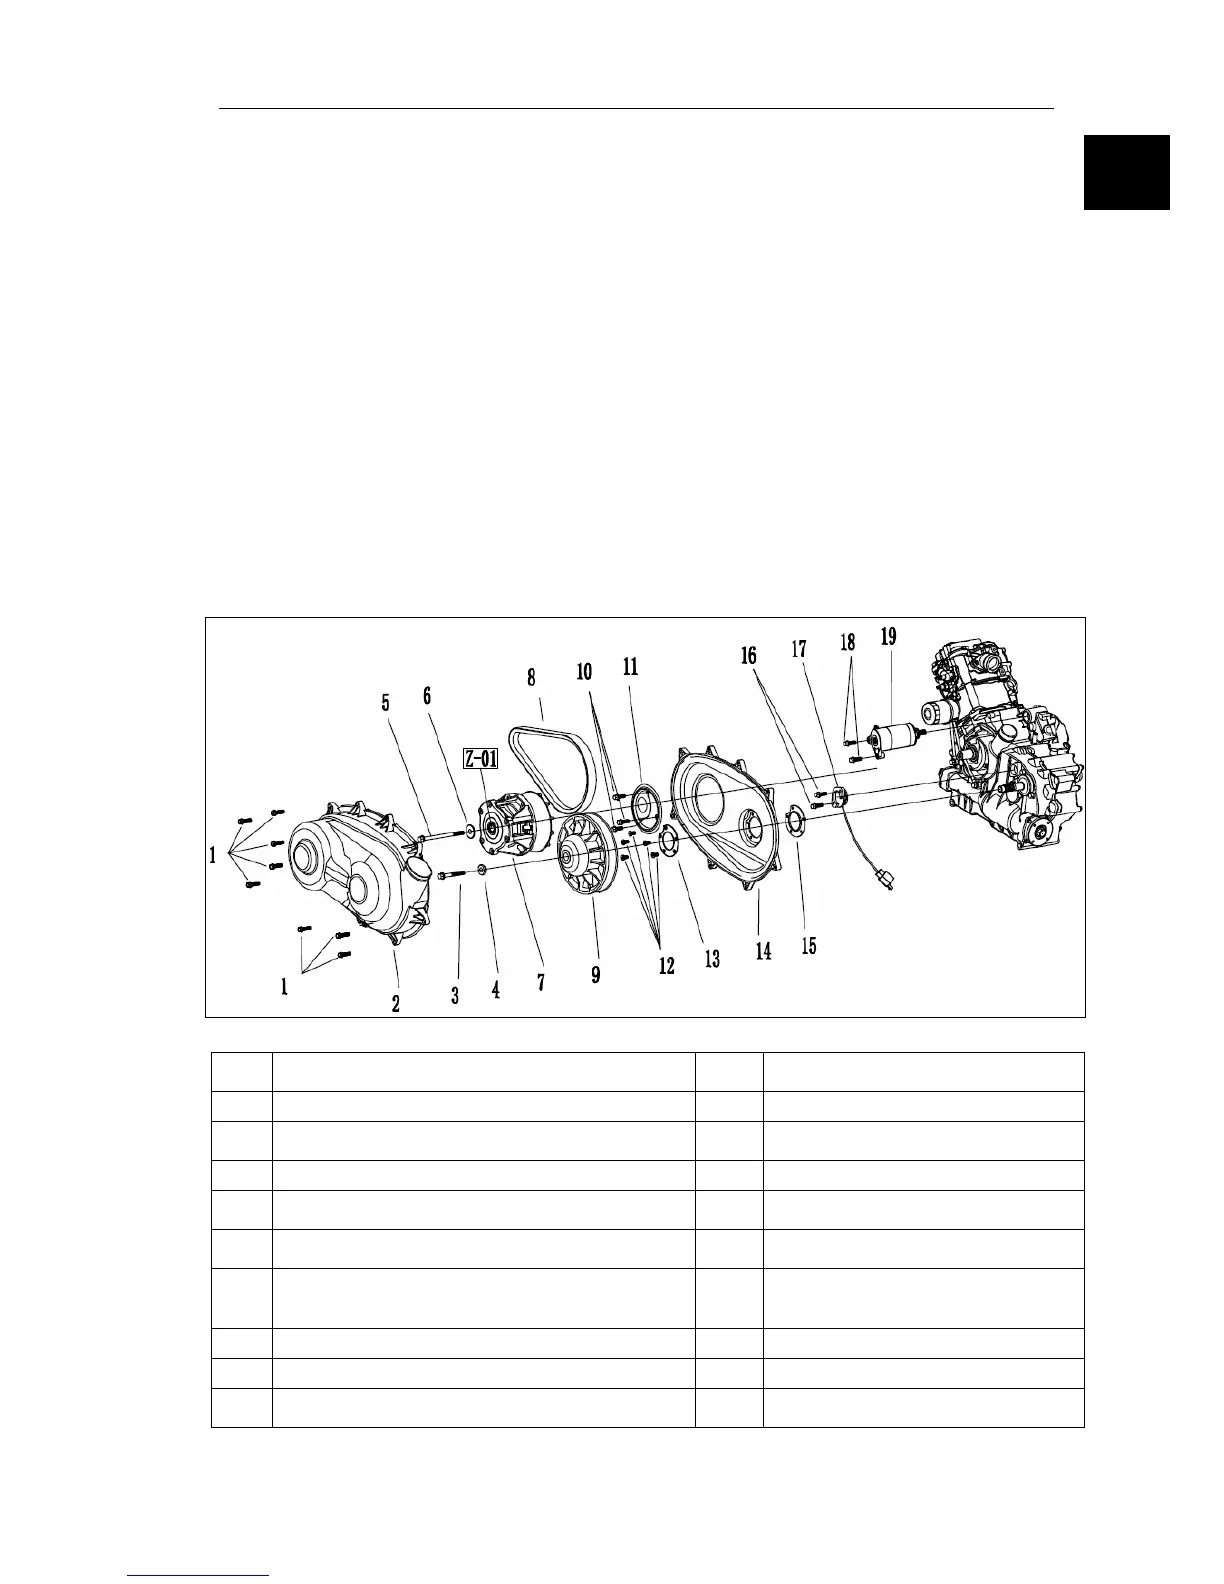
1. CVT
part remove check
According to the lis
t of instructions on the order
1
Hexagon flange bolts M6*32
11
Crankshaft clapboard
2 Left upper lid 12 The countersunk head screwsM6*
3
Hexagon flange bolts M10*100
13
The partitio
n of the drive shaft
4 St
eps mat 14 Left box nakedness
5
Hexagon flange bolts M10*160
15
Under the partition of the drive sh