55
LeeBoy 6150 Conveyor Paver 5-27
Maintenance
14. Reinsert the sprocket back onto the chain.
15. Reinsert the motor.
16. Cover bolts with thread-locking adhesive, reinsert
and tighten.
17. Adjust the chain for 1/4 inches of slack.
18. Lubricate with chain lube.
19. Reconnect the hydraulic hoses and check for leaks.
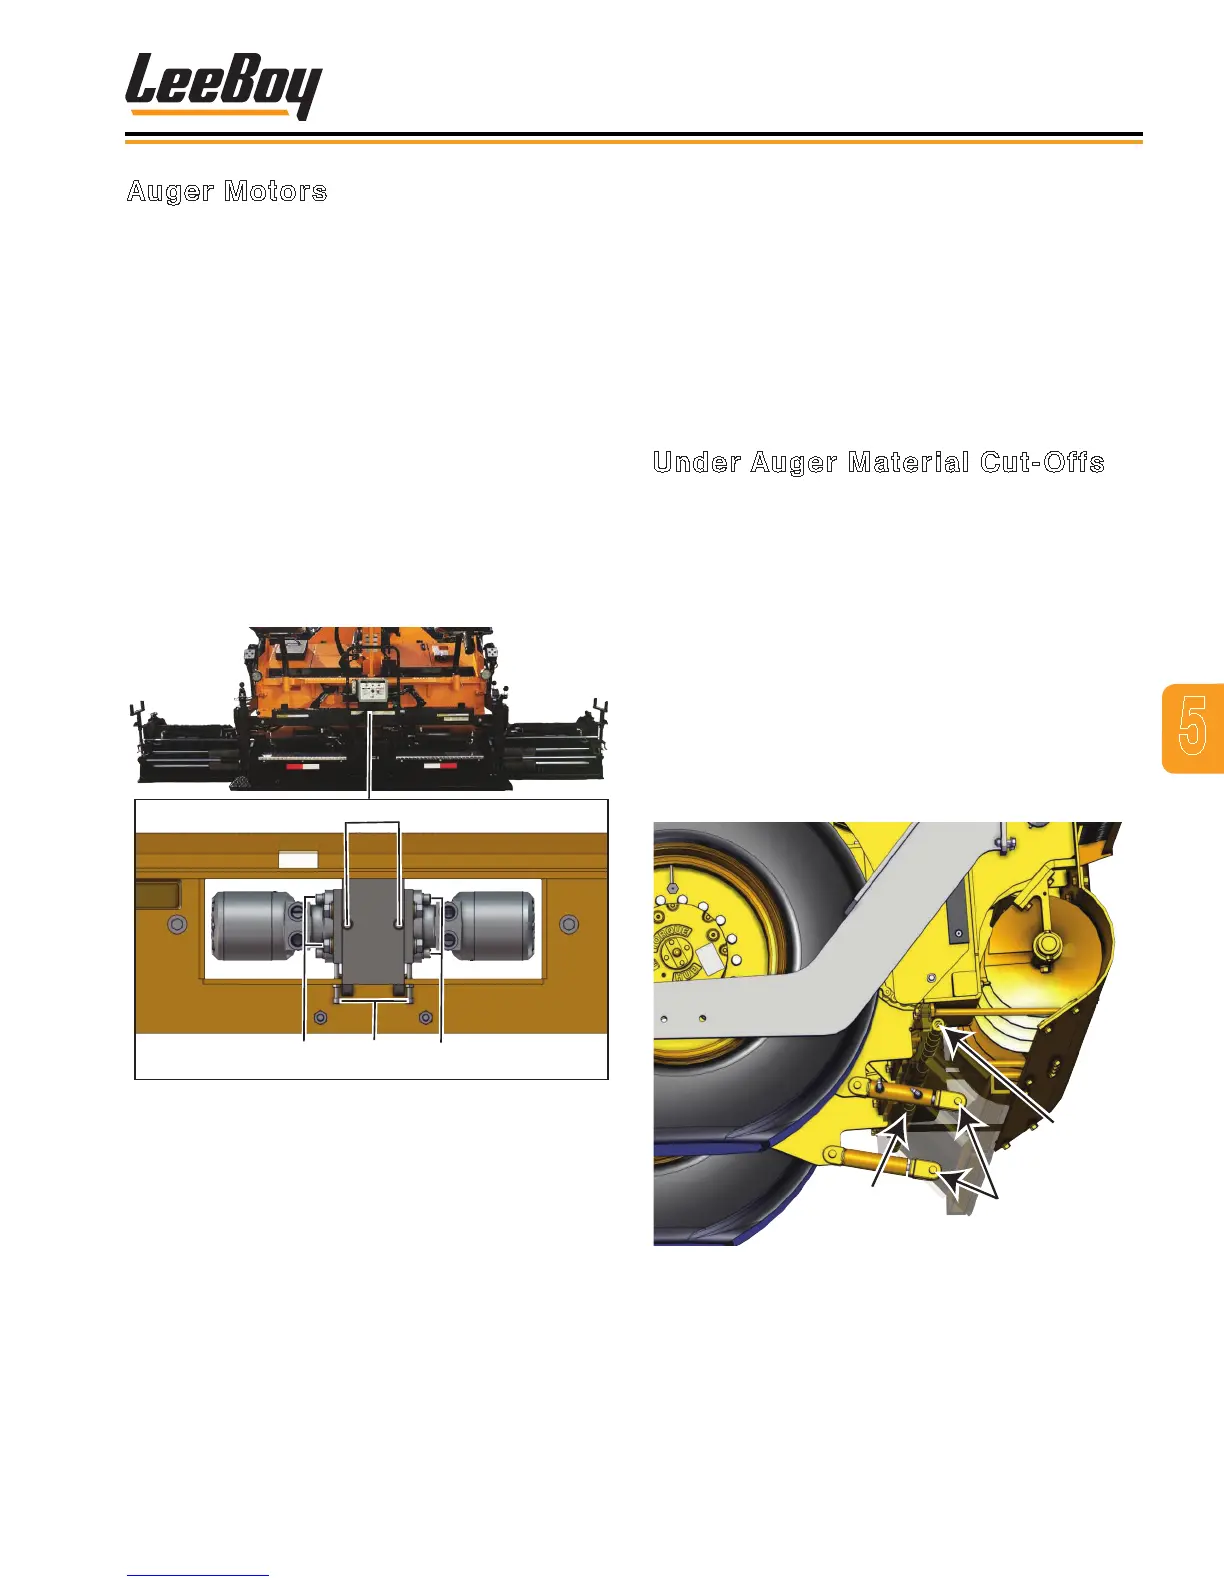
Under Auger Material Cut-Offs
1. Remove clevis pin that connects the cut-off cylinder
to the cut-off. (Figure 4-32)
2. Remove roll pin from the cut-off hinge.
3. Insert a 3/8” bolt in the end of the hinge to remove
the hinge pin (inside hinge). Cut-off will slide down.
4. Clean area around the cut-off hinge.
5. Realign cut-off hinge.
6. Grease and insert new hinge pin.
7. Reinsert roll pin into outer cut-off hinge.
8. Reconnect cylinder to cut-off.
Cylinder
Clevis Pins
Roll Pin
Hinge Pin
(Inside Hinge)
Figure 5-32. Under Auger Material Cut-Offs
Auger Motors
1. Extend screed extension completely.
2. Remove walkboard grating.
3. Clean asphalt buildup around cover.
4. Disconnect and label the hydraulic hoses. Plug
ttings.
5. Remove the two nuts on the cover and pry the cover
apart. (Figure 5-31)
NOTE: Heating asphalt may be required.
6. Loosen auger tension adjusters.
7. Loosen the two bolts securing the auger motor
mounting brackets.
8. Loosen the auger chains by sliding the auger
motors out from the back side.
Cover/Nuts
Tension
Adjusters
Motor Bolts
Motor Bolts
Figure 5-31. Auger Motors
9. Slide the long screw through the bolt side of the
chain to prevent it from falling down into the cover.
Once chain is secure, remove the bolt holding the
sprocket.
10. Hold the sprocket at the chain as you slide out the
motor.
11. Remove the sprocket from the chain.
12. Slide off the sprocket and remove the auger motor
mount.
13. Place the new auger motor onto the mount.