Remote/Slave Cabinet Configuration
Z-Max Advanced Programming & Systems Design Guide rac00-sdg
Revision A:11/2005 Page 135
Remote Cabinet Configuration
All of the functional configuration of your relay cabinet is performed at the master
control module. However, prior to the master control module being able to address
the remote relay cabinets, there are two primary configuration steps which must
occur:
•Set the Starting Relay Number
•Set the starting relay & remote input number
Before we get into the specific configuration of the above items, please review the
basic rules of Master/Slave networks and network topology on page 127. The rules
expressed in that section are critical to the successful operation of your network.
Out of the Box Configuration
The steps required to successfully configure your remote relay panel are as follows:
Step 1: Configure the Slave Cabinets
Step 2: Configure the Master Cabinet for Master/Slave
Step 3: Verify Network Communication
Step 4: Configure relay functionality at the Master
Remote/Slave Cabinet Configuration
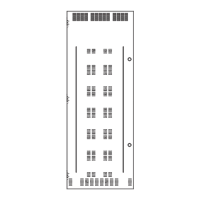
The remote relay cabinets must be configured with their starting relay number. On
some of the relay cabinets this is performed using a dipswitch on the circuit board
inside the cabinet, on other relay cabinets this configuration must be performed from
a PC connected via USB.
Comments & Examples on Relay Numbering
Please find a discussion with examples of relay numbering found on page 132. This
information may be helpful when configuring your relay panels.
Configuration of Remote Relay Cabinets with Dipswitches
Locate the 8 position dipswitch and set the "MRN" code which corresponds to the
starting relay number. The MRN code and corresponding starting relay numbers can
be found in the table on the next page. The MRN code equals the sum of all the
values "enabled" by the dipswitch.