Remote/Slave Cabinet Configuration
Z-Max Advanced Programming & Systems Design Guide rac00-sdg
Revision A:11/2005 Page 137
Step 1: Choose the MRN code that corresponds to your starting relay code as
shown in the Table of MRN Codes & Starting Relay Number on page 136.
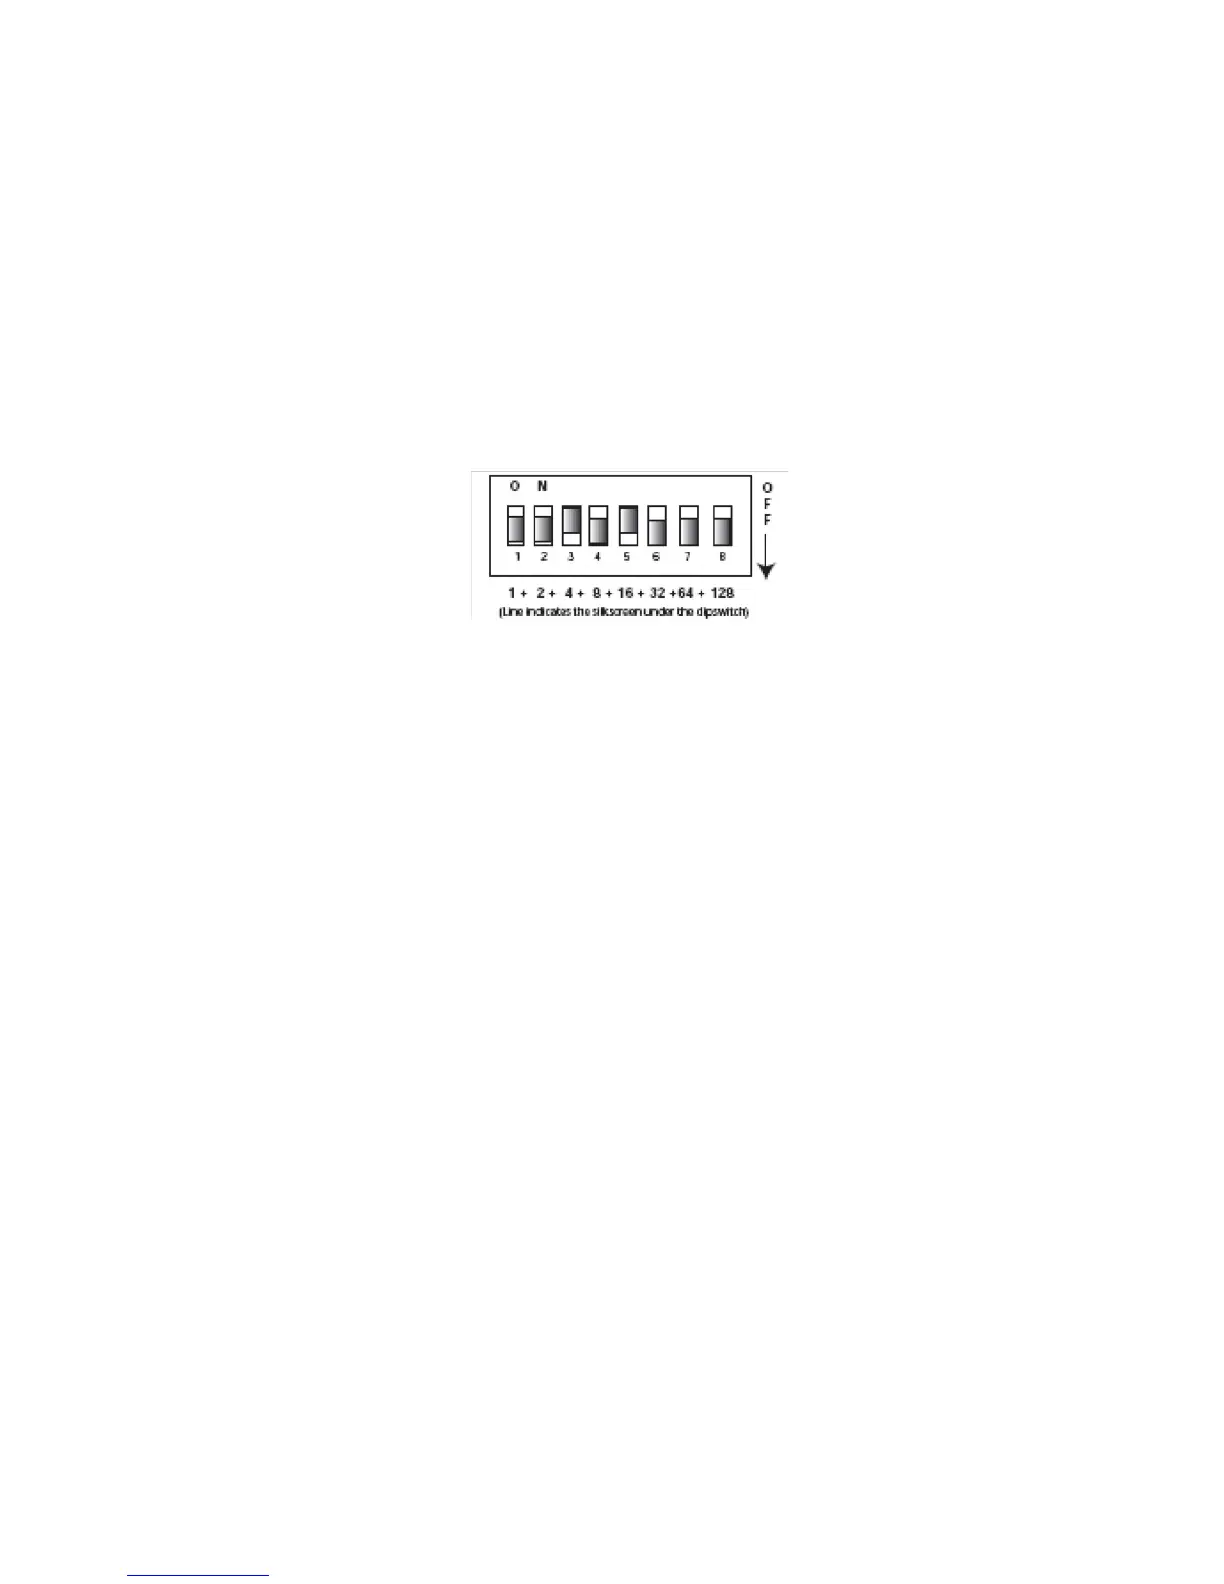
Step 2: Enter the MRN code into the dipswitch by adding the value of each lever
in the "On" position. The values of the levers are as follows:
1 = 1
2 = 2
3 = 4
4 = 8
5 = 16
6 = 32
7 = 64
8 = 128
For example, if you wanted to set the starting relay number to 77, you would
reference from the starting relay number to MRN code chart that
Starting Relay Number 77 = MRN Code 20
From that you then would deduce that you need Lever 3 & 5 in the on position
because 16 + 4 , the values associated with levers 3 & 5 sum to 20, resulting in a
starting relay number of 77.
Configuration of Remote Relay Cabinets without Dipswitches
or via USB
Remote relay cabinets that do not have dipswitches for setting the starting relay
number must be configured via USB. The instructions contained in this part of the
manual assume that you already have a successful connection between your PC and
your relay cabinet. For instructions connecting your PC to your relay cabinet, please
reference the instructions contained at our website, www.leviton.com and in your
master control panel user guide. Additionally, for this purpose, your PC requires
additional software and drivers which must be downloaded from our website.
Once connected to the relay panel via USB and you have the terminal program open
at the Z-MAX prompt, there are several settings which can be set to affect operation
of master/slave cabinets. From the terminal prompt, the command ’help’ (without
quotes) can be used at anytime to list out all commands and their syntax. Note that
not all settings are applicable to remote panels.
• MRN Code - sets the MRN code determining the starting relay for this panel. This is
usually the only option you’re going to need to set for Remote relay panels. A table
of MRN codes and their corresponding starting relay number can be found on
page 136.
• MRE Code - The setting is only used in Master panel configurations to set the
number of external relays. On slave cabinets this should always be set to 0, the
default setting