214327 175 Revision B
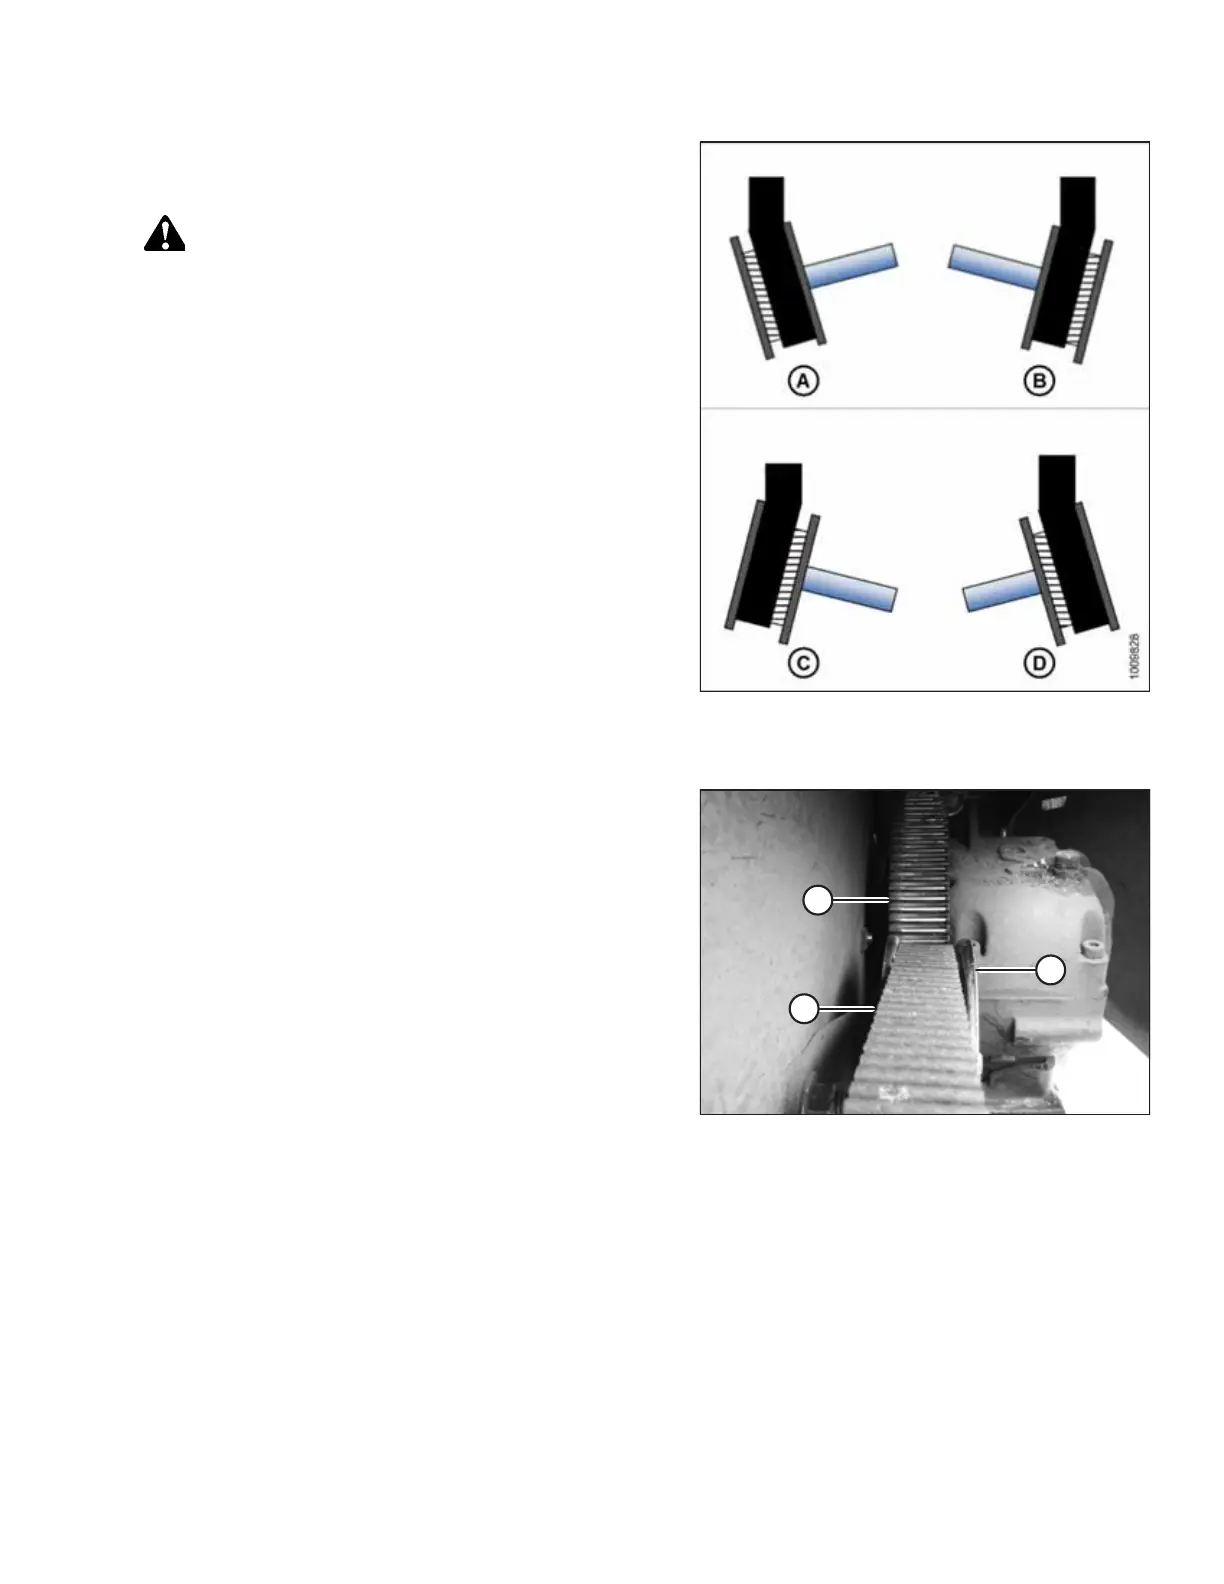
Figure 5.99: Knife Drive Pulley
A - Toe-Out: Left Side B - Toe-Out: Right Side
C - Toe-In: Left Side D - Toe-In: Right Side
1. Open the endshields. For instructions, refer to Opening
Endshield, page 35.
CAUTION
Exercise extreme care when operating the header with the
endshields open.
2. Operate the header and observe how the belt is tracking on
both the drive pulley and the knife drive box pulley on both
sides of the header. Shut down the engine, and remove the
key from the ignition before making any adjustments.
3. If the belt is tracking toward the inboard side of the drive
pulley, the likely cause is a toe-out problem (the belt tends
to move toward the low tension side of the pulley
[inboard]). For instructions, refer to Adjusting Drive Belt
Tracking – Drive Pulley, page 175.
4. If the belt is tracking toward the outboard side of the drive
pulley, the likely cause is a toe-in problem (the belt tends to
move toward the low tension side of the pulley [outboard]).
For instructions, refer to Adjusting Drive Belt Tracking –
Drive Pulley, page 175.
Figure 5.100: Knife Drive Belt
5. If belt (A) is tracking to one side of knife drive box
pulley (B), the likely cause is an out of position idler
pulley (C). For instructions, refer to Adjusting Drive Belt
Tracking – Knife Drive Box Pulley, page 177.
Adjusting Drive Belt Tracking – Drive Pulley
The following procedure is applicable to the left knife drive and the right knife drive on timed drive headers.
Before adjusting the drive belt tracking, verify the pulley that needs to be adjusted. For instructions, refer to Checking Knife
Drive Belt Tracking, page 174.
IMPORTANT:
A belt that is not tracking properly is subject to premature failure. Ensure the pulleys are aligned and parallel. Follow the
belt tensioning procedures in this manual to avoid misalignment.
MAINTENANCE AND SERVICING