214327 176 Revision B
The cogged timing belt should be centered on the knife drive box pulley and at least 2 mm (0.08 in.) from either edge when
the header is running. The belt should also avoid constant contact with the flanges on the drive pulley, but occasional
contact is acceptable. A gap should be visible between the belt and pulley flanges.
CAUTION
Exercise extreme care when operating the header with the endshields open.
1. Open both endshields. For instructions, refer to Opening Endshield, page 35.
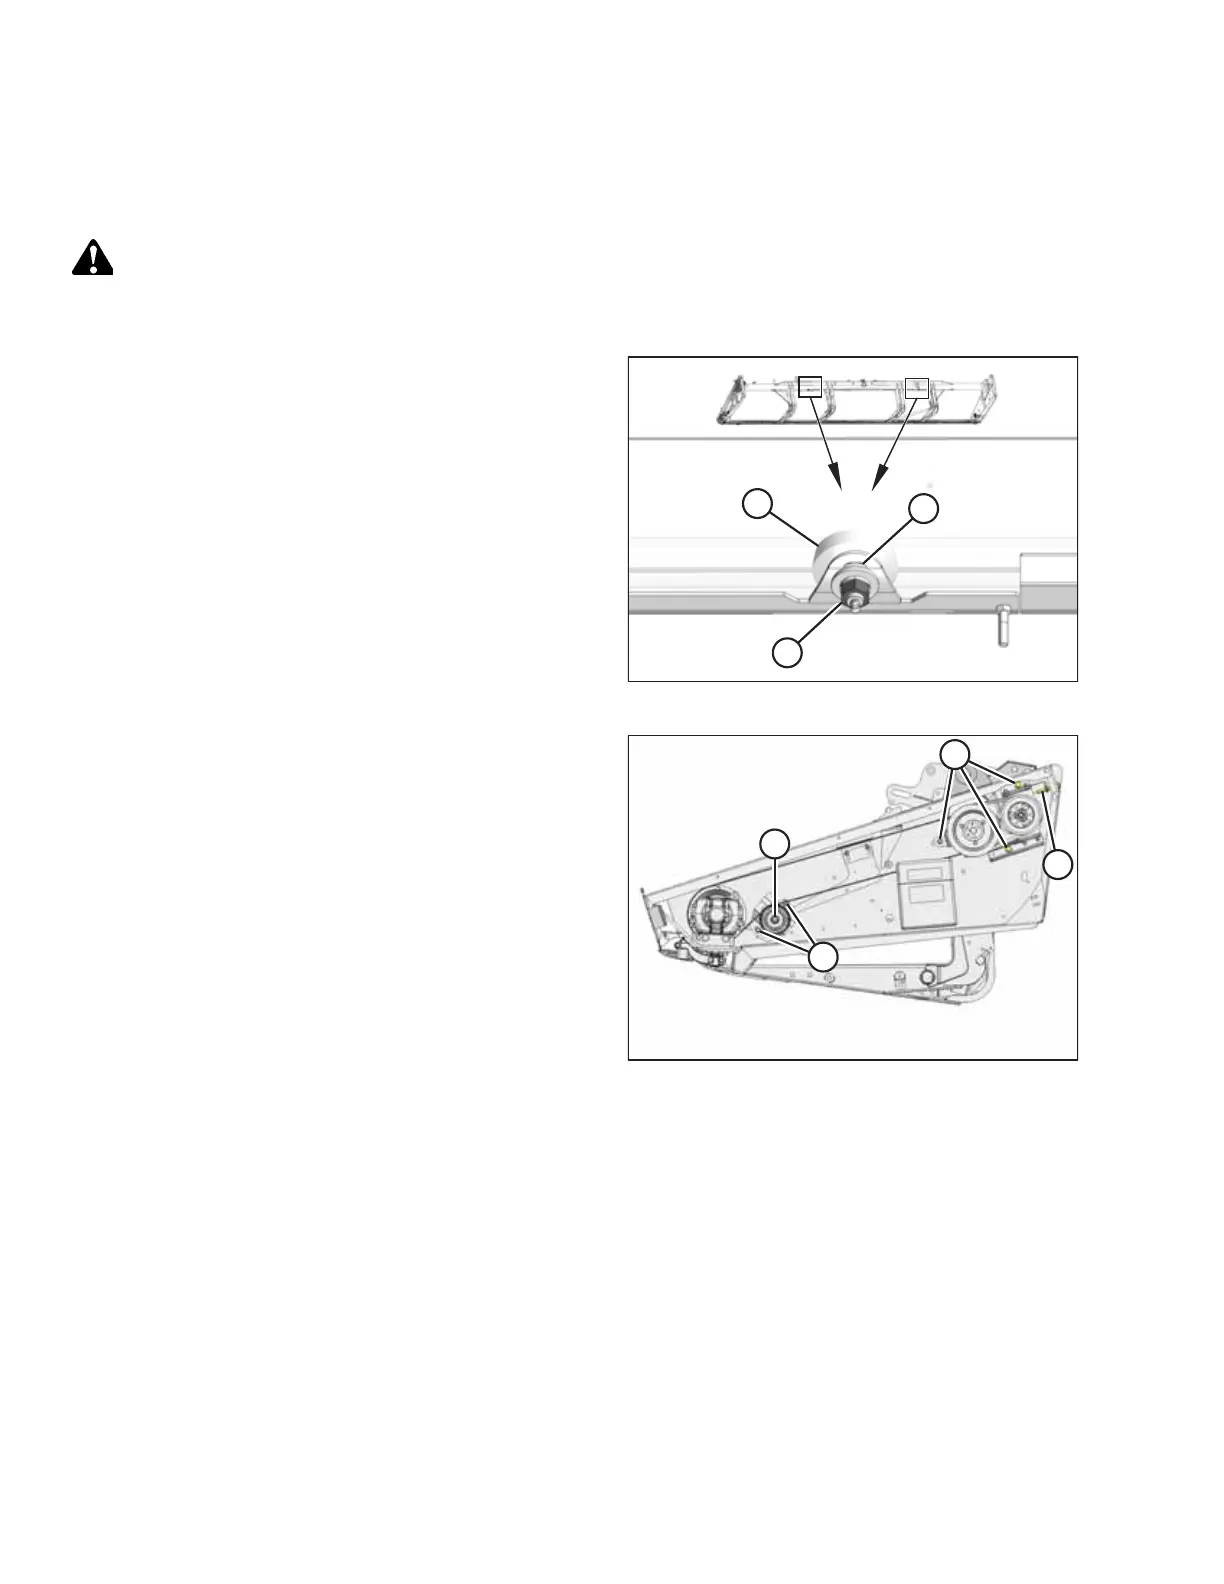
Figure 5.101: Cross-Shaft Support
2. Loosen nut (A) on support assembly (B).
3. Slide support (B) rearward in slot (C) to correct toe-out
condition, or forward to correct toe-in condition.
4. Tighten nut (A).
5. Operate the header and check the tracking. For
instructions, refer to Checking Knife Drive Belt Tracking,
page 174. Adjust the support assembly as required.
6. If the belt tracking problem continues, proceed to Step 7,
page 176.
Figure 5.102: Knife Drive – Left Side
7. Loosen nut (A) on the idler and nuts (B) on the idler
bracket.
8. Loosen nuts (C) at the drive pulley location.
9. To correct a toe-in problem, turn adjuster bolt (D) clockwise
to allow the belt to track inboard.
10. To correct a toe-out problem, turn adjuster bolt (D)
counterclockwise to allow the belt to track outboard.
11. Tighten nuts (C) at the drive pulley location.
12. Tension the belt. For instructions, refer to Tensioning Timed
Knife Drive Belts, page 170.
13. Operate the header and check the tracking. For
instructions, refer to Checking Knife Drive Belt Tracking,
page 174. Adjust the drive pulley if required as per the
above steps.
MAINTENANCE AND SERVICING