Section 5 – PERIODIC MAINTENANCE
Mini-Crawler Crane M A E D A
5-42 3/2019 MC305C-3
8. Turn the filter cartridge (3) counterclockwise
(left) with the use of the filter wrench to
remove it.
NOTICE: The oil is to be drained in large quantity
immediately after the engine is stopped. Wait for
10 minutes before removing the filter cartridge (3).
Fig. 5-64
9. Clean the filter stand. Apply clean engine oil
(or a light coating of grease) to a new filter
cartridge gasket and thread part, and install
the filter cartridge.
NOTICE: With the gasket surface maintained
contact with the sealing surface of the filter stand,
rotate the filter cartridge one-half to three-quarters
of a turn to secure it.
Always give manual tightening to the filter
cartridge.
10. Check around the filter cartridge (3) for oil
leaks. Be sure to wipe off oil completely if
spilled.
11. After replacing the filter cartridge (3), supply
the engine oil at a specified amount from the
filler cap (F).
12. With the oil level gauge (G) pulled out, wipe
off the oil with a waste cloth.
13. With the oil level gauge (G) inserted in the
gauge guide, pull the oil level gauge out.
14. Make sure the oil level is in the range "H" to
"L" marked on the oil level gauge (G).
Fig. 5-65
15. Attach the oil level gauge (G) and filler cap (F)
properly upon completion of oil replacement.
16. Start the engine, and idle it for 5 minutes.
Stop the engine.
17. Make sure again the oil level is in the range
"H" to "L" marked on the oil level gauge (G).
18. See "Installing Machinery Cover" on page
5-18 and install the machinery cover.
19. See "OUTRIGGER STOWING" on page 4-45
and stow the outriggers.
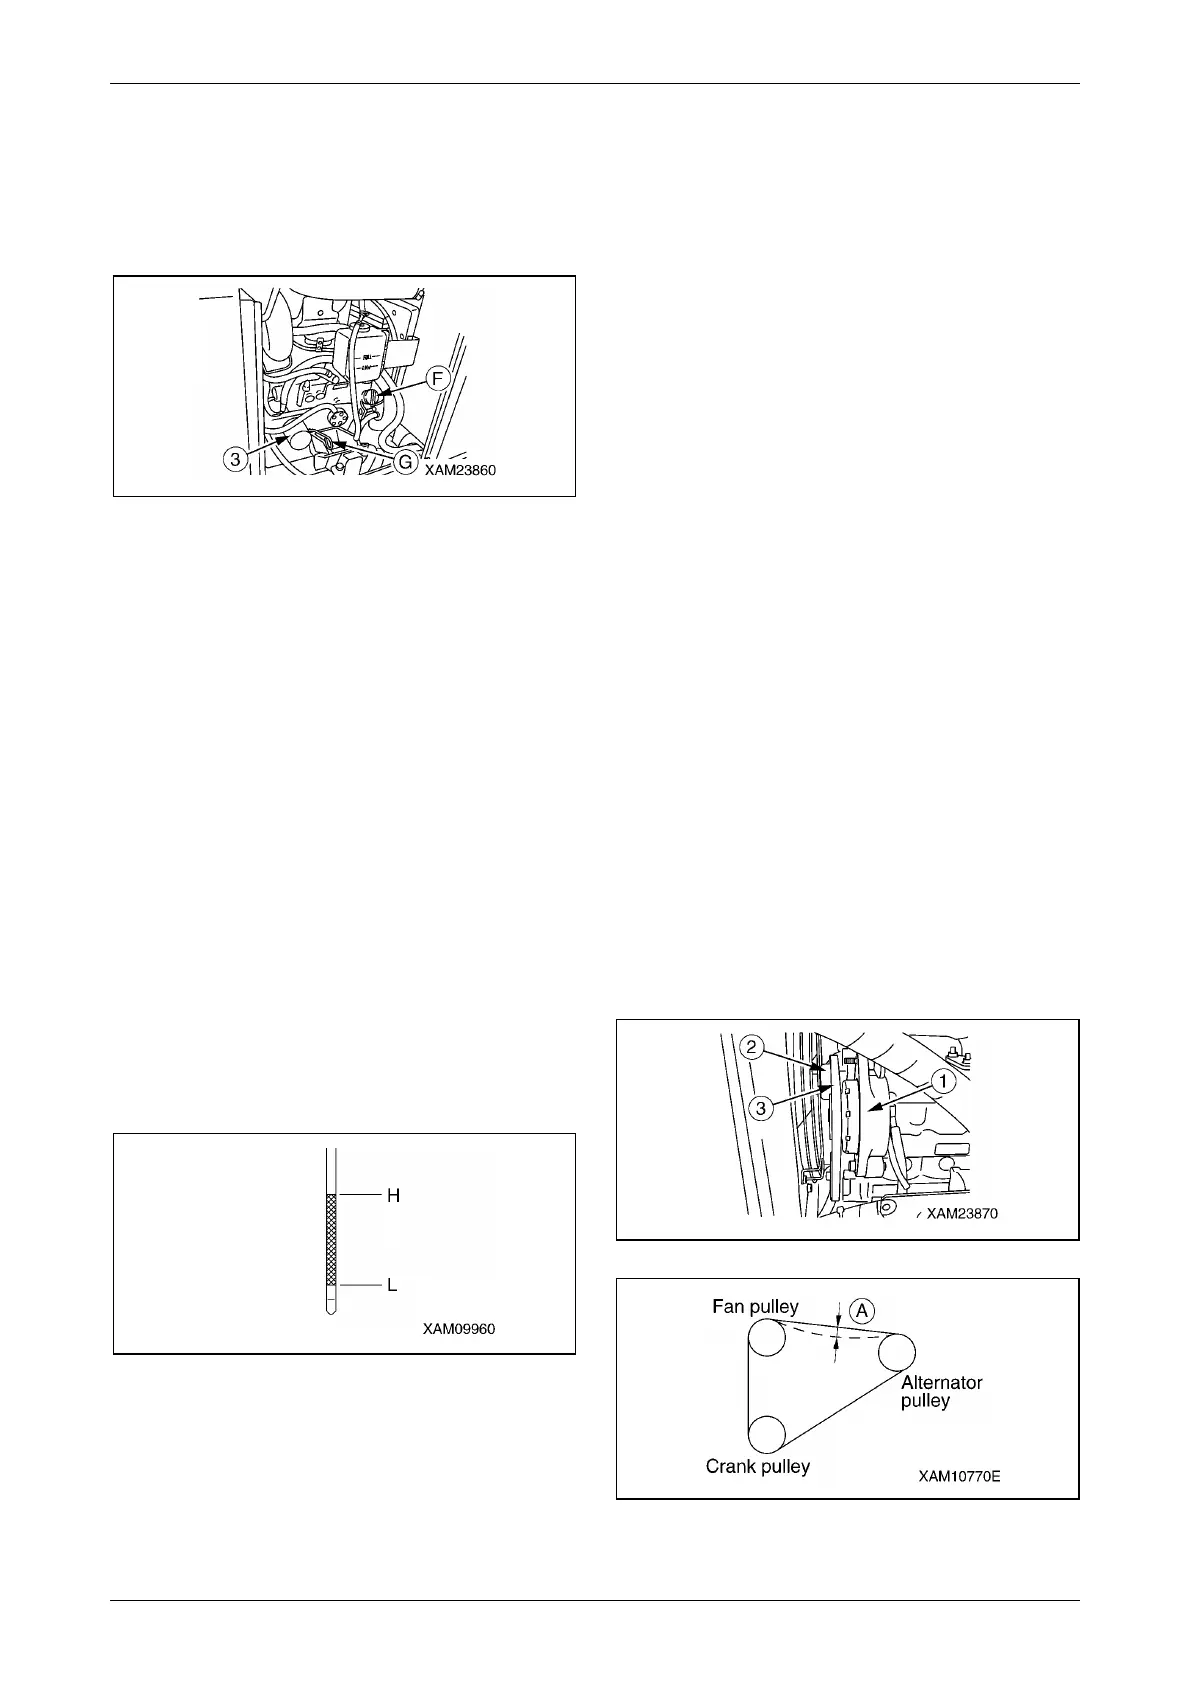
Check / Adjust Belt Tension
Tension Check
1. See "OUTRIGGER SETTING" on page 4-36
and rotate the outriggers outward.
2. See "Removing Machinery Cover" on page
5-18 and remove the machinery cover.
3. With the fingers, push (by approximately 98 N
(10 kgf) the midpoint between the fan pulley
(2) and alternator pulley (1) of the belt (3),
and if the strain is between 10 and 12mm it is
within standard.
4. If the inspection result indicated that the
strain of the belt (3) is out of the standard
value range, see the Tension check section
and adjust the tension of the belt (3).
NOTICE: Inspect the followings as well when you
inspect the tension of the alternator belt.
• Check the pulleys for breakage, the V groove
and belt for wear. Ensure that the belt is not in
contact with the bottom of the V groove.
• Prompt belt replacement is required if belt
adjustment is no longer enabled due to a
stretched belt or if the belt is scratched or
cracked.
• At least 5 minute long test run is required after
belt replacement. Re-adjust the belt tension
upon completion of test run.
Fig. 5-66
Fig. 5-67