Section 5 – PERIODIC MAINTENANCE
Mini-Crawler Crane M A E D A
5-48 3/2019 MC305C-3
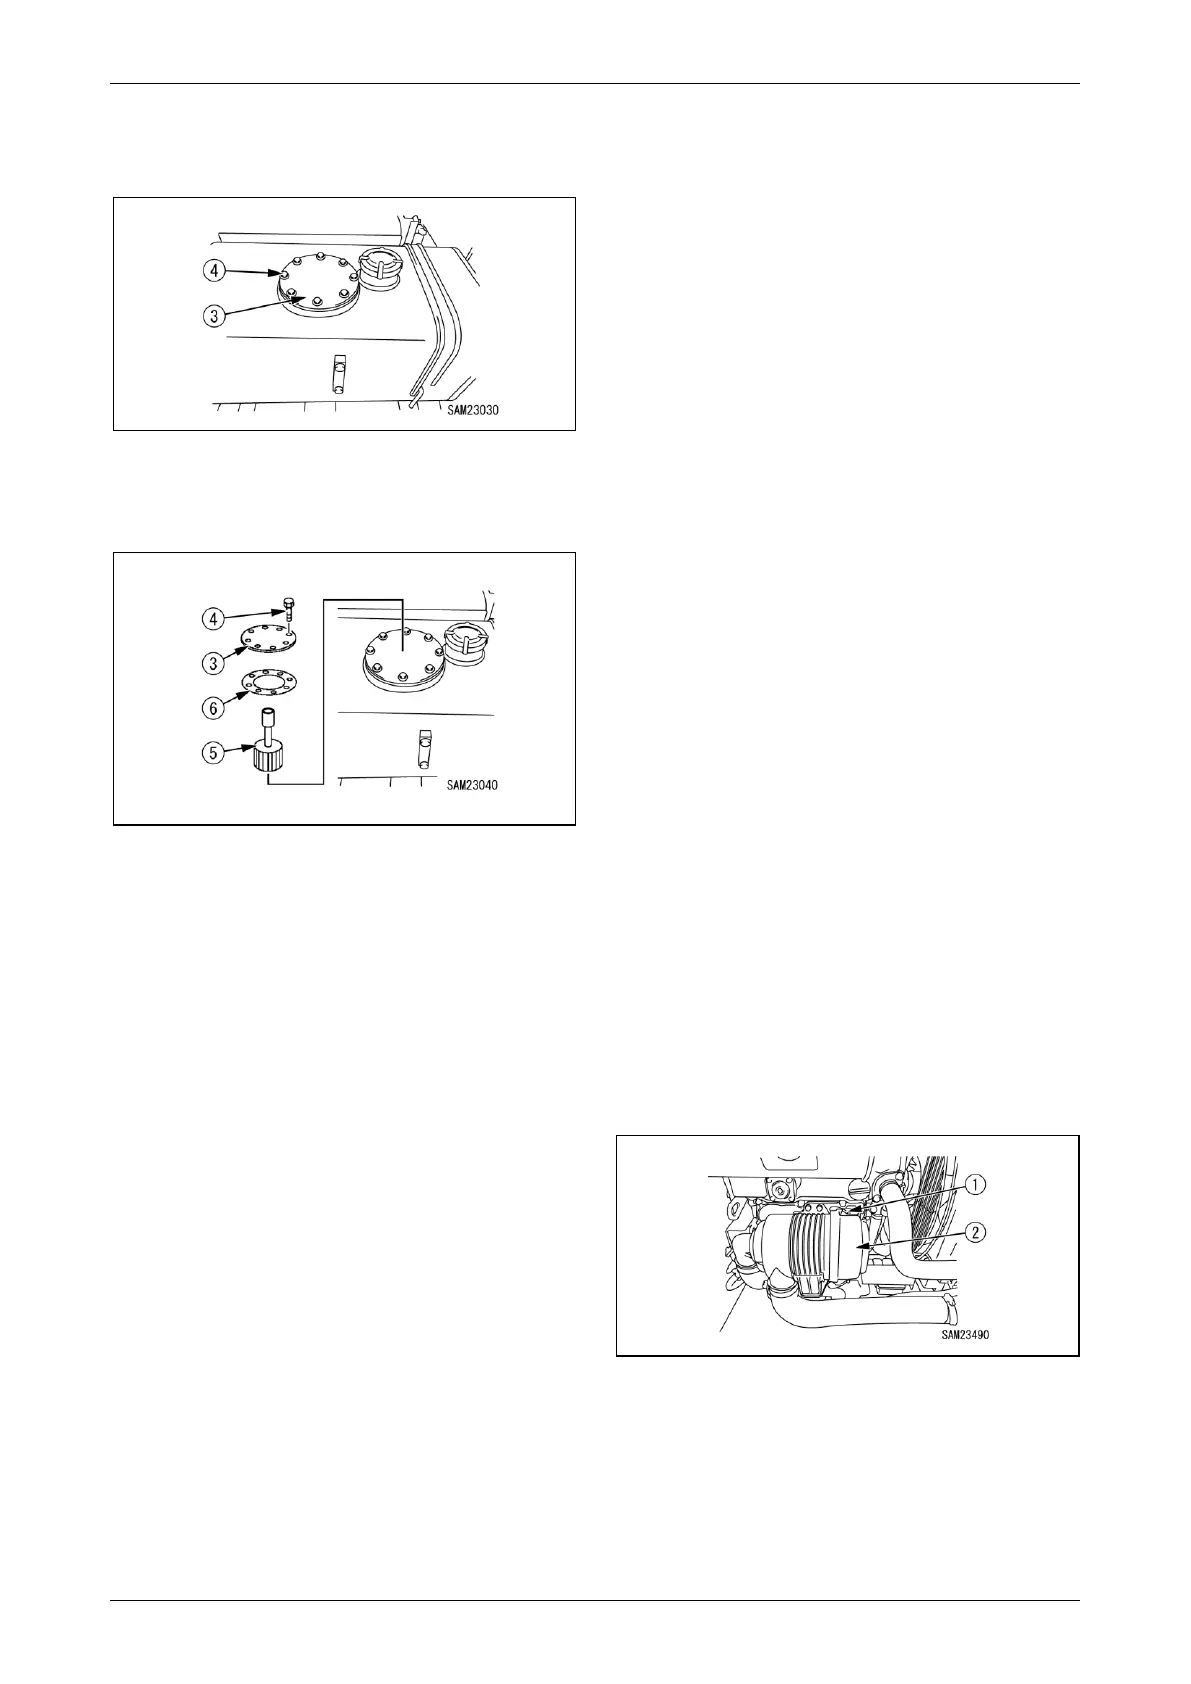
4. Remove the eight mounting bolts (4) and
remove the flange (3) on top of the hydraulic
oil tank.
Fig. 5-80
5. Remove the flange (3) and pull out the
suction filter (5) from inside the hydraulic oil
tank.
Fig. 5-81
6. Insert the new suction filter (5) to the inside of
the hydraulic oil tank.
7. Put the flange (3) in place with liquid packing
applied to the rubber plate (6). Secure the
flange (3) with the eight mounting bolts (4).
NOTICE: Wipe off the oil completely if spilled.
8. See "Check / Add Hydraulic Oil" on page 5-30
to check the oil level in the hydraulic oil tank.
Prompt oil refilling is required if check finds
insufficient oil.
9. See "Installing Machinery Cover" on page
5-19 and install the machinery cover.
10. Use the following procedure for air bleed.
(1) Start the engine with piping and hydraulic
equipment filled with oil.
Make sure the engine runs at low idle for
10 minutes.
(2) Move the cylinders and winch motor
slowly with a crane control lever at low idle
speed.
Always stop the boom lift cylinder and
telescoping cylinder approx. 100mm back
from the stroke end when operating the
cylinders.
Repeat this task 4 to 5 times.
(3) Allow all the outriggers to be extended,
referring to "OUTRIGGER SETTING" on
page 4-36. Extend and retract the
outrigger cylinder, keeping the machine
down on the ground.
Always stop the outrigger cylinder approx.
100mm back from the stroke end when
operating the cylinder.
Repeat this task 4 to 5 times.
11. See "OUTRIGGER STOWING" on page 4-45
to stow the outriggers.
Replace Air Cleaner Element
WARNING! DO NOT clean and replace the air
cleaner when the engine is in rotation.
Potential damage to the engine may occur if
disregarded.
CAUTION:
• Avoid the use of an element if its groove,
gasket, or sealing is damaged.
• Always use Maeda genuine elements.
1. See "OUTRIGGER SETTING" on page 4-36
and rotate the outriggers outward.
2. See "Removing Machinery Cover" on page
5-18 and remove the machinery cover.
Fig. 5-82
3. Disengage the two clamps (1) and remove
the dust pan (2).