Section 5 – PERIODIC MAINTENANCE
Mini-Crawler Crane M A E D A
5-44 3/2019 MC305C-3
Inspect / Clean / Replace Air Cleaner
WARNING!
• DO NOT clean and replace the air cleaner
when the engine is in rotation.
Potential damage to the engine may occur if
disregarded.
• Use of compressed air when cleaning the
element causes particles to be airborne.
Always wear protective goggles to prevent
injury from flying particles.
CAUTION:
• Assure pre- or post-work cleaning when
using the machine in a dusty site.
• DO NOT tap and bump the element against
anywhere when cleaning it.
• Avoid the use of an element if its groove,
gasket, or sealing is damaged.
• Always use Maeda genuine elements.
1. See "OUTRIGGER SETTING" on page 4-36
and rotate the outriggers outward.
2. See "Removing Machinery Cover" on page
5-18 and remove the machinery cover.
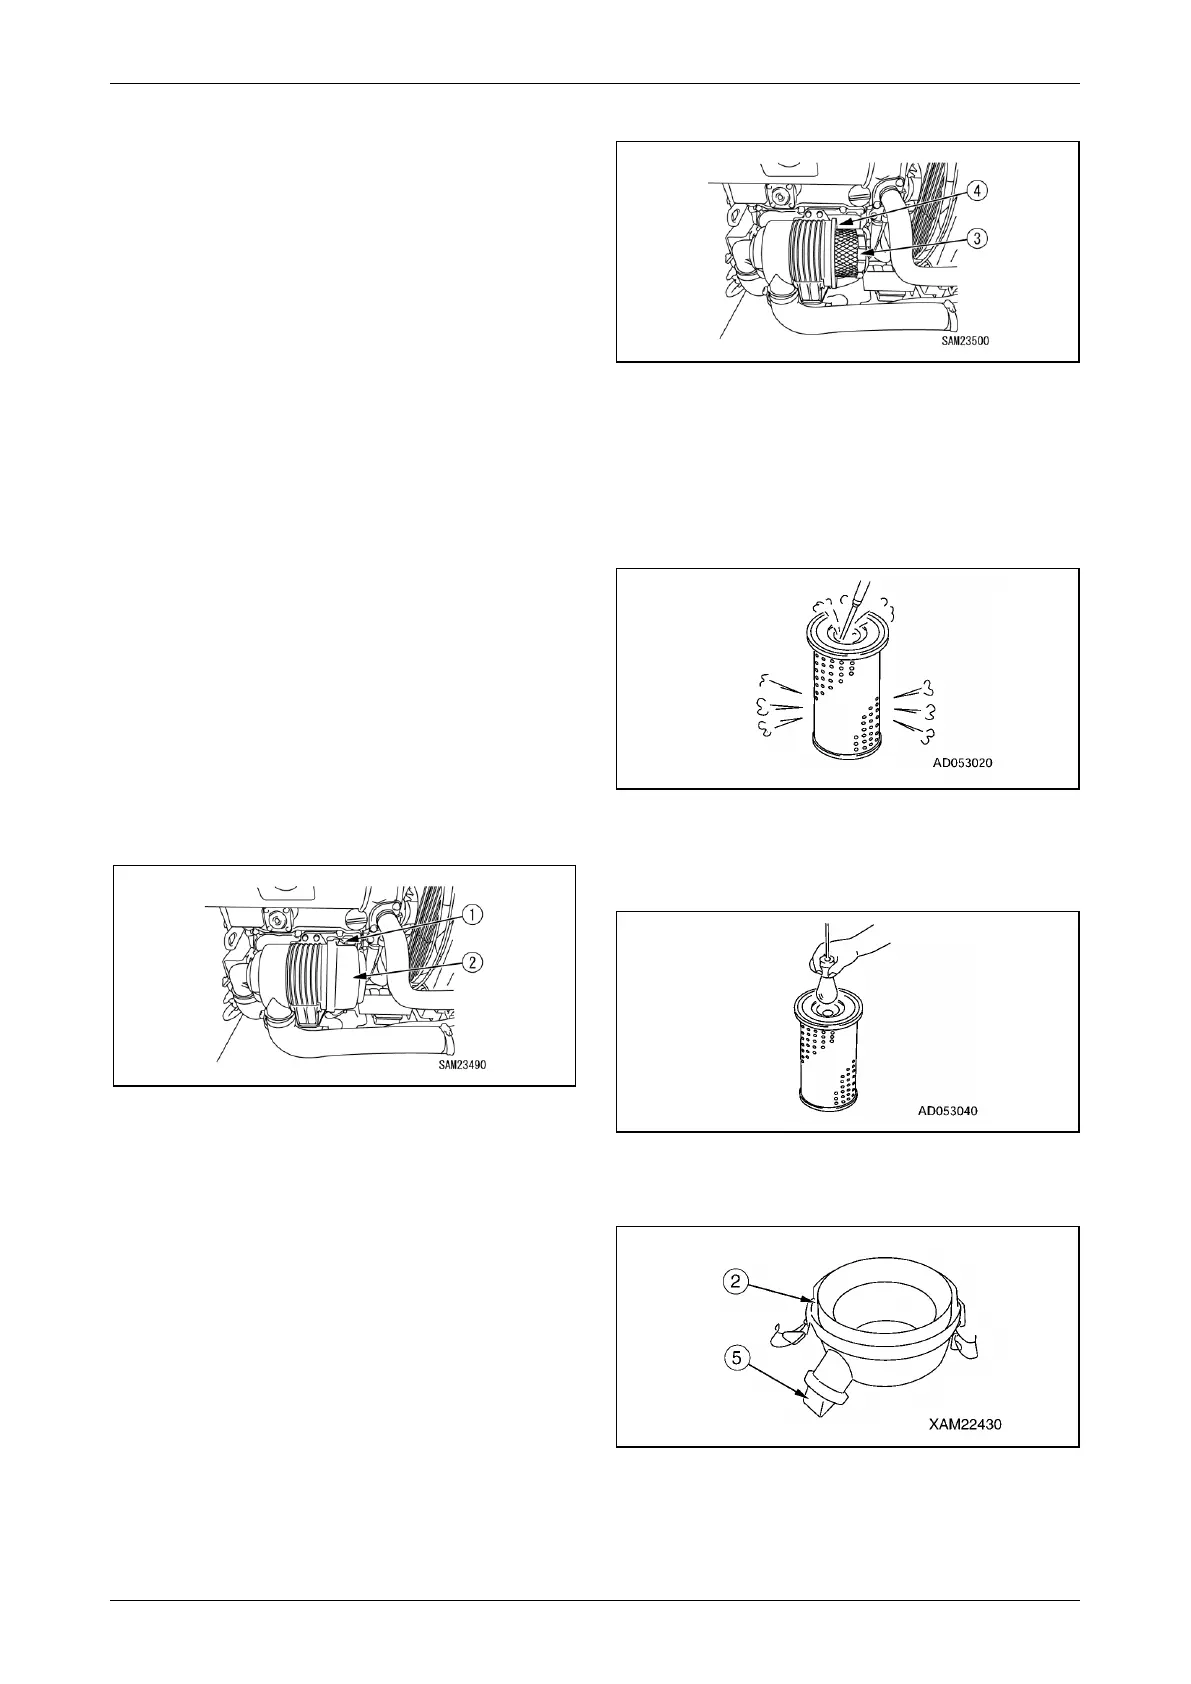
3. Disengage the two clamps (1) and remove
the dust pan (2).
Fig. 5-70
4. Pull out the element (3).
5. Cover the duct entrance located at the back
of the air cleaner body (4) with a clean cloth
or tape, to keep impurities out of the duct
entrance.
6. Clean the inside of the air cleaner body (4).
Fig. 5-71
7. Blow dry compressed air on the inside of the
element along the grooves at max. 0.69MPa
(7kg/cm
2
).
Blow compressed air on the outside of the
element along the grooves, and re-blow the
air on the inside.
Fig. 5-72
8. Shine a light bulb into the element after
cleaning for check. If check finds a pore or
thinned part, replace the element.
Fig. 5-73
9. Clean the inside of the dust pan (2) and
rubber cup (5).
Fig. 5-74
10. Remove the cloth or tape from the air
connector at the back of the air cleaner body
(4).