Section 5 – GENERAL MACHINE MAINTENANSE
Mini-Crawler Crane M A E D A
5-68 3/2019 MC305C-3
9. Tidily spool up the wire rope into the winch
drum with some tension applied to the rope.
10. Repeat the above procedure until the hook is
no more twisted.
If the wire rope is still twisted after performing the
procedure above, change with a new wire rope.
Winch Wire Rope - Removal
Use the following procedure to remove the wire
rope.
1. Place the machine on a level and firm
surface.
2. Place the boom telescoping lever in the
"Extend" position (push it toward the front) to
extend the boom slightly.
3. Move the winch lever to LOWER (push
forward) to lower the hook block until just
before it makes contact with the ground.
Lower the hook block by either moving the
boom lifting lever to LOWER (push forward)
to lower the boom or by moving the boom
telescoping lever to RETRACT (pull toward
you) to retract the boom.
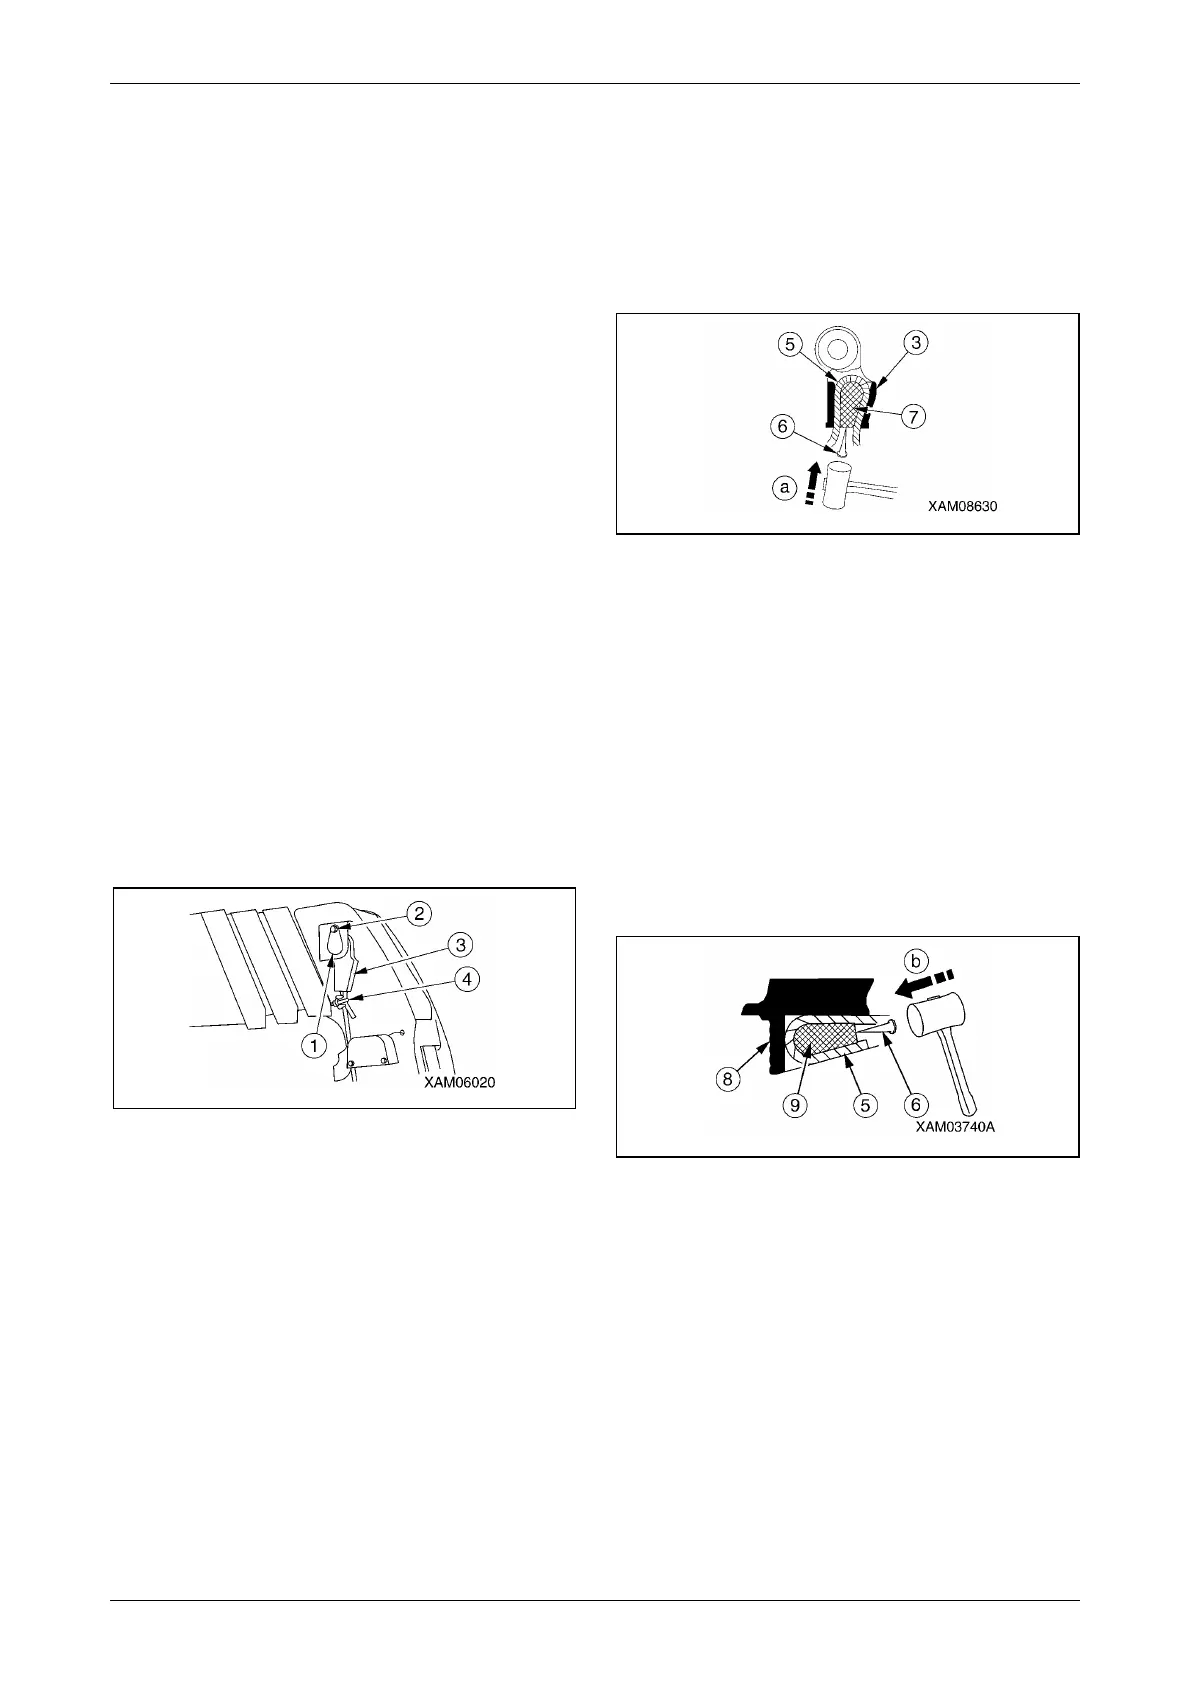
4. Undo the wedge socket fixing bolt (2).
Remove the wedge socket pin (1) and
remove the wedge socket (3).
5. Remove the wire clip (4).
Fig. 5-142
6. Pull the wire rope (5) out of the wedge socket
(3), following the procedure provided below.
(1) Bring a 4 to 6mm round bar (6) into contact
with the rope wedge (7).
(2) Remove the rope wedge (7), lightly
tapping the round bar (6) with a hammer in
the direction indicated by the arrow (a).
Fig. 5-143
7. Place the winch lever in the "Down" position
(push it toward the front) to wind up the wire
rope (5) from the winch drum.
8. With the wire rope winded up from the winch
drum, detach the end of the wire rope (5) from
the winch drum (8) by following the procedure
provided below.
(1) Bring a 4 to 6mm round bar (6) into contact
with the rope wedge (9).
(2) Remove the rope wedge (9), lightly
tapping the round bar (6) with a hammer in
the direction indicated by the arrow (b).
Fig. 5-144
9. Wind up the remaining wire rope (5)
completely.
Removal of the winch wire rope is completed.