M A E D A Mini-Crawler Crane Section 5 – INSPECTION
3/2019 MC305C-3 5-29
Check / Clean Fuel Filter Pot
WARNING!
• The fuel filter pot has fuel (diesel oil) inside.
Be extremely careful of fire such as cigarette
when cleaning the water separator pot.
• If the fuel spills when the fuel filter pot is
removed, thoroughly wipe it off.
CAUTION:
• Water or dust accumulated inside the fuel
filter pot will cause engine failure. Check
inside the pot and remove any water or dust
accumulated inside.
• If water remains in the fuel filter pot, it is
assumed that much water is also mixed in
the fuel tank. See "Drain Contaminant
Water/Deposits in Fuel Tank" on page 5-38
and eliminate water and dust mixed into the
fuel tank.
1. Stop the machine at levelled location.
2. See "OUTRIGGER SETTING" on page 4-36
and rotate the "Outrigger (1)" and "Outrigger
(2)" outrigger rotaries outward.
3. Open the access hatch in the right-hand
machinery cover.
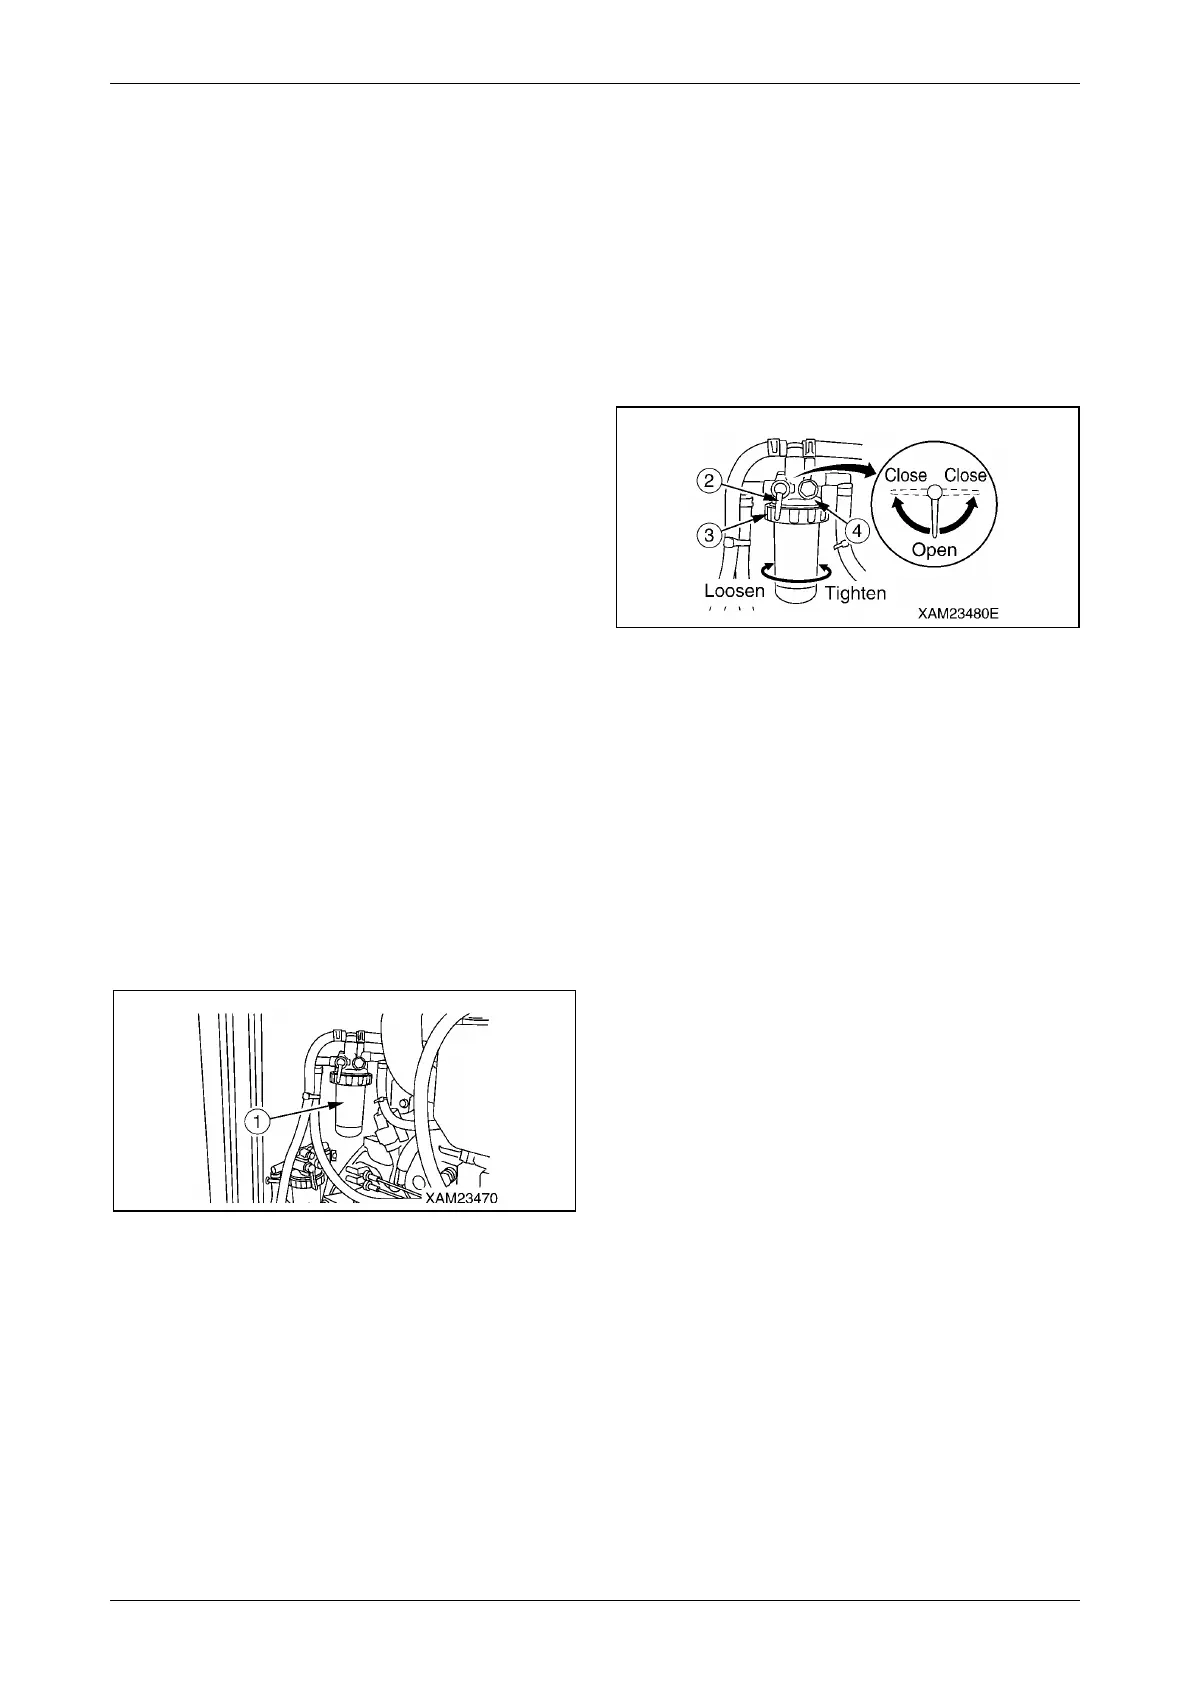
4. Inspect the fuel filter pot (1) and check for
water or dust accumulated inside the pot, and
also for the dust or similar object blocking the
element.
Fig. 5-40
5. If water, dust or similar object is accumulated
inside the pot (1), clean the inside of the pot
using the following procedure.
(1) Raise the lever (2) of the head (4) section
to horizontal position (close) to shut off the
fuel.
(2) Turn the retainer ring (3) of the head (4)
section counterclockwise (left) to loosen,
then remove the pot (1) from the head (4)
section.
(3) Drain the fuel and water out of the pot (1).
(4) Clean the pot (1) and element with diesel,
and spray the compressed air (0.20 to
0.29 MPa {2 to 3 kg/cm
2
}) inside to scrape
off the dusts from the surface.
(5) Set the pot (1) to the head (4) section, then
turn the retainer ring (3) clockwise (right)
to tighten.
(6) Lower the fuel lever (2) of the head (4)
section down to the vertical position
(open) to open the fuel circuit.
Fig. 5-41
6. Close the access hatch.
7. See "OUTRIGGER STOWING" on page 4-45
and stow the "Outrigger (1)" and "Outrigger
(2)" outrigger rotaries.