4-2
Remove the four screws under the chemical
dispenser lid.
Insert and turn both service lock keys 1/4
turn.
NOTE: If only 1 key is available, turn one of
the locks 1/4 turn, then near the released
lock, lift the top at the corner about 1/2 Inch.
Turn the key in the opposite direction and
remove the key. Move to the other top lock
and perform the same procedure.
1.
2.
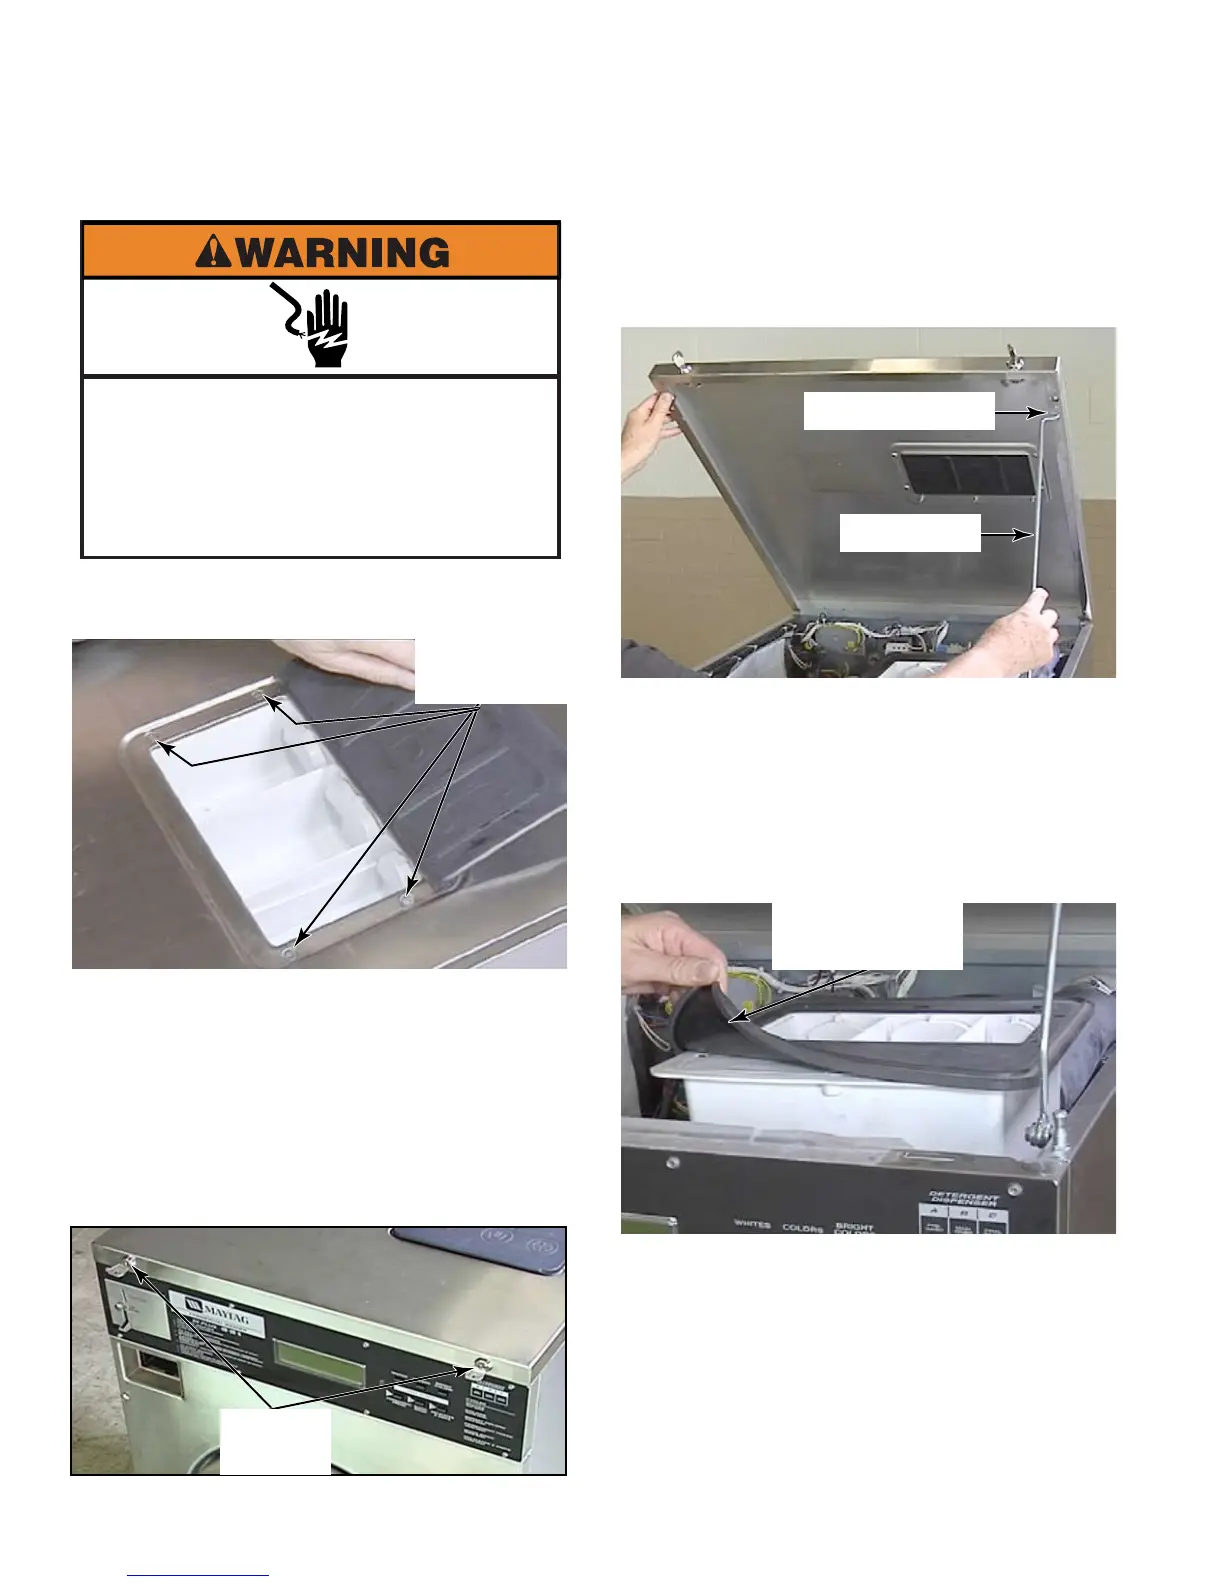
RAISE THE TOP
Lift the top on its hinges. Use the prop rod,
mounted inside on the right side panel, to
hold the top up. There is a hole in the under
flange of the top to insert the prop rod into.
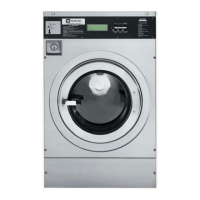
REASSEMBLY NOTE: Make sure the
seal around the top edge of the chemical
dispenser is flush or even with the edge of
the dispenser to provide a good seal when
the top panel is lowered and the screws are
reinstalled. The seal wraps around over the
edge. There is a lip that wraps under it as
well.
3.
Electrical Shock Hazard
Disconnect power before servicing.
Failure to do so can result in death or
electrical shock.
Replace all parts and panels before
operating.
4 Screws
2 Lid
Locks
Prop Rod
Prop Rod Hole
Dispenser Seal
With Edge Lip