6-1
TUBS, BASKETS, BEARINGS & SEALS
Remove the belts (See page 4-29).
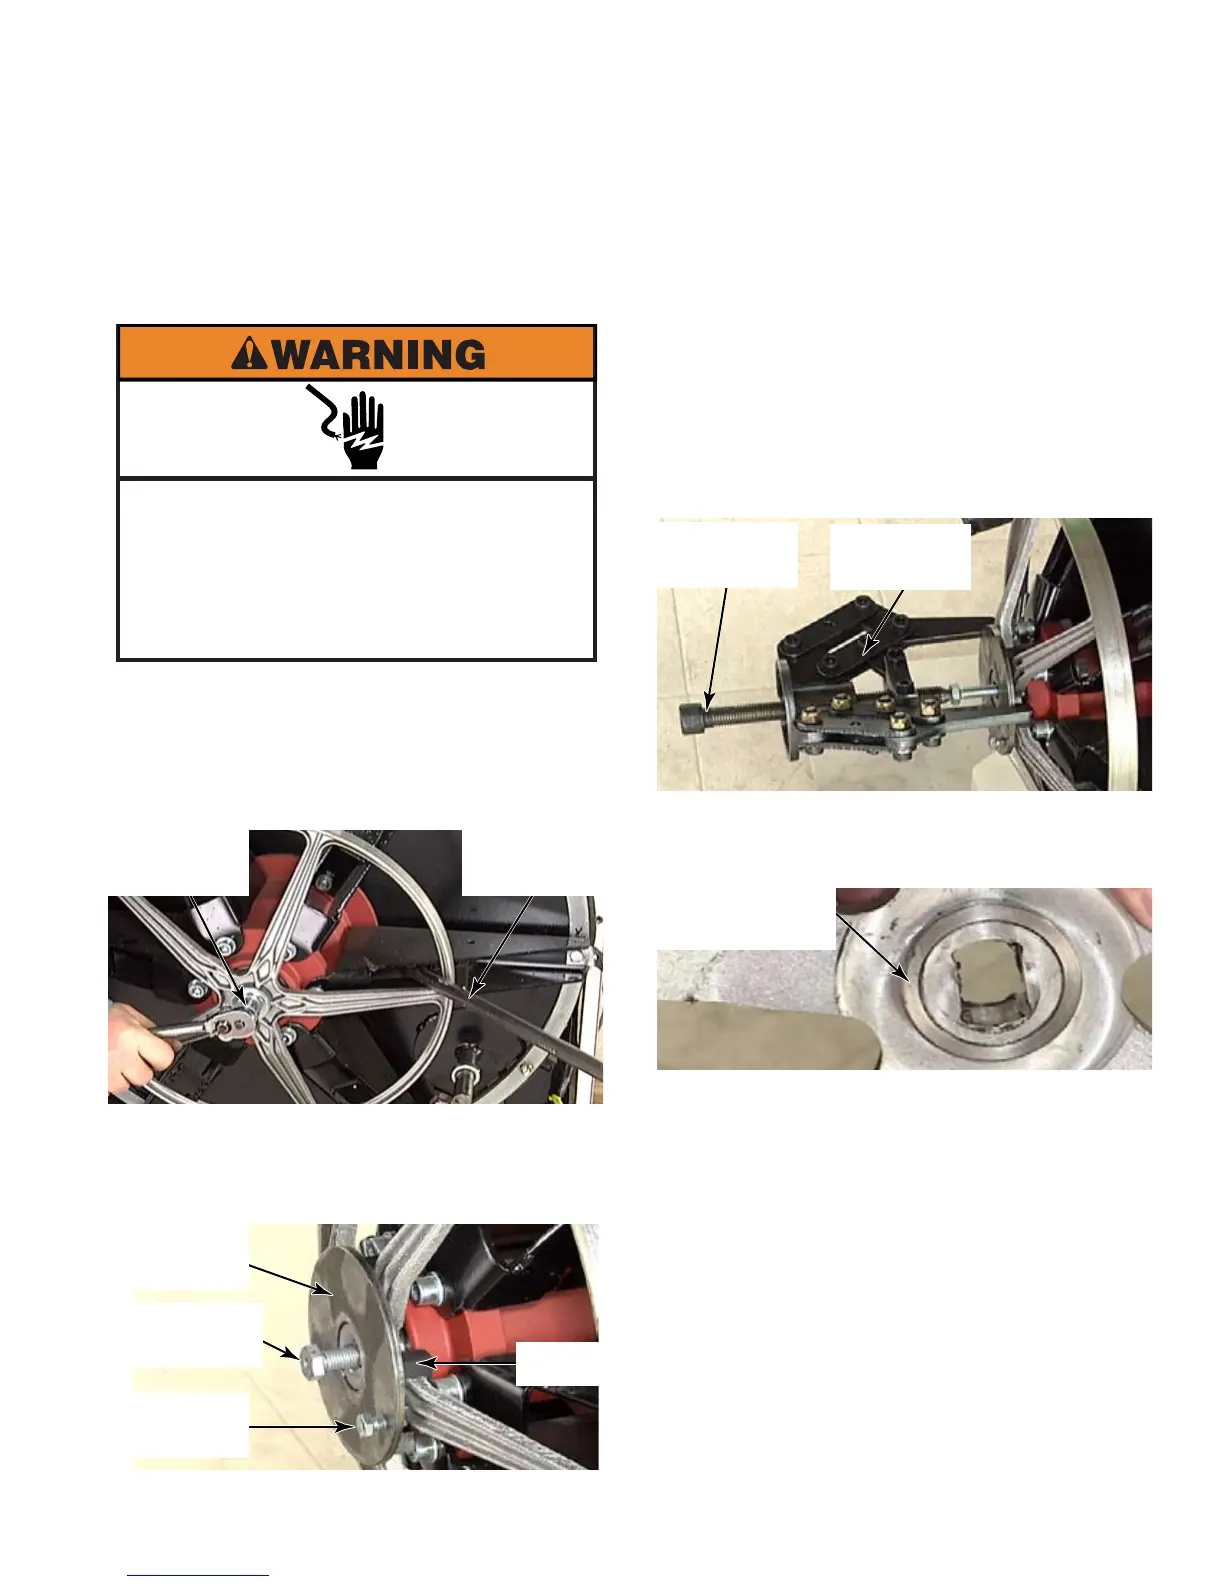
Use lever bar #514759 to block pulley to
the back of washer. Remove the 19mm bolt
that secures the pulley to the basket shaft.
Attach tool #518929 on the basket pulley,
making sure that the hooks are well secured
on the back side of the pulley. Tighten the
securing bolt to hold the tool in place.
1.
2.
3.
REMOVE & REINSTALL BASKET PULLEY - MFR18 & 25
Install the center bolt M12x50, #518933, into
the center of the basket shaft.
Attach the 3 arm puller, #518936, to the
tool #518929 with the pushing bolt seated
in the center bolt. Use #20 hex key to turn
pushing bolt. Remove the tools.
Some models have a bearing supporting
ring on back side of pulley. Beveled side
faces the pulley. Flat side faces the bearing.
Align flat sides of shaft with pulley center
hole. Press the pulley on by hand as far as
possible. Do not hammer the pulley on the
shaft, because it can damage bearings and /
or move the drum shaft from center position.
Reinstall pulley bolt with large flat washer.
Tighten bolt with 19mm socket, press pulley
onto shaft almost all the way on. Remove
the pulley bolt. Place lock washer then
large flat washer onto pulley bolt. Use
screw lock on threads. Use lever bar
#514759 to block pulley to back of tub.
Tighten bolt until bearing supporting ring
contacts the rear bearing race.
4.
5.
6.
7.
8.
Electrical Shock Hazard
Disconnect power before servicing.
Failure to do so can result in death or
electrical shock.
Replace all parts and panels before
operating.
Lever Bar
#514759
19mm Bolt
Bearing
Supporting Ring
Tool
#518929
Securing
Bolt
Hook
Center Bolt
#518933
3 Arm Puller
#518936
Pushing Bolt