6-7
Remove the trunnion from the basket
assembly (See page 6-2).
Remove the stainless steel back plate from
the tub ring. (See page 6-4).
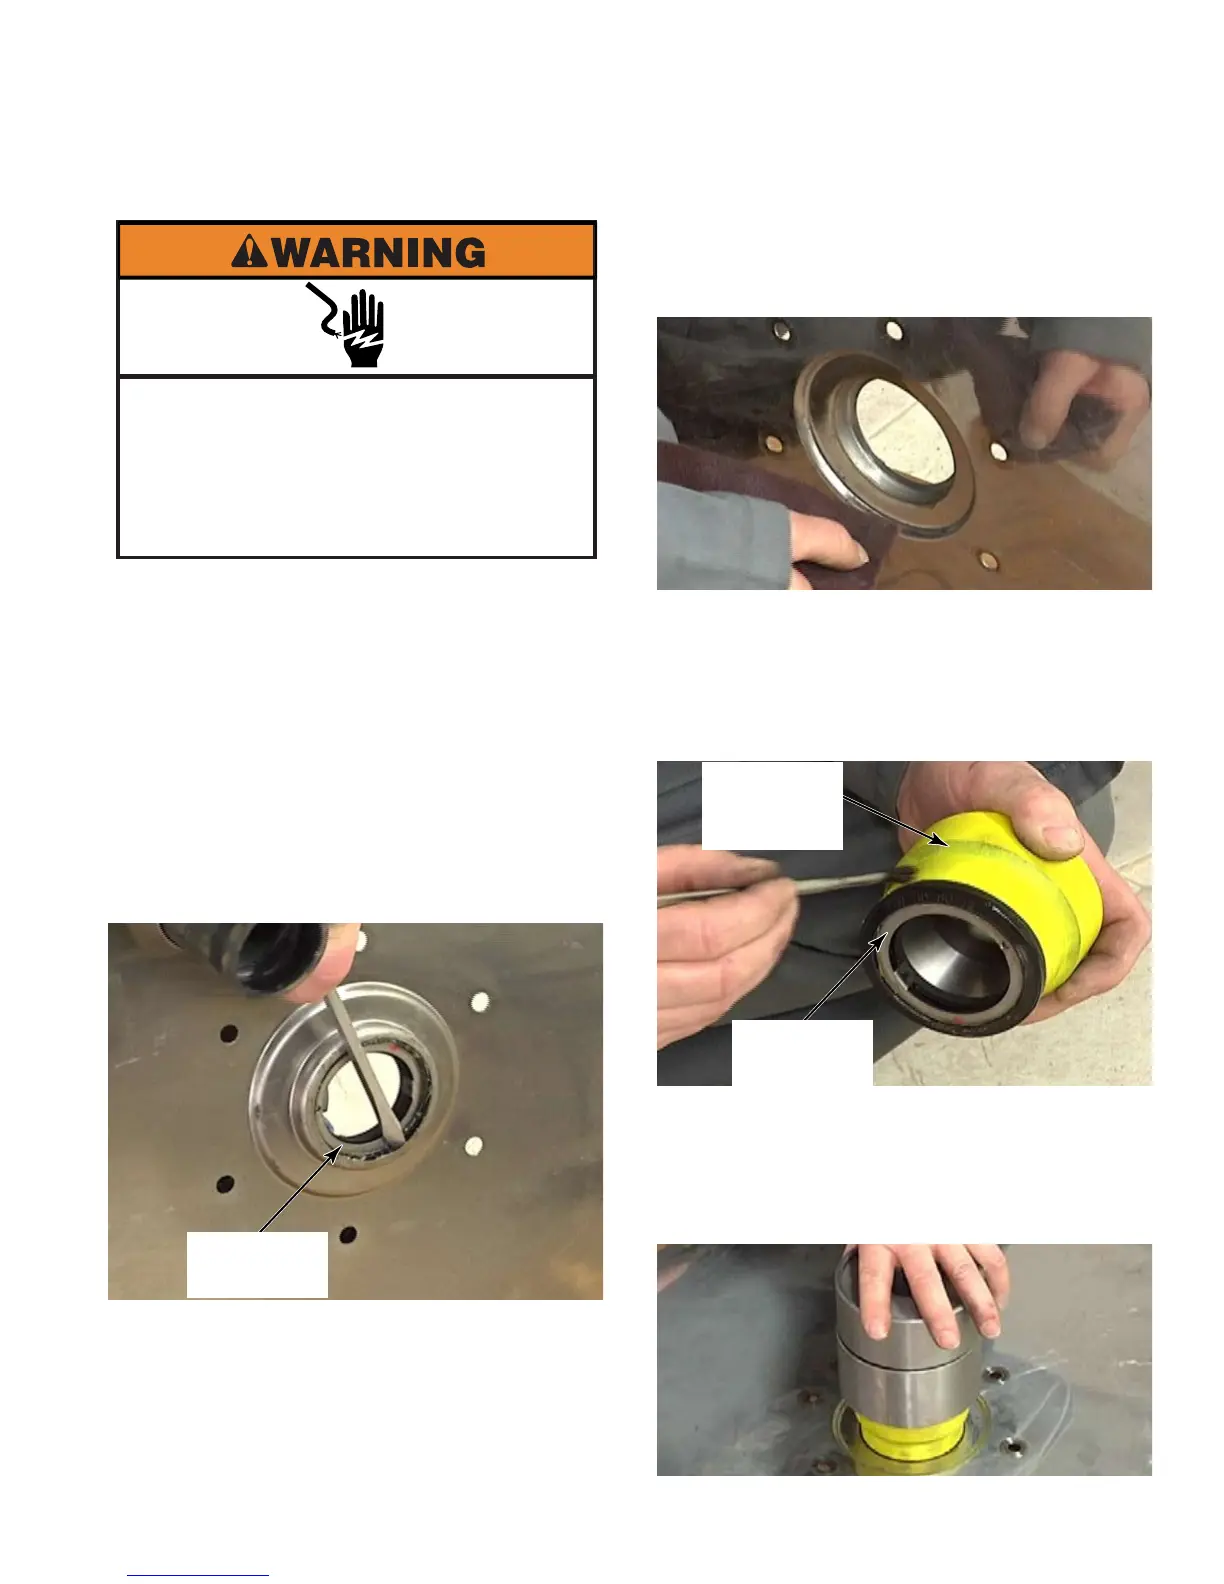
Use a flat blade screwdriver to gently pry
between the stainless steel seal holder
seat and the axial seal. Make sure not to
damage the seal holder seat, or change its
shape. Work the screwdriver all the way
around the seal, pushing a little at a time,
until it can be removed.
NOTE: This section covers two models,
MFR18 & 25, and in some cases different
tools are used. When differences exist, both
tool numbers are shown, the first number is
for MFR18, second number is for MFR25.
1.
2.
3.
REMOVE & REPLACE AXIAL SEAL - MFR18 & 25
Use a Scotch-Brite™ pad to clean surface
of seal holder removing any dirt or residue
without removing any seal holder material,
that would change the fitting dimension.
Place new axial seal in tool #518962 or
#518961, carbon ring inwards. Use a brush
to apply a thin layer of Scotch-Clad™ 776 to
the lower half of the seal visible outside of
the tool. Press the seal immediately into the
recessed shape of the seal holder.
Verify that the seal sits against the back wall
of the seal holder with no gaps.
Add some weight on top of the tool and let
the assembly dry for at least a half hour.
4.
5.
6.
7.
Electrical Shock Hazard
Disconnect power before servicing.
Failure to do so can result in death or
electrical shock.
Replace all parts and panels before
operating.
Axial Seal
Tool
#518962
#518961
Axial Seal
 Loading...