53
4 - Daily Setup
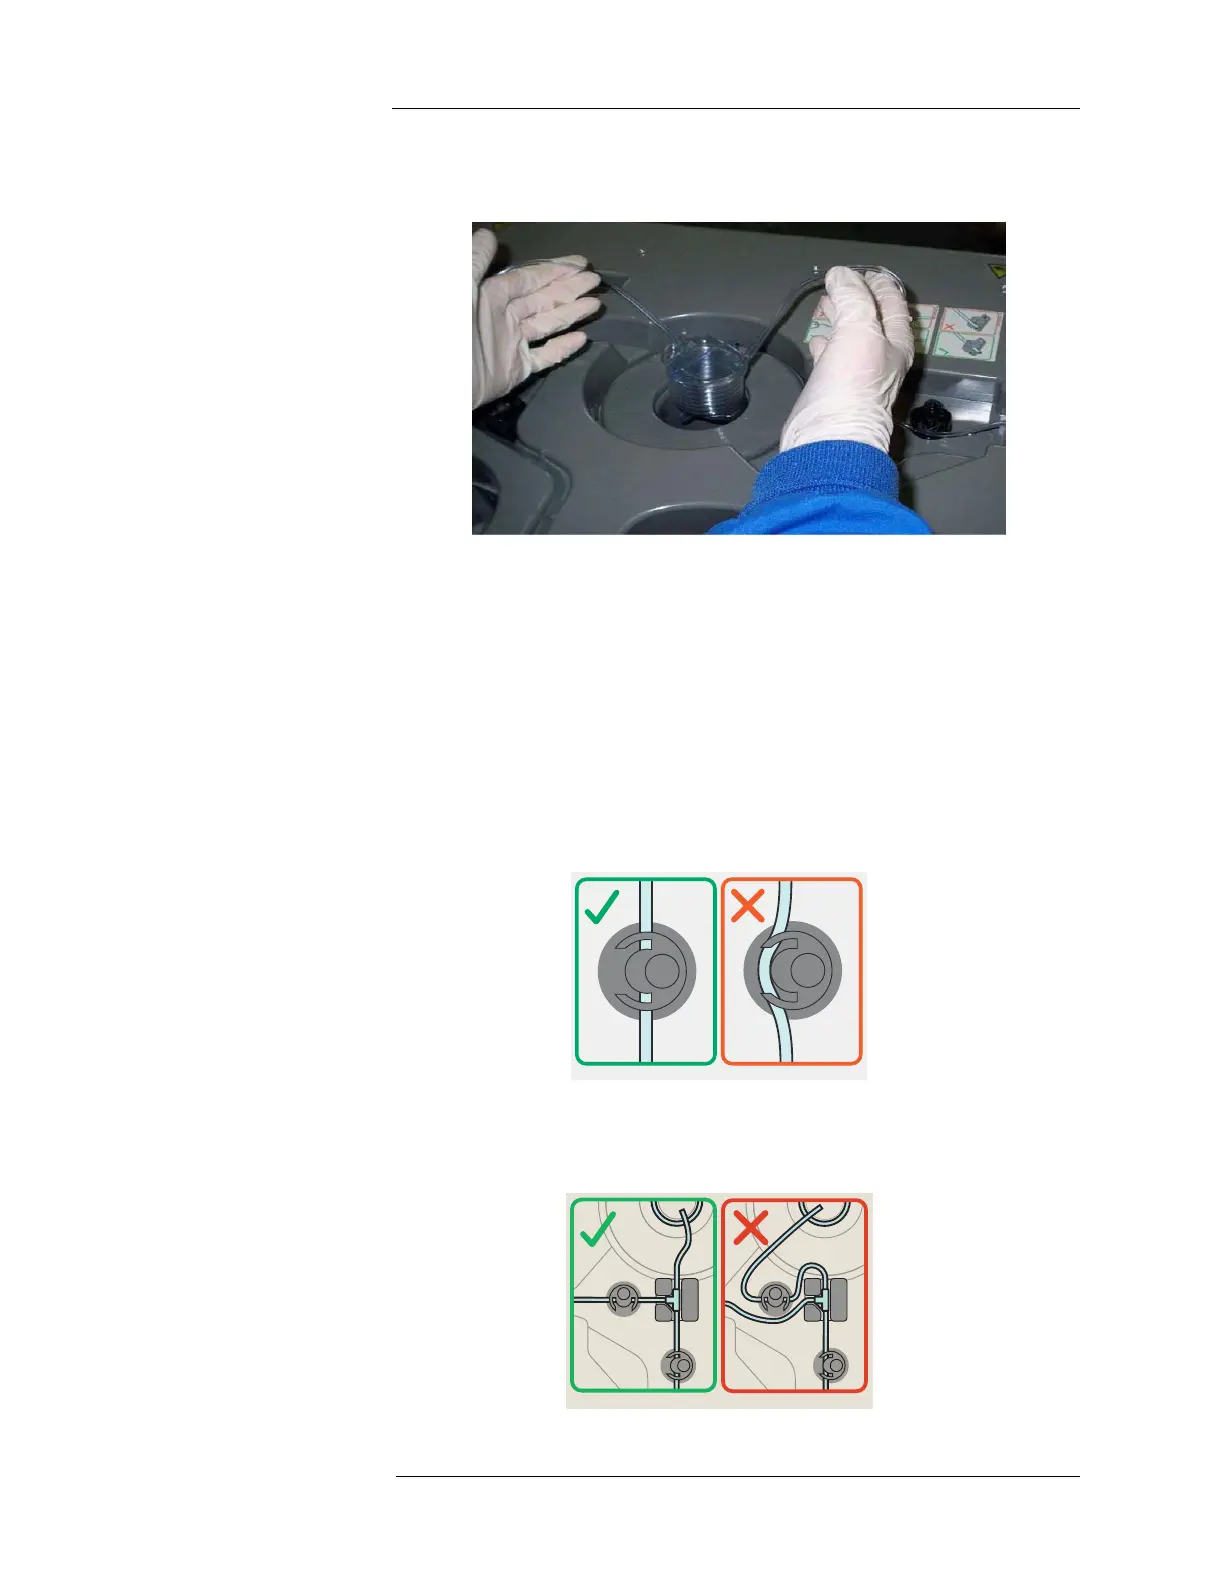
8. Insert the SAS Coil into the Dose Calibrator. Be sure the Pre-Coil Tube enters and the
Post-Coil Tube exits on top of the SAS Coil and the SAS Coil is placed at the bottom of the
Dose Calibrator.
9. Route the Pre-Coil Tube into the SAS track between the SAS confluence holder and the
Dose Calibrator. Be sure to press the tubing firmly into the SAS track.
10. Unroll the Waste Container and insert it into the Waste Storage.
11. Place the T-Connector into the T-Connector Holder.
12. Install the Waste Tube into the Waste Pinch Valve. Install the Patient Tube into the PAS
Pinch Valve.
NOTE: To install tubing in a Pinch Valve, open the valve by pressing the button on the
top. While holding the valve open and grasping the tubing on either side of the
valve, pull the tubing in from the side. The tubing must be inserted completely
as shown in the left panel below. Release the button on the valve to pinch the
tubing in place.
NOTE: The left panel in the picture below shows the correct layout of the SAS when the
tubing has been properly installed into the SAS T-Connector Holder, Waste
Pinch Valve, and PAS Pinch Valve.