6-WORKINGOPERATIONS
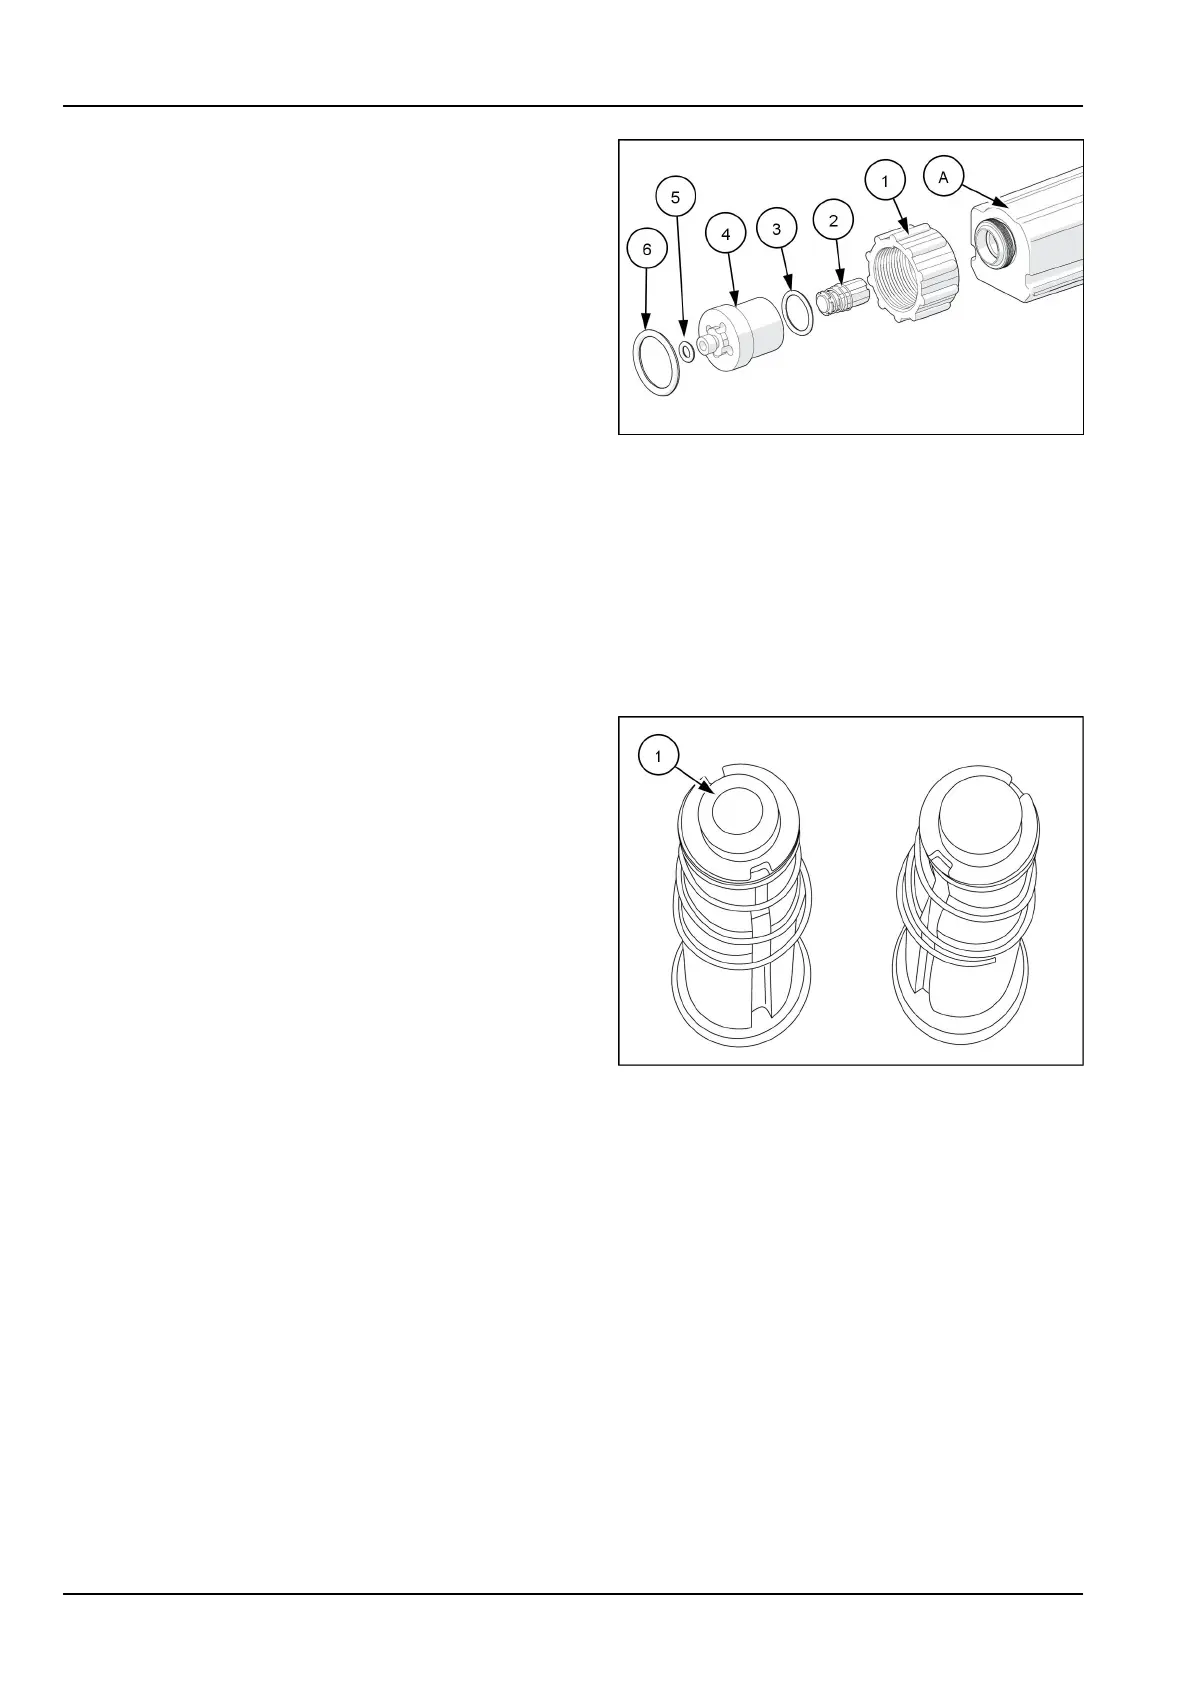
6.InspectthelargeO-ring(6)onthefaceofthevalve
body(4).Replaceifnecessary.
7.InspectthesmallO-ring(5)onthetipofthevalve
body(4).Replaceifnecessary.
8.Usingavalvebodyremovaltool(B),loosenand
removethevalvebody(4)fromthenozzlecontrol
valve.
9.InspecttheO-ring(3)ontheinsideofthevalvebody.
Replaceifnecessary.
10.Cleanandinspecttheplungerassembly(2).Replace
theplungerassemblyiftherubbersealiswornor
damaged.Refertothefollowingsectiononplunger
sealinspection.
11.Inspectynut(1).Replaceifwornordamaged.
12.Removeanydebrisfromthenozzlecomponentsby
washingthecomponentsincleanwater.Reassem-
blethenozzlecomponents
NOTE:RefertoISOProductControloperationmanualfor
additionalmaintenanceandtestingprocedures.
RAIL16SP00352AA2
Plungersealinspection
Afterextendeduse,thesoftplungerseal(1)willdevelop
aweargrooveatthelocationwherethesealimpactsthe
hardoriceseat.
Asthegroovedeepens,thepressurecapacityofthevalve
willdecreaseuntilitinterfereswiththeoperatingpressure
ofthesprayer.
Thesystemwilloperatenormallyatlowerpressuresun-
tilreplacementpartscanbeacquired.Highoperating
pressuresandabrasivespraysolutionswillacceleratethe
wearoftheplungersealmaterial.
RAIL13SP04058AA3
6-46