Software Upgrade and Maintenance 6-11
6.4 Data Backup and Storage
6.4.1 Manage Settings
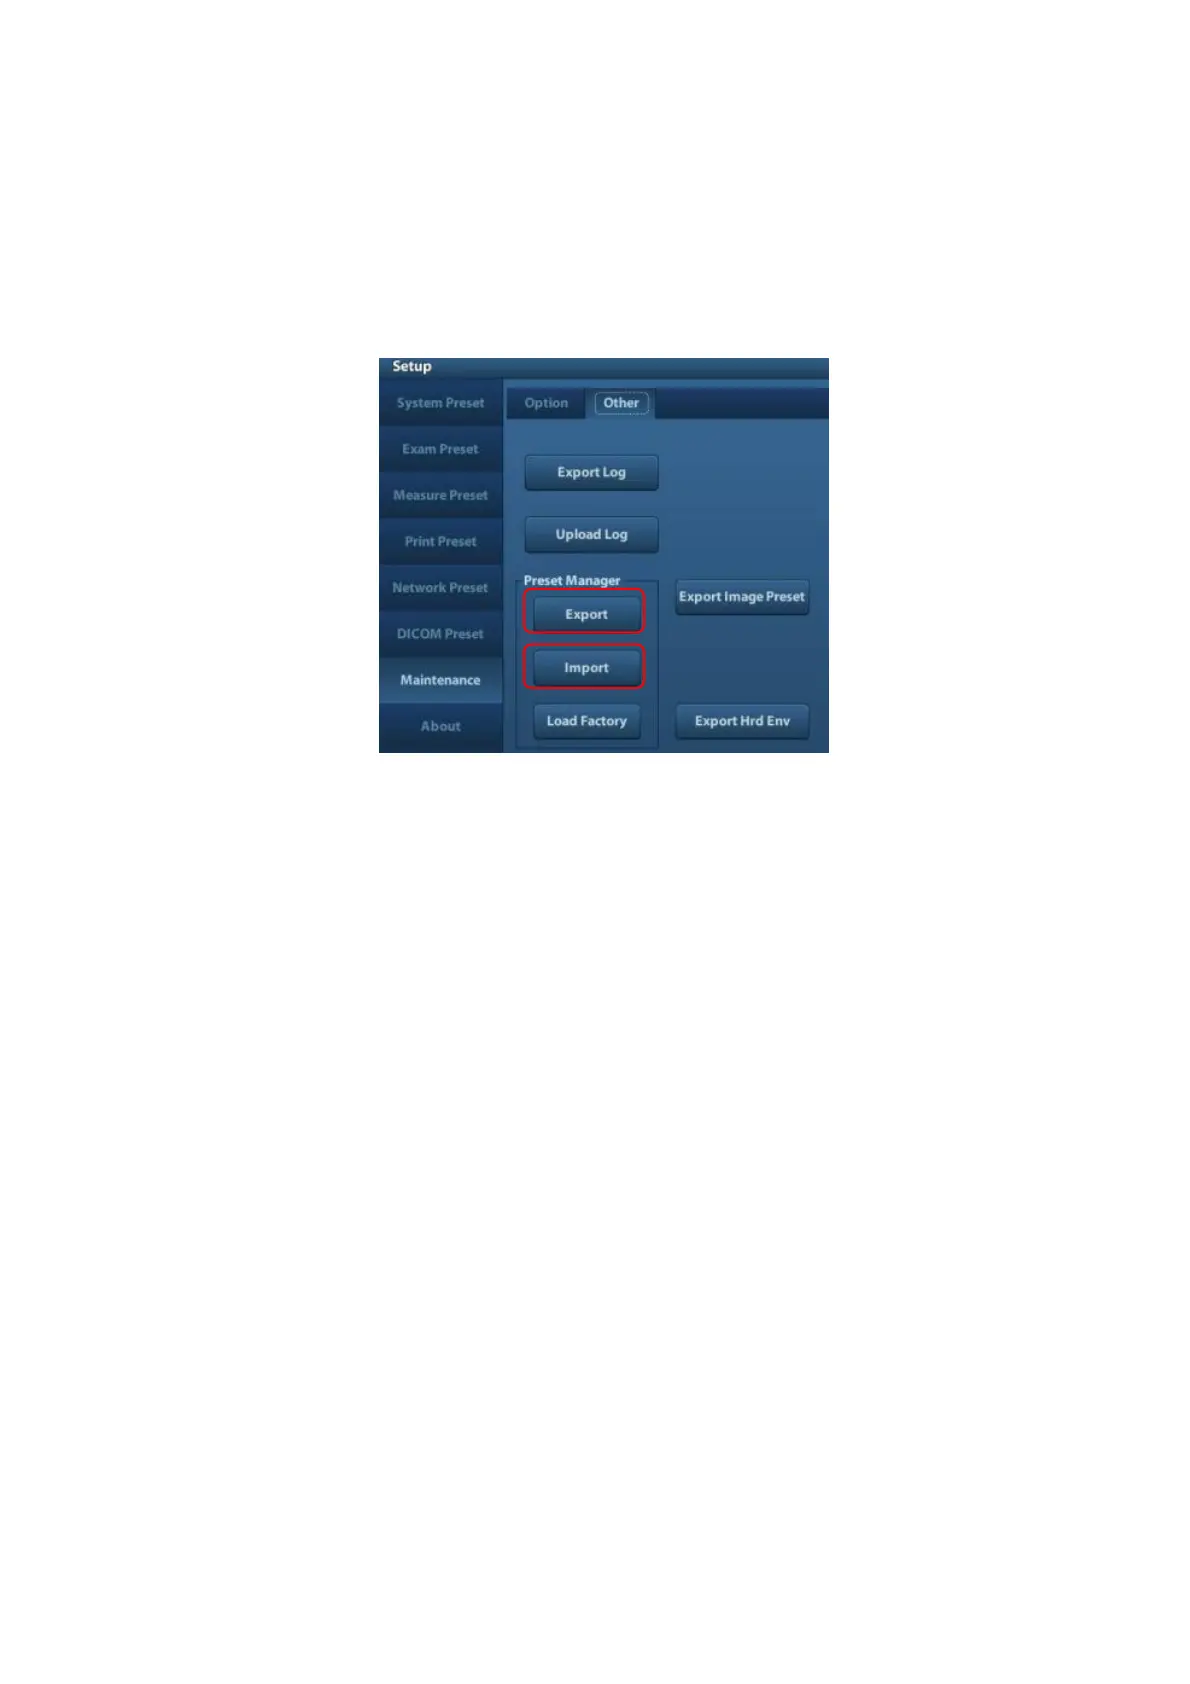
Press <Setup> to open the Setup menu, click [Other] to open the Manage Setting interface. System
preset can be performed here. Image parameters can be exported, imported or restored to factory.
6.4.1.1 Back up the Preset Data
1. On Manage Settings page, Click [Export] to open the [Export Data] dialogue box.
2. Select the path to save data.
3. Click [OK], a progress bar will appear and the preset data of the selected items will be exported
to the specified path.
6.4.1.2 Restore the Preset Data
1. On Manage Settings page, Click [Import] to open the [Import Data] dialogue box.
2. Select the path of the preset data.
3. Click [OK], a progress bar will appear and the preset data will be imported to the specified path.
Note: If selecting [Load factory],it will restore the system to the factory setting, but the
[Region],[Admin] , [Network Preset] and [DICOM Preset] cannot be restored.
6.4.2 Patient Data Backup and Restore
6.4.2.1 Patient Data Backup
1. Press [iStation] on the control panel to open the iStation dialogue box.
2. Click [Select All] to select all the data or select the target data one by one.
3. Select the data, click [Backup] to pop up the Backup patient Record dialogue box, select the
target storage device (recorder or USB disk), click [Backup], the data will be backed up.
6.4.2.2 Restore Patient Data
1. Press [iStation] on the control panel to open the iStation dialogue box;

 Loading...