11 - 23
11. OPTIONS AND PERIPHERAL EQUIPMENT
(4) Connection of the regenerative option
POINT
When using a regenerative option, remove the built-in regenerative resistor
and its wirings from the servo amplifier.
For the sizes of wires used for wiring, refer to section 11.5.
Avoid installing and removing the built-in regenerative resistor frequently, as
much as possible.
When reinstalling the removed built-in regenerative resistor, check if there is
no damage on the lead of the built-in regenerative resistor.
The regenerative option causes a temperature rise of 100
relative to the ambient temperature. Fully
examine heat dissipation, installation position and used wires, etc. before installing the option. For wiring,
use flame-resistant wire and keep them clear of the regenerative option body. Always use twisted cables of
max. 5m length for connection with the servo amplifier.
When using a regenerative option for MR-JN-20A(1)
MR-JN-40A, disconnect the wiring to P and C,
remove the built-in regenerative resistor from the servo amplifier, and then connect the regenerative option
to P and C. G3 and G4 are thermal sensor output terminals. G3-G4 is disconnected when the regenerative
option overheats abnormally.
P
C
G4
G3
C
P
Regenerative option
5m or less
Servo amplifier
(Note 2)
Always remove wiring (across P-C) of servo
amplifier built-in regenerative resistor.
(Note 1)
Note 1. A built-in regenerative resistor is not provided for the MR-JN-10A(1).
2. Make up a sequence which will switch off the magnetic contactor (MC) when abnormal heating occurs.
G3-G4 contact specifications
Maximum voltage: 120V AC/DC
Maximum current: 0.5A/4.8VDC
Maximum capacity: 2.4VA
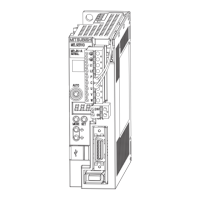
Remove the built-in regenerative resistor in the procedures of 1) to 3), referring to the following diagram.
1) Disconnect the wires of the built-in regenerative resistor from the main circuit power supply connector
(CNP1). (Refer to (3) in section 3.3.3)
2) Remove the wires of the built-in regenerative resistor from the servo amplifier, starting from the
closest to the main circuit power supply connector (CNP1). At this time, be careful so as not to break
the wires.
 Loading...


