117
WT07627X03
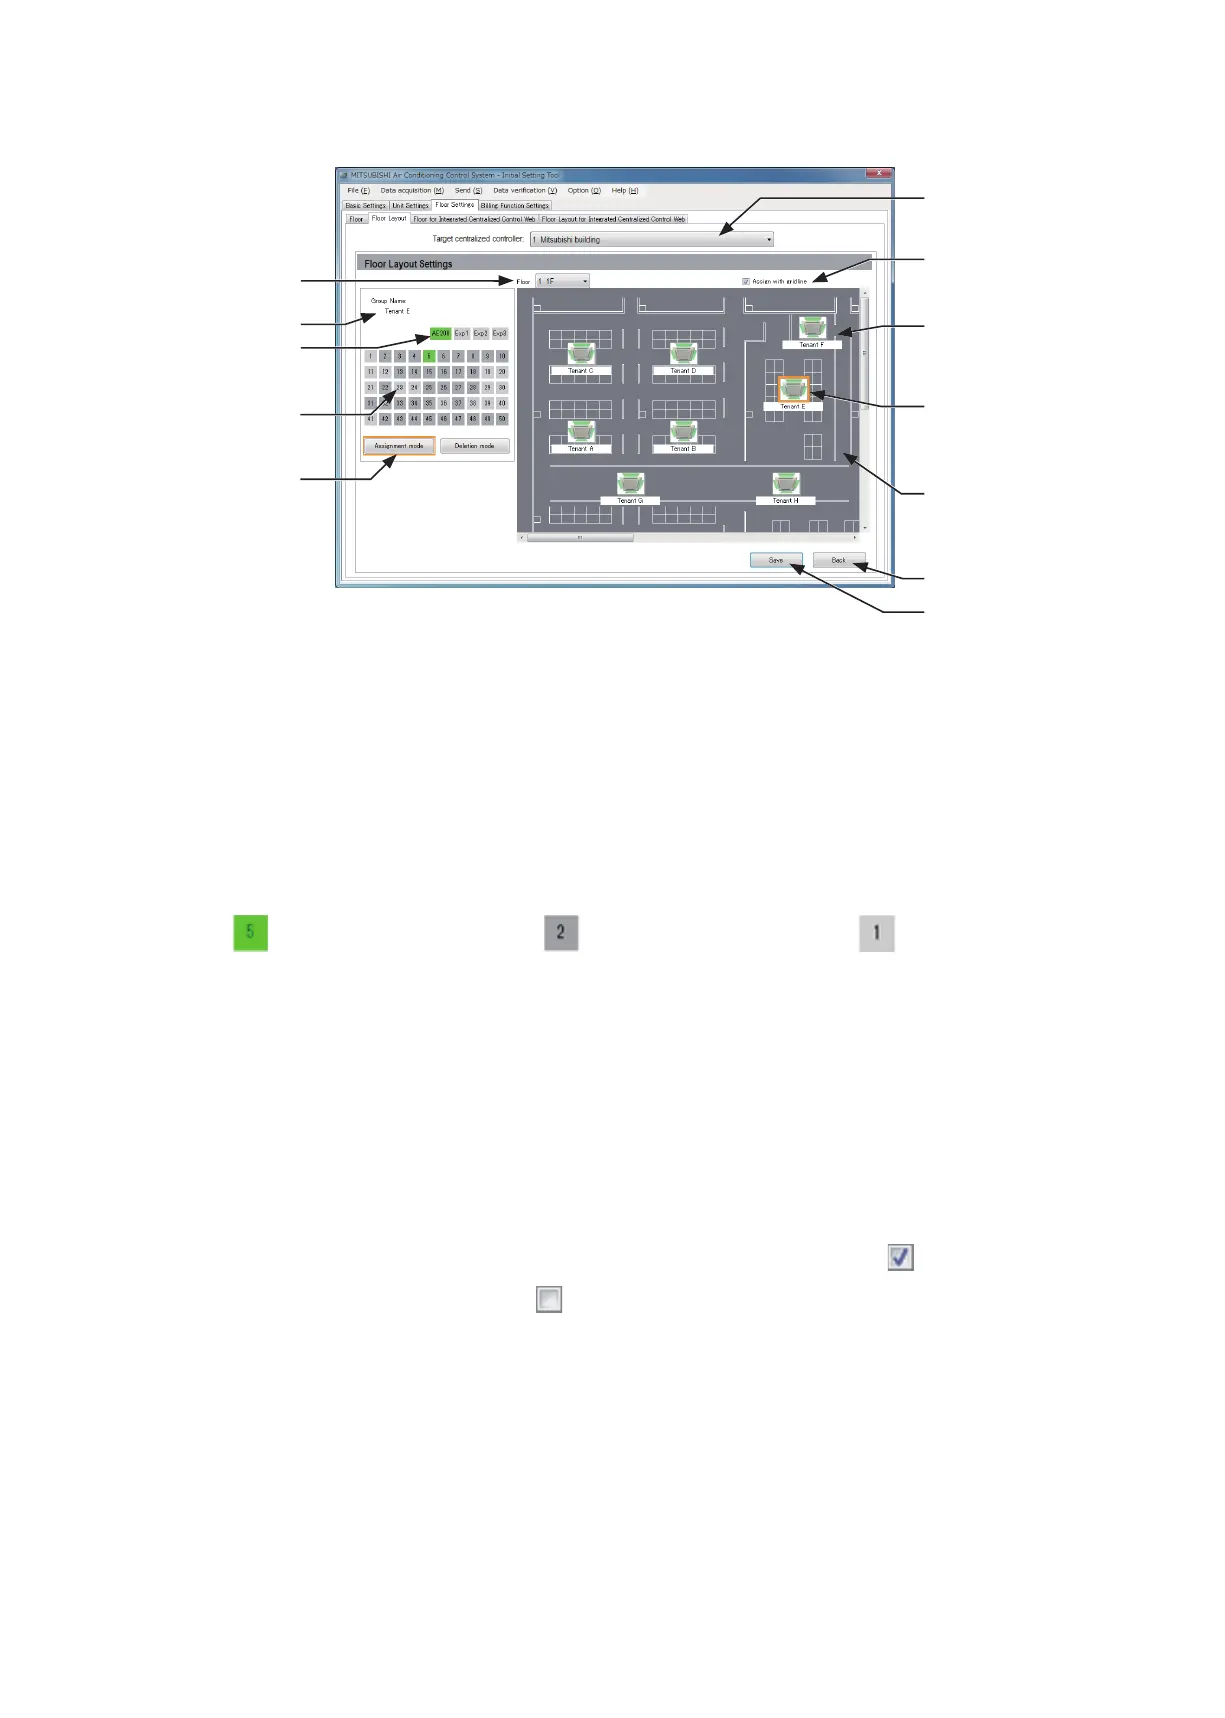
6-5-2. Floor Layout settings for LCD
Click [Floor Settings] > [Floor Layout] to access the LCD’s floor layout settings screen.
[1] Assigning groups
(1) Click [Assignment mode].
(2) Select a target centralized controller.
(3) In [Floor switching], select a floor to set the layout.
(4) Switch between display areas by scrolling up/down, and left/right.
(5) Select the controller managing the group to assign. (EW-50 cannot be selected.)
(6) Select the group number to assign.
Note: (green) indicates a selected group, (dark gray) an assigned group, and (light gray) a selectable group.
Note: Groups of air conditioners, Air To Water (PWFY) units, LOSSNAY units, and general equipment can be assigned to the
floor layout.
(7) Click on the floor plan image to assign the group.
Note: If assigning group icons overlappedly, groups having higher group number are placed above.
(8) Click [Save] to save the changes.
[2] Moving groups within areas
(1) Click [Assignment mode].
(2) Click the group icon you wish to move within the display area, and this will become selected (with orange
frame).
Note: Before clicking the group icon, placing a check mark in “Assign with gridline” to select ( ) will allow assignment of
the group icons at a set interval.
Additionally, removing this check mark (
) will allow fine assignment of group icons.
(3) Click again in the location to move to in order to confirm the group icon positions.
(4) Click [Save] to save the changes.
[3] Deleting groups
(1) Click [Deletion mode].
(2) Click the assigned group icon, and this will return to the selectable group.
(3) Click [Save] to save the changes.
Note: Up to 30 groups can be assigned to each area. If the layout is 2 (height) × 3 (width), up to a maximum of 180 groups
can be assigned on each floor.
Note: Groups that have not been assigned to any area will appear in “Unassigned groups” on the LCD.
Floor switching
Groups to be assigned
Target centralized
controller
Assign with gridline
Assigned group
Selected group
Floor plan image
Back
Save
Group name
Centralized controller
switching
Assignment mode/
Deletion mode
 Loading...