115
WT07627X03
6-5. Floor Settings
6-5-1. Floor settings for LCD
The floor layout on the floor display under the [Monitor/Operation] menu on the LCD can be set and changed, and
the display position of the group icons on the floor can be changed.
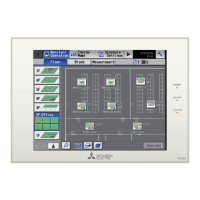
(1) Click [Floor Settings] > [Floor] to access the LCD’s floor settings screen.
(2) In [Target centralized controller], select a target centralized controller.
The floor level settings for the selected centralized controller will appear.
Note: The target centralized controller No. is the number shown in 6-3-1 “System Configuration settings”. The controller name
is the name registered in unit settings in Basic System settings.
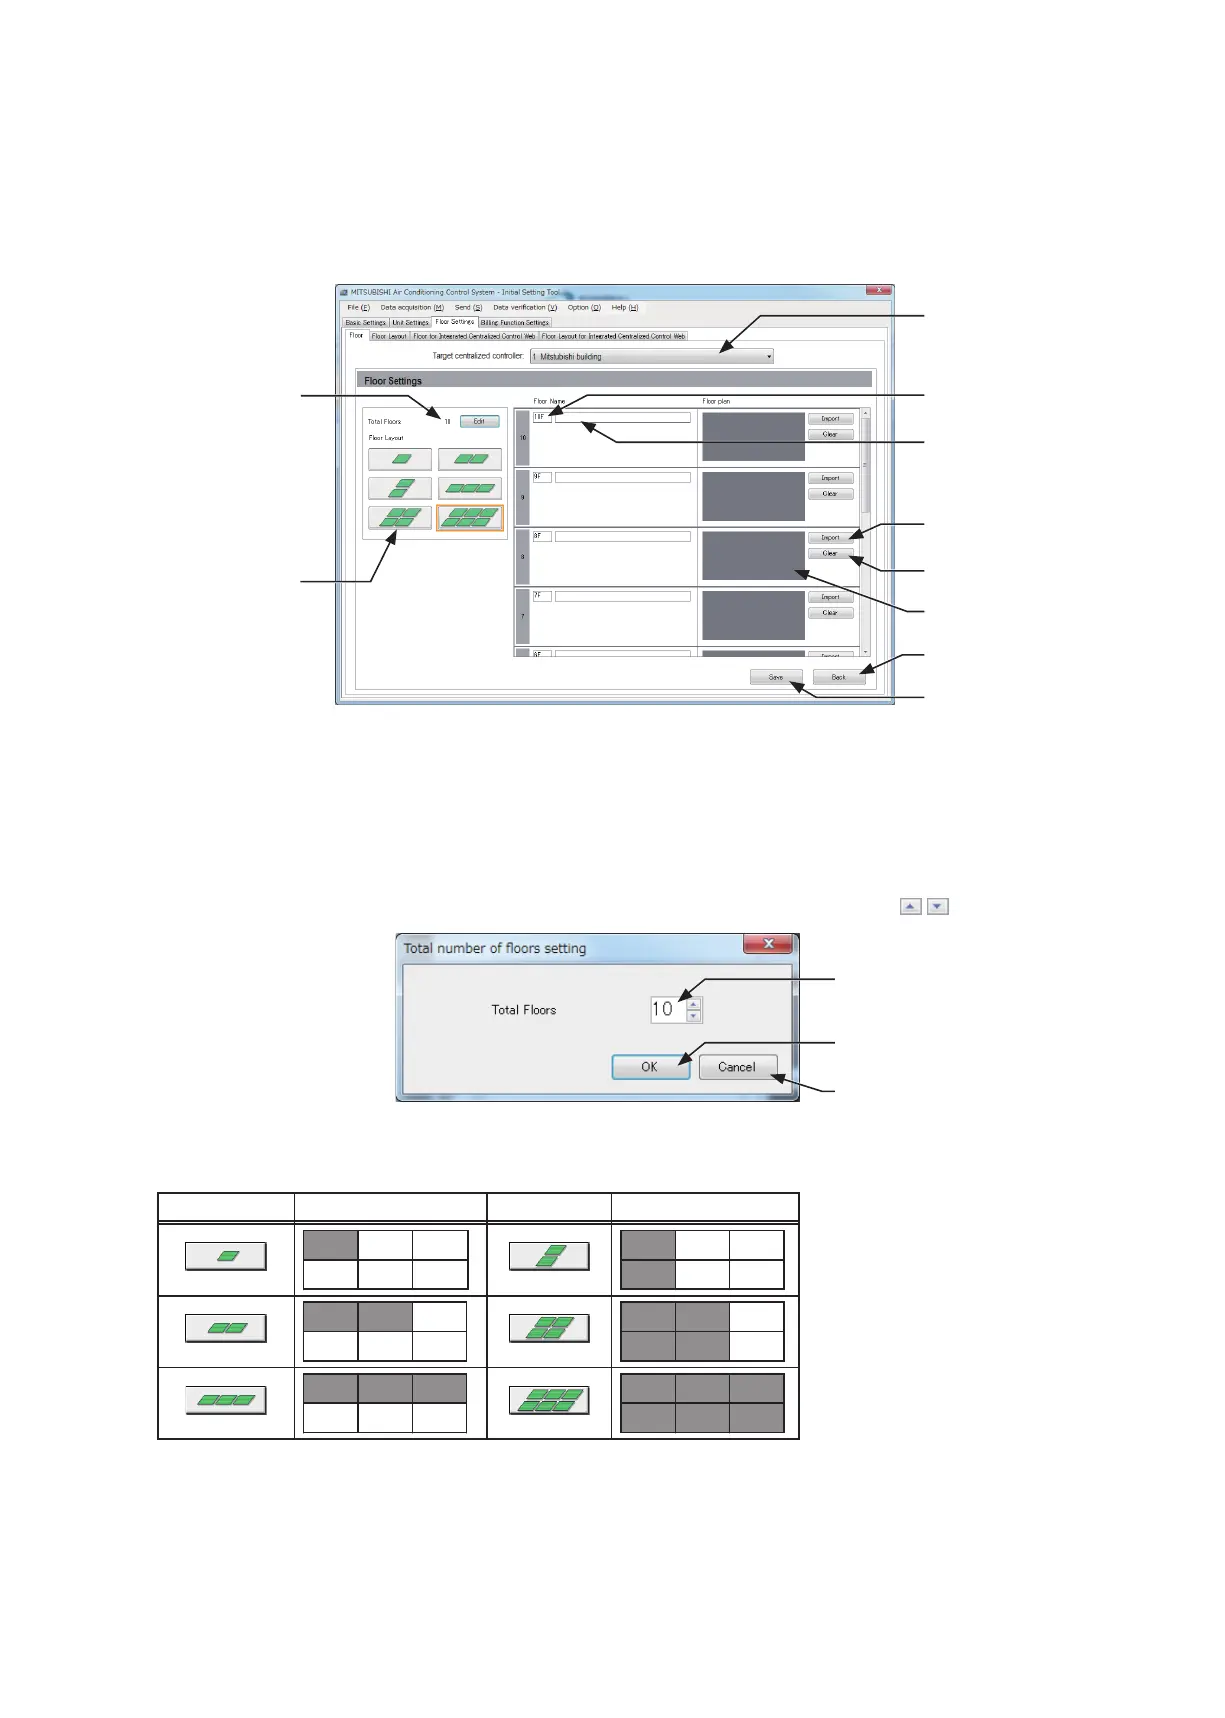
(3) Click [Edit] in [Total Floors] to display the “Total number of floors setting” screen.
(4) Set the total number of floors by entering the number on the keyboard or by clicking
buttons.
Note: If the total number of floors is set to “0,” all groups will appear as unassigned groups.
Note: Up to ten floors can be registerted.
The display range of the area on the Floor Layout screen vary, depending on the selected floor layout.
Floor layout Display area Floor layout Display area
(5) In [Floor Layout], select the floor layout to be used.
(6) In [Floor level name], enter the floor level name in 3 alphanumeric or symbol characters or less.
(7) In [Floor name], enter the floor name in 20 alphanumeric or symbol characters or less.
(8) To read a floor plan file, click [Import] and select a file. Refer to the table below for the restrictions on the floor
plan files to be imported. Click [Clear] to delete the imported floor plan file.
Total Floors
Floor Layout
Target centralized
controller
Floor level name
Floor name
Import floor plan
Clear floor plan
Floor plan image
Back
Save
Total number of floors
OK
Cancel
 Loading...