36
WT07627X03
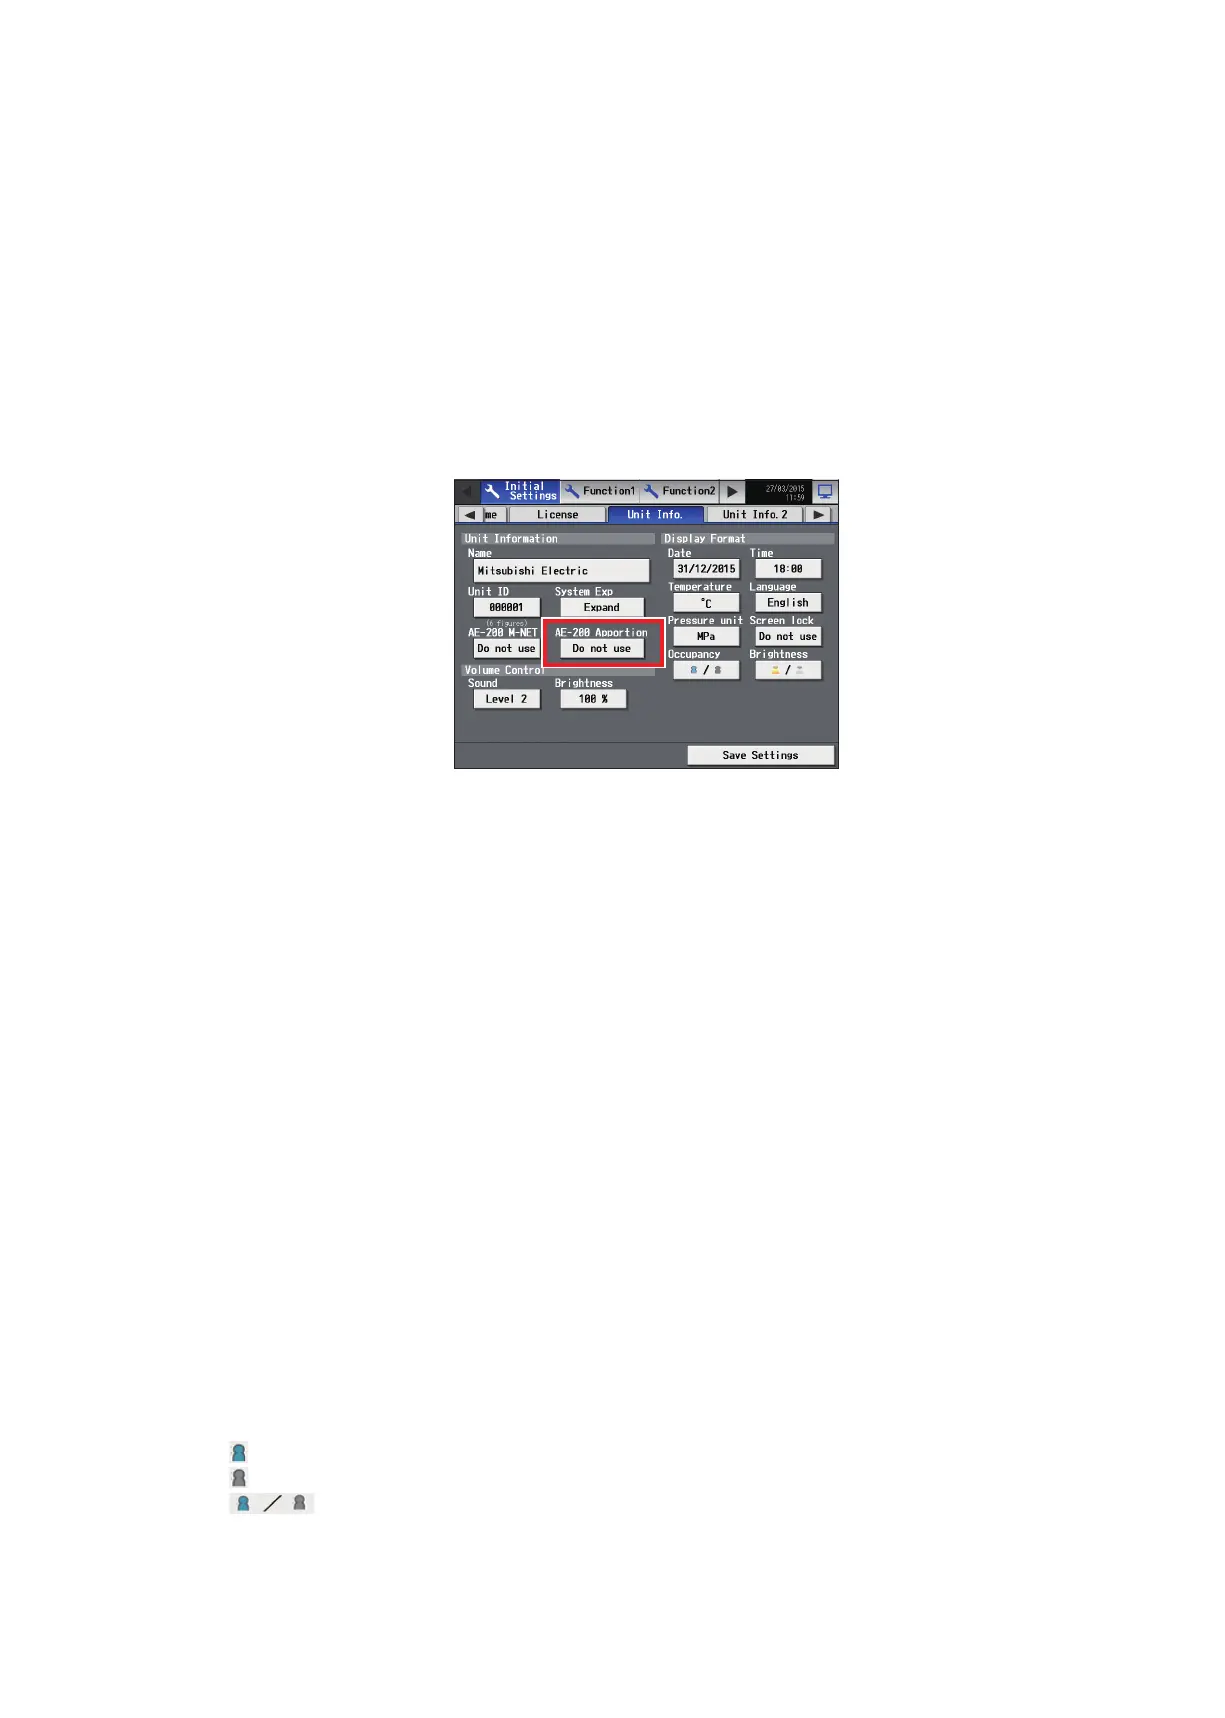
(2) Touch the [Unit ID] button to display the keyboard. Enter the unit ID in 6 figures. Use this setting to manage
the multiple unit IDs. The unit ID entered here will be used on the screen of the software that controls multiple
AE-200 units and will also be used as a sender ID in the error notification e-mail and e-mail alarm.
(3) When connecting one or more AE-50/EW-50 controllers, set the [System Exp] setting to [Expand].
Note: The [System Exp] section does not appear on this screen on the AE-50.
Note: When the [System Exp] setting is set to [Expand], make sure to make network settings for the AE-50/EW-50 controllers
on the [Network] screen. (Refer to section 5-1-5 “Network” for details.)
Set the EW-50’s IP address on the Web Browser for Initial Settings. (Refer to section 4-3-1 “Setting IP addresses of
AE-50/EW-50” for details.)
(4) When using an AE-200 apportioned electricity billing function or when not using an AE-200 M-NET, set the
[AE-200 M-NET] setting to [Do not use].
Note: When [Do not use] is selected, up to four AE-50/EW-50 controllers can be connected.
Note: The [AE-200 M-NET] section does not appear on this screen on the AE-50.
Note: The [AE-200 Apportion] section appears when “Charge” license is registered. To use an electricity charge apportioning
function of TG-2000A, set the [AE-200 Apportion] setting to [Do not use].
[2] Sound and brightness
(1) In the [Sound] section, select the volume (Level 0–3) of the buzzer that sounds when the screen is touched.
(Level 0: No sound)
Note: Although the change will be reflected right away, it will not be saved until [Save Settings] is touched.
(2) In the [Brightness] section, select the brightness (70%, 80%, 90%, 100%) of the screen. (The greater the
value, the brighter the brightness.)
Note: Although the change will be reflected right away, it will not be saved until [Save Settings] is touched.
[3] Display Format
(1) In the [Date] section, select the desired display format for year, month, and date.
(2) In the [Time] section, select the desired display of time format.
(3) In the [Temperature] section, select the desired temperature unit [ºC] or [ºF].
(4) In the [Language] section, select the desired display language.
(5) In the [Pressure unit] section, select [MPa], [PSI], or [kgf/cm
2
].
(6) In the [Screen lock] section, select [Use] or [Do not use]. Select [Use] to activate the screen lock function. (Refer
to section 5-1-2 “Locking the screen” for details.)
(7) In the [Occupancy] section, make the Show/Hide setting for the occupancy/vacancy status that is detected
by the built-in occupancy sensor on the ME remote controller (North America: PAR-U01MEDU, Europe: PAR-
U02MEDA).
Select [Hide] not to display the occupancy/vacancy status on the [Floor] or [Block] display.
Select [
] (blue) to display the occupancy icon when the sensor on the remote controller detects occupancy.
Select [
] (gray) to display the vacancy icon when the sensor on the remote controller detects vacancy.
Select [
] (blue/gray) to display the occupancy or vacancy icon according to the occupancy status of
the room.
Note: If the ME remote controller has no built-in occupancy sensor, the occupancy/vacancy icons will not be displayed on the
[Floor] or [Block] display.
 Loading...