MI
76
Innovation. Quality. Performance. Best in Industry. Worldwide.
Set Camera Scale
The Set Camera Scale function is used to calibrate the camera scale. The operator specifies a distance to which the
machine will move, take a picture, move back, take a picture, calculate the scale, and save the camera scale. The
camera scale can be set at the initial setup and then will default to 1000. Operators should repeat the Set the
Camera Scale process
only if the diameter of the fiducial changes between job files (e.g., 0.25 to 0.375
[6.35mm to 9.53mm]).
1 Press Jog Arrows
to reach a fiducial.
2. Press Menu to access the menu system.
3. Press X-axis Jog Arrows until Vision is highlighted in blue.
4. Press Enter to access the Vision sub-menu.
5. Press X-axis Jog Arrows until Set Camera Scale is highlighted in blue.
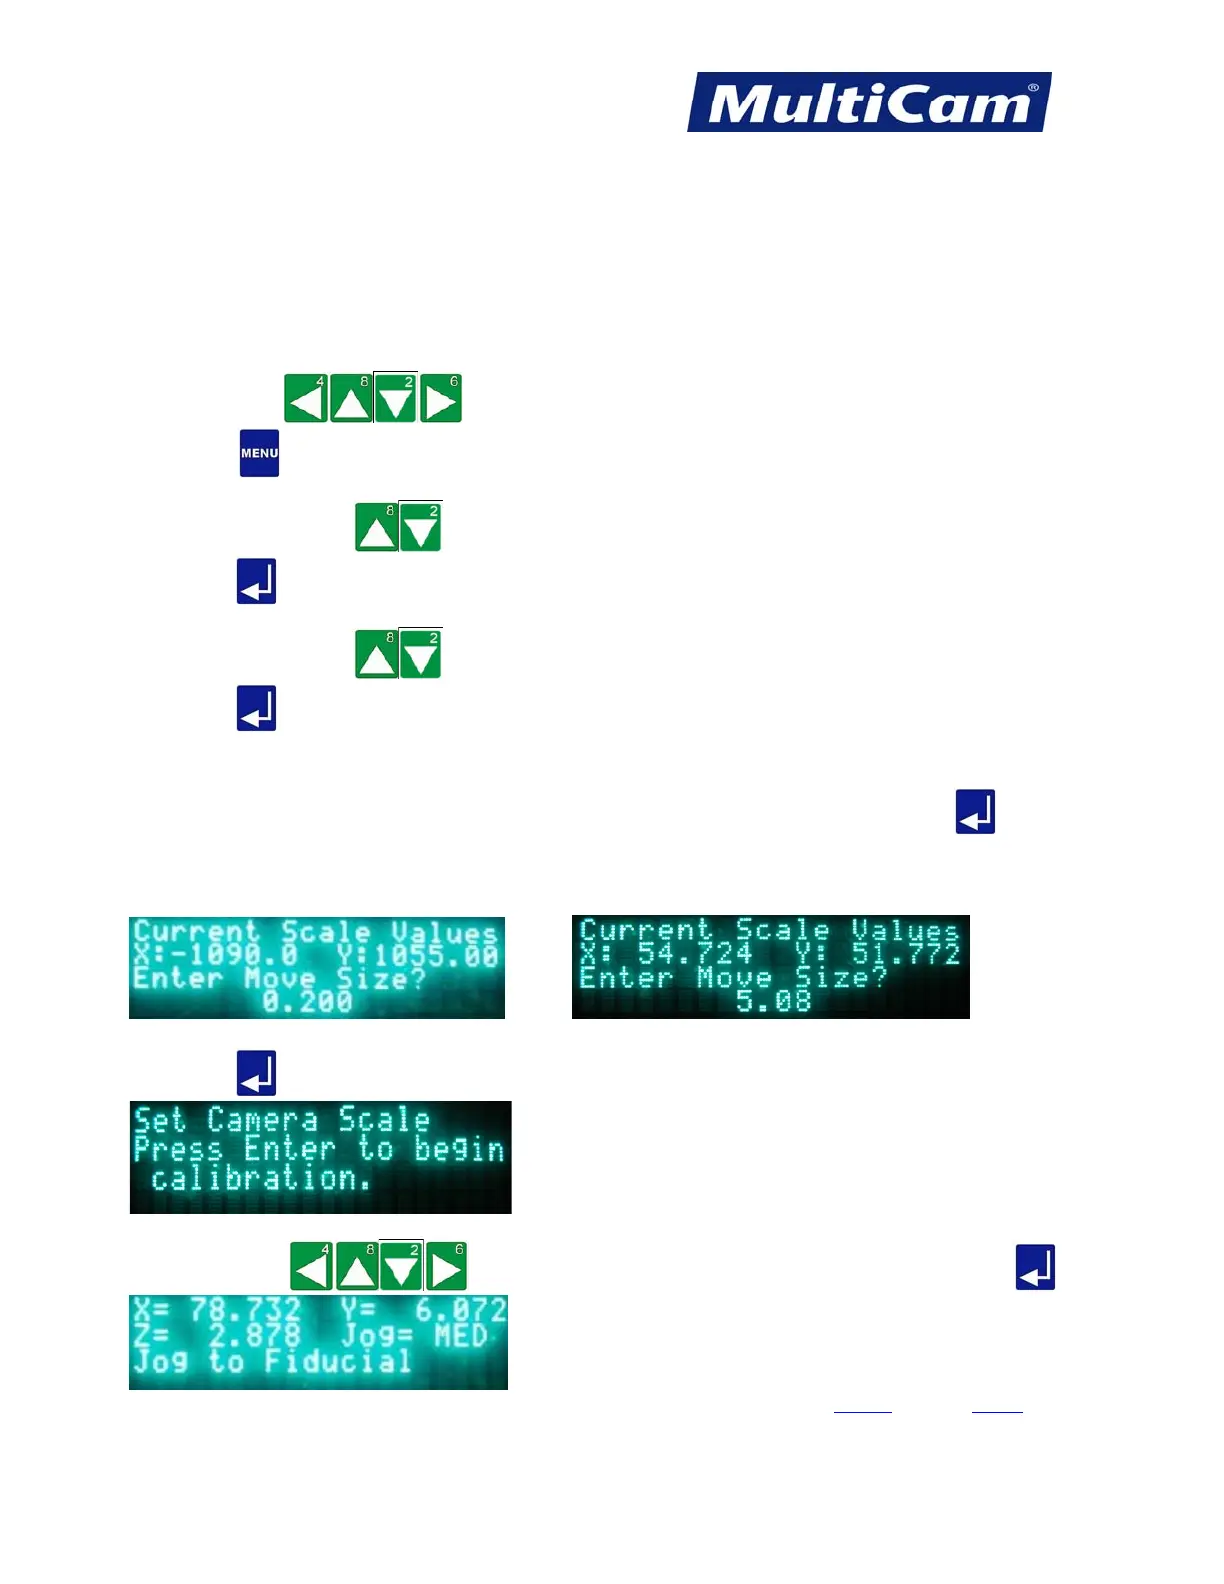
6. Press Enter to access the Set Camera Scale function. The keypad display will prompt the operator for
a move size. The operator specifies a distance to which the machine will move, take a picture, move back,
take a picture, calculate the scale, and save the camera scale.
7. Enter 0.2 for 1” FOV lens (5.08 for 6.35 mm) for a standard Ethernet camera and press Enter . The
camera will complete a series of 0.2” (5.08 mm) moves off the fiducial point as the camera checks for
pixels per inch (mm). The scale will be based on these readings. A typical scale value will be 1000 ± 100
for a 1” (25.4mm) FOV.
or
8. Press Enter
at the prompt to begin calibration.
9. Press Jog Arrows
to reach the fiducial on the material to be cut and press Enter .
Vision
Menu
Routers * Lasers * Plasma * WaterJets * Knife Cutters
www.MultiCam.com v. 11 10