4 Applications
80 Pulse Laser Station NPL-302 Series Instruction Manual
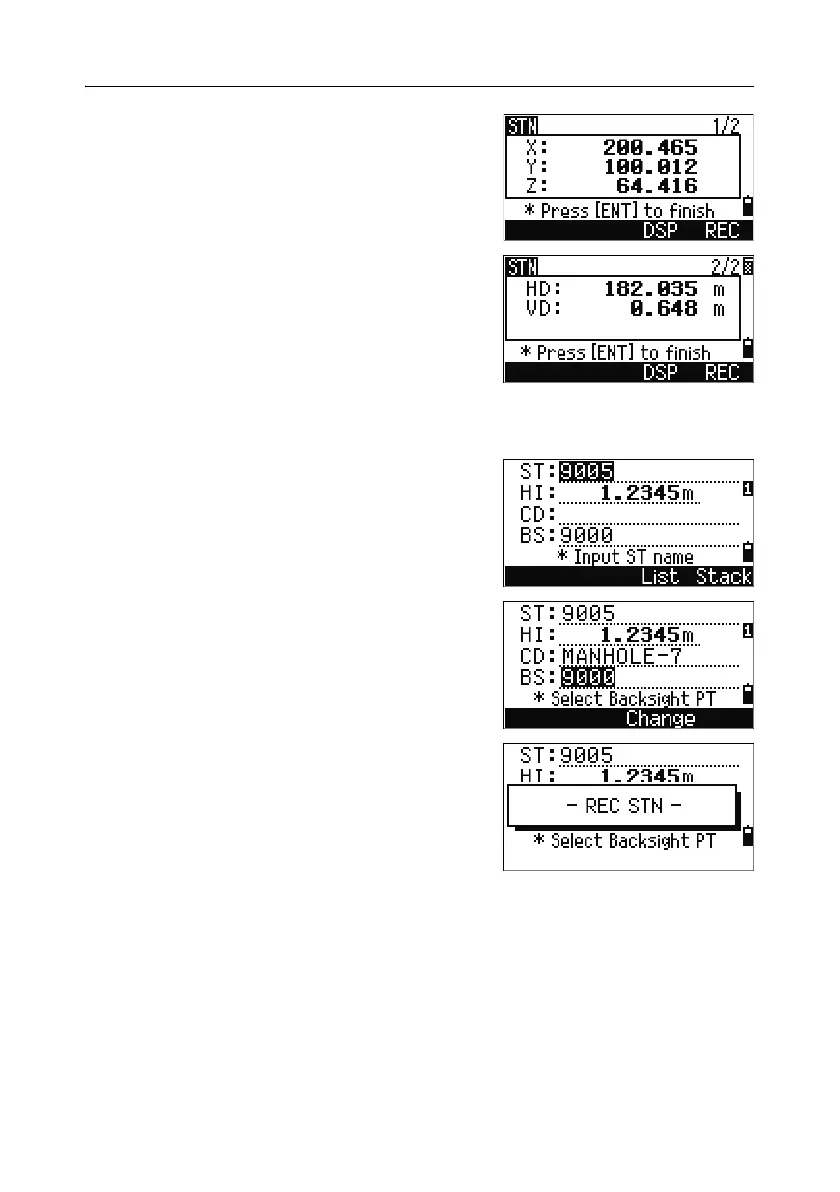
After the measurement to P2 is completed, the
coordinates of the station are calculated.
6. To record the station, press [ENT] or the REC
softkey.
7. To check your measurement, press the DSP
softkey. If you defined the line by entering its
azimuth, HD and VD between P1 and P2 are
displayed.
If you defined the line by entering the P2
coordinates, the difference of HD (dHD) and
VD (dZ) between your measurement data and
input coordinate data are displayed.
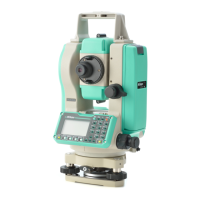
8. Enter the station name, the height of
instrument (HI), and a feature code (CD) if
required. The station name defaults to the last
recorded PT + 1, or last recorded ST + 1,
depending on the Split ST setting.
9. Backsight (BS) defaults to the first point (P1).
To change it, highlight the BS field and then
press the
Change softkey.
10. To finish the setup and record the station, press
[ENT] in the BS field.
Sample records
CO, Temperature:20C Pressure:1013hPa Prism:0 …
ST,9005, ,265, ,1.2350,150.40300,150.40300
F1,265,1.6040,79.0010,90.30150,89.35260,
F1,200,1.4590,50.2300,269.4035,93.50110,
CO, P1-P2 HD=122.0350 VD=0.5600