2 Preparation
24 Pulse Laser Station NPL-302 Series Instruction Manual
Note – The prism constant of a Nikon prism is always 0.
B
Tip – When using a prism at a short distance, set the prism at a slight angle to
the sighting axis, rather than completely square.
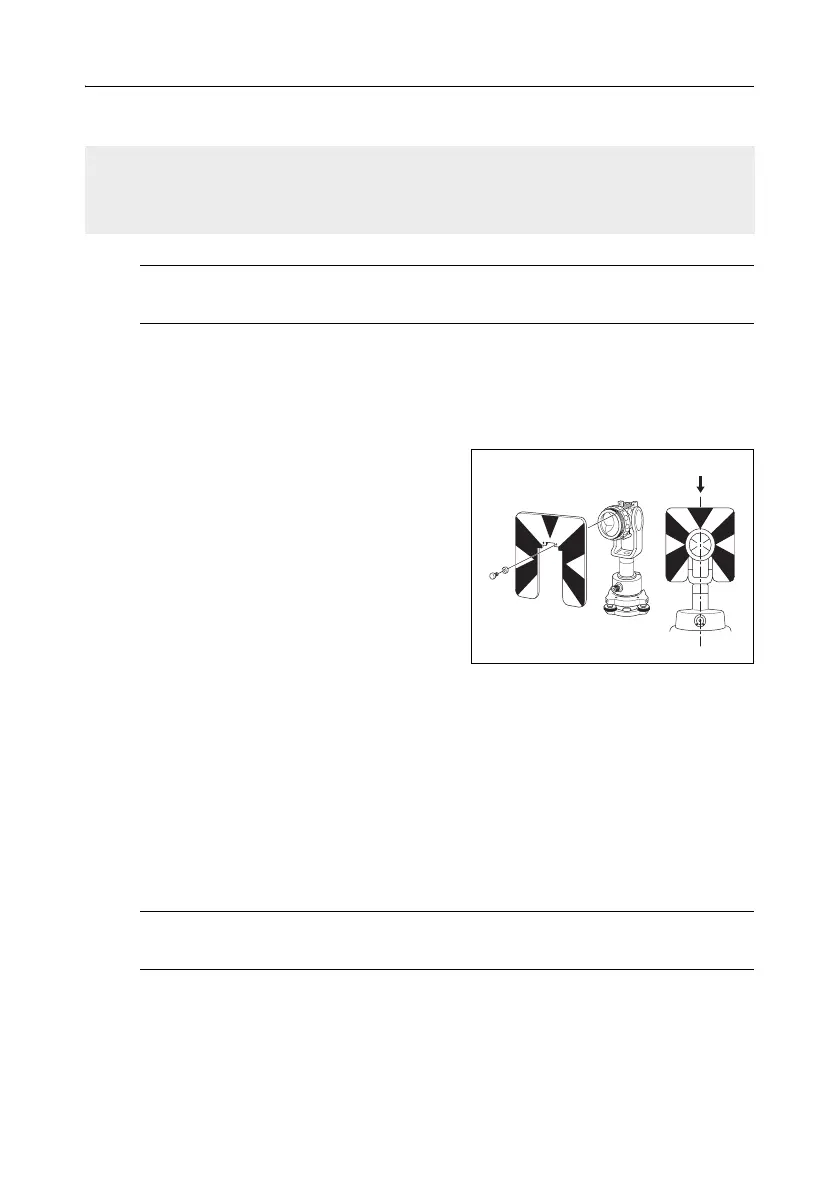
Setting the position of the target plate 20.1
Make sure that the target plate is aligned with the tribrach adapter and the prism.
To set the position of the target plate:
1. Use the two set screws supplied to attach
the target plate to the single prism holder.
2. Move the target plate within the screw
holes until the apex of the wedge pattern is
aligned with the vertical axis of the prism
and the tribrach adapter.
Face-1/Face-2 Measurements 2.1
You can take a measurement from either face of the instrument. To change the face,
rotate the instrument 180° on its base, and rotate the telescope 180° within the
standard.
By averaging the Face-1 and Face-2 measurement values, you can cancel out most
constant mechanical errors. Some errors, such as vertical axis error, cannot be
cancelled out by averaging Face-1 and Face-2 measurements.
C
Caution – When rotating the telescope, take care not to catch your finger in
the gap between the instrument’s standard and the telescope.
If your prism constant is not 0mm, then directly enter the prism constant value
in the Const field. For example, if your prism constant is 30mm, enter 30mm in the
Const field on the instrument.
Center on axis