Page 5-12
To the next page
1E4C-E-OMA05-A01-02
1D3C-044P
1D3C-046P
1D3C-047P
1D3C-045P
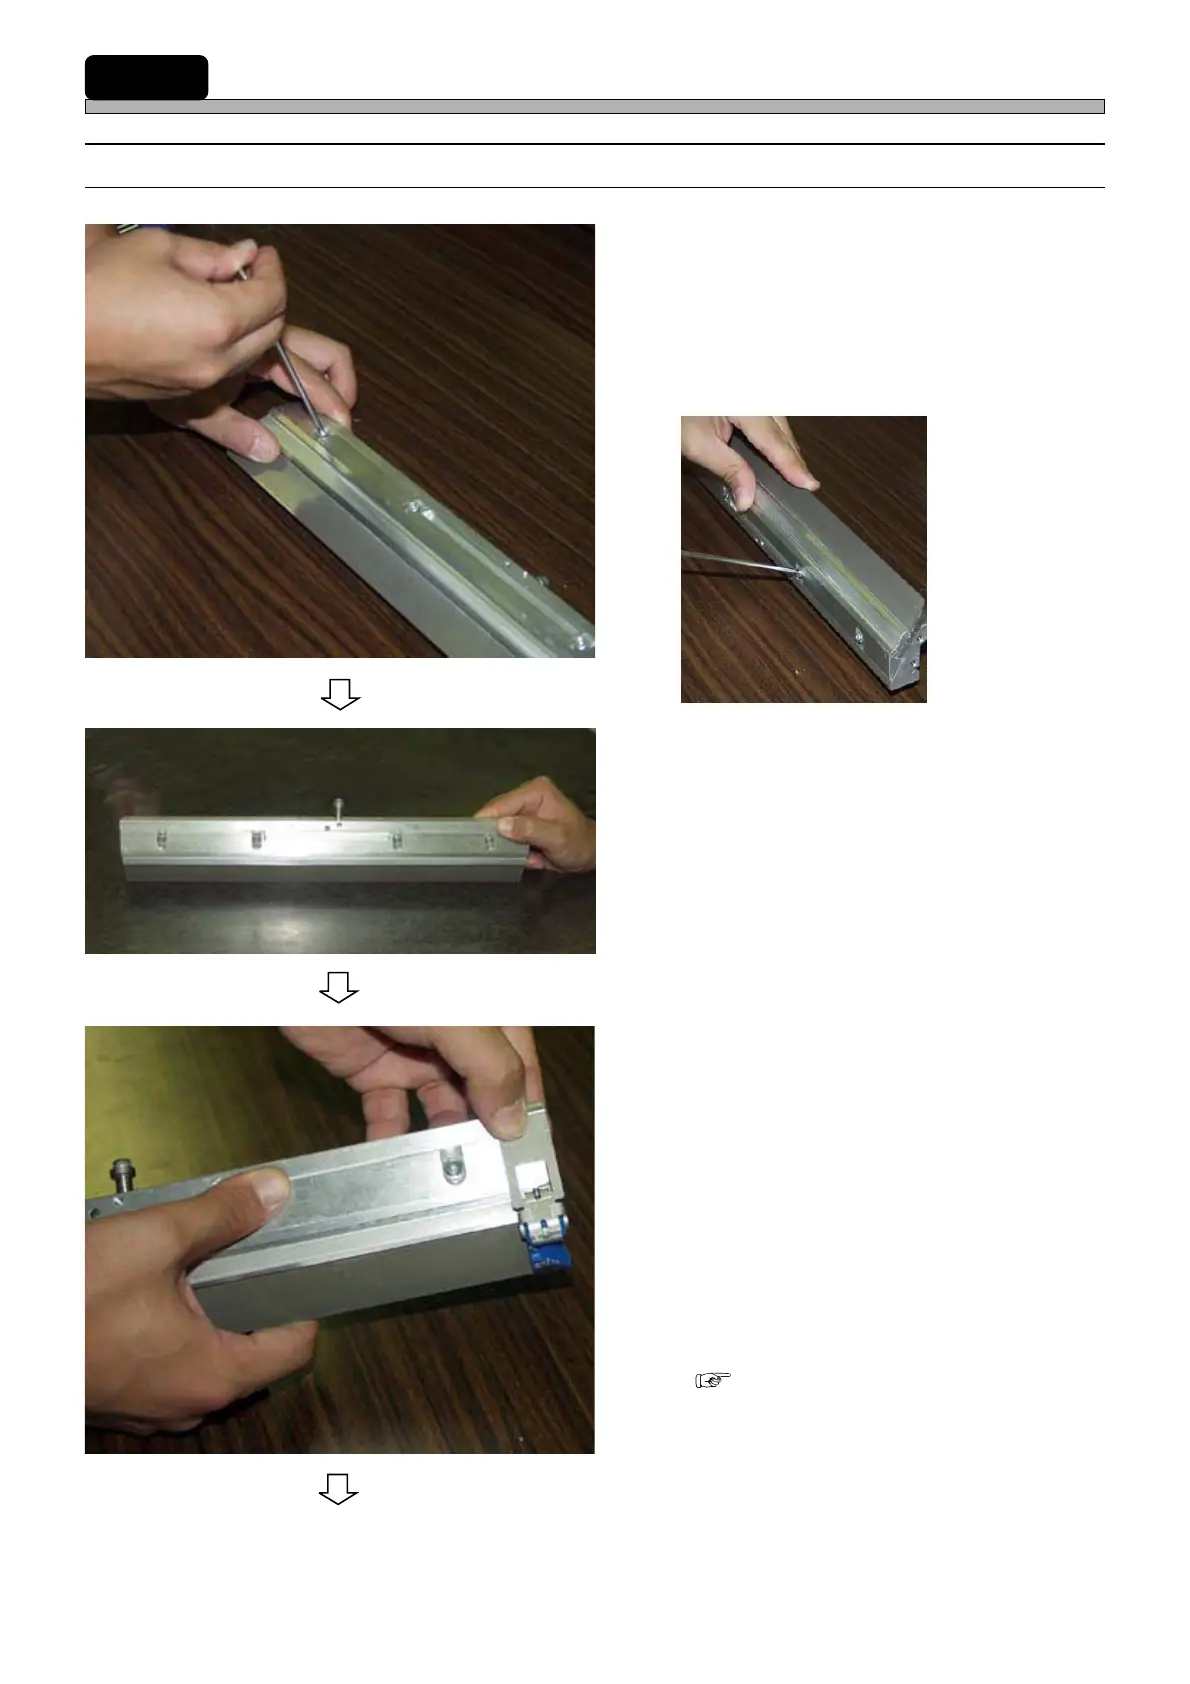
5-3-1 Assembling Squeegees
1. Loosen the M4 bolts of the squeegee
holder, and attach the squeegee.
∗ Positioning will be easy when you press the
squeegee, plate, and pressing plate against
edge with the squeegee holder turned upside
down.
2. By bringing the squeegee into contact
with something flat like a surface
plate or support blocks, ensure that
no clearance between them.
3. While slightly pressing down the
spring of the block with your finger,
insert the pin on the end into the
groove of the bracket.
• Block (for 60º)
: This is used for the attack angle of 60º.
(Standard)
• Block (for 55º)
: This is used for the attack angle of 55º.
∗ Both F and R must have the same attack
angle.
∗ Attack angle adjustment procedure.
( 5-2 How to Change Squeegees and
Adjust the Angle)
∗ In the attack angle of 60º, enough solder may
not be filled in large apertures owing to its
properties. In this case, the attack angle of 55º
is recommended.
5-3
Procedures for Using Advanced Squeegees (Option)