Service Manual 2 Knife Drive
2.2 Clutch-and-brake assembly
1/09 PERFECTA 115 / 132 / 168 / 225 – TS 11
PERFECTA Schneidemaschinenwerk GmbH D-02625 Bautzen Schäfferstr. 44 Tel.: +49-3591-556-131 to -133 Fax: +49 3591-556-139
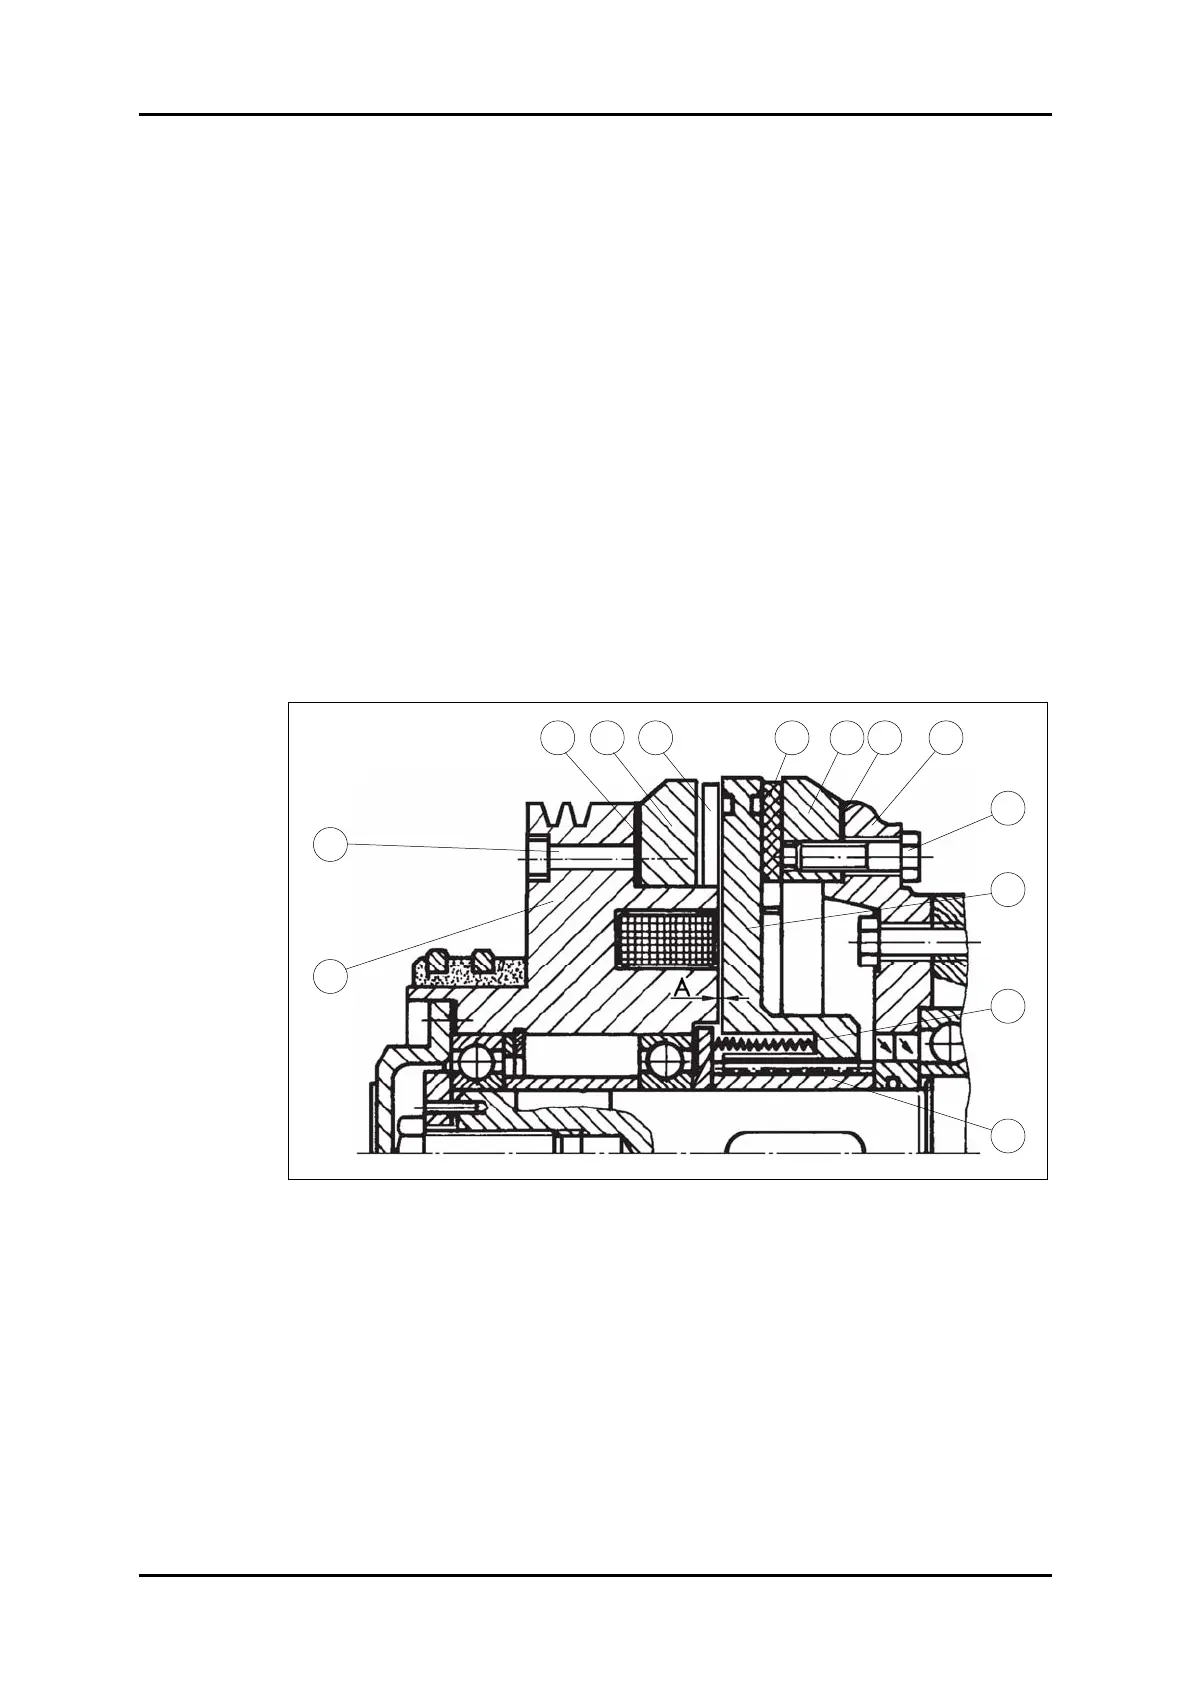
2.2.2 Checking and setting the air gap
Under normal working conditions, you should check the air gap once per year.
Air gap A is defined in Table 1.
• Engaged state (clutch is "ON")
If air gap A min is smaller than indicated in Table 1 place shims 10 of equal thick-
ness between coil body 7 and friction ring 8 on 76 and 92 cm size machines
(Figure 4), or between friction ring 8 and spacer segment 9 (Figure 3) on machines
with 115/132/168/225 cm cuts. To do so, turn off the clutch, slacken screws 11
around the circumference put in the shims and re-tighten the screws.
The shims available are of different thickness. Please refer to the Spare Parts
Catalogue in the Operating Manual. After you have put in the shims make sure
that air gap A max specified in the table is not exceeded (if so, use thinner shims)
and A min in the braked state (clutch is "OFF") is not undercut.
• Braked state (clutch is "OFF"):
If air gap A max is wider than specified in the table put shims 12 of the same thickness
between brake ring 6 and gearbox cover 14. For this purpose, turn on the clutch as
described under "Manual Cranking" in the Operating Manual, slacken screws 13
around the circumference, put in the shims and then re-tighten the screws.
Figure 4: Air gap.
4
6 8 14
5
10
11
7
13
12 1
3
2