Service Manual 8 Hydraulic Clamping System
8.6 Hydraulic clamping system malfunctions
1/09 PERFECTA 115 / 132 / 168 / 225 – TS 55
PERFECTA Schneidemaschinenwerk GmbH D-02625 Bautzen Schäfferstr. 44 Tel.: +49-3591-556-131 to -133 Fax: +49 3591-556-139
8.6 Hydraulic clamping system malfunctions
If any malfunctions occur in the hydraulic clamping system check the following first:
- Oil level in the tank; top up oil, if necessary.
- Pump drive; re-tension the belt, if necessary.
Potential problems and their remedies:
Problem Remedy
When a cut is released
by the cut pushbuttons,
the clamp comes
down to the pile, with
no cut being triggered.
Releasing the cut
pushbuttons brings
the clamp back to its
topmost position.
- The comparison between the desired and actual values by
the computer and an evaluation through the pressure sen-
sor are not in the specified setpoint window. (Identification:
The green rectangle is not lit after the clamp has come to
rest on the pile.)
⇒ Check: There must be 6.2 V at measuring points 1 and 2
of the proportional amplifier card if P
max.= 100 % and
the cut-release pushbuttons are pressed. Use P2 for
correction.
⇒ At P
max., you must measure a setpoint voltage of about
8 V at terminals 4 and 5. At the power output of termi-
nals 14/15 you must measure ≈ 6 V and a solenoid cur-
rent of about 2 A must be present.
- At P
max., and when the cut is activated, the green rectan-
gular setpoint window is not lit.
⇒ Check pressure sensor B90.
⇒ Measure the pressure sensor output at terminals 1/7 of
the amplifier card. For P
max., you must measure about
5 V at these terminals.
⇒ Use P6 (note: 20 turn pot) to set the desired maximum
actual value, at the same time adjusting the machine-
specific maximum pressure with the aid of a manome-
ter. (Please refer to Table 3.)
- At a given setpoint of 5 % and when the cut is activated,
the green rectangular window is not lit.
⇒ Use P4 to set the desired minimum actual value until
the green rectangular window is lit.
⇒ Check the bridge terminal of the amplifier card at termi-
nals 11/12.
⇒ Check the resistance at terminals 4/5 (430 Ohms).
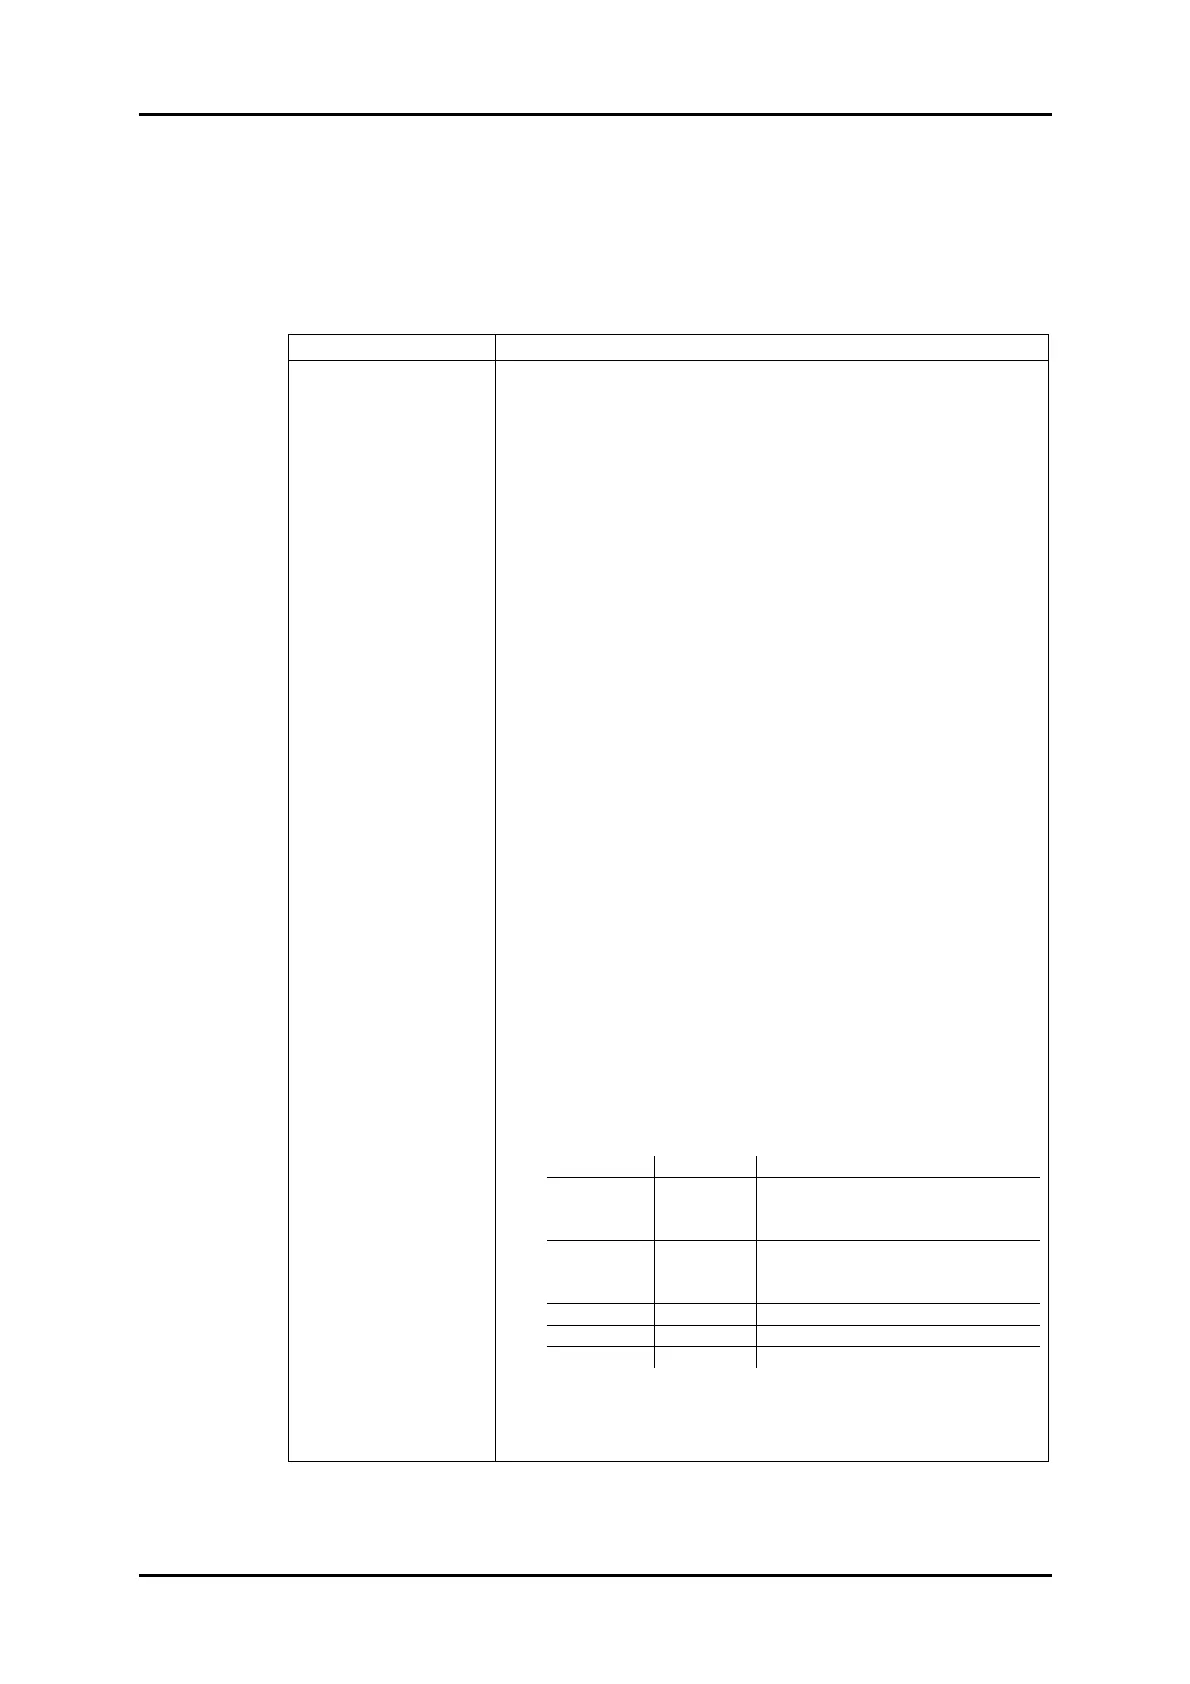
⇒ LEDs:
Green = stabilized reference voltage produced on the card
= supply voltage ON.
Yellow LED Red LED Indicating
ON OFF - Power output and control OK.
- No solenoid connected or ground
fault, but setpoint = 0.
ON ON - Allowed control range exceeded
(I
max > Ipermitted).
- Short-circuit in solenoid connection.
OFF OFF - No solenoid connected.
OFF ON - Ground fault.
OFF ON/OFF - Overtemperature
The electronic system is controlling properly when the
green and yellow LEDs are lit and the red one is OFF, with
the clamp resting on the pile.