33
Polyend Tracker Manual
32
Polyend Tracker Manual
▌ SAVING THE CURRENT PROJECT - FIRST TIME
1. Press [File] to open the le browser menu.
2. Press [Save] - 5
th
screen button from left or Press [Save As] - 6
th
screen
button from left. If using ‘Save’ for the rst time the ‘Save As’ function is
triggered to request a name.
3. The naming function will appear to allow a new name to be created.
The [PAD] buttons will represent the alpha-numeric keyboard. Type in
the name required using the [PAD] buttons.
4. Alternatively, press [Auto Name] - 6
th
screen button from left. This will
generate a random name for the project and present it in the editor.
5. With the desired name created, Press [Save] - 8
th
/ last screen button.
6. The project is saved and the keyboard editor function is closed.
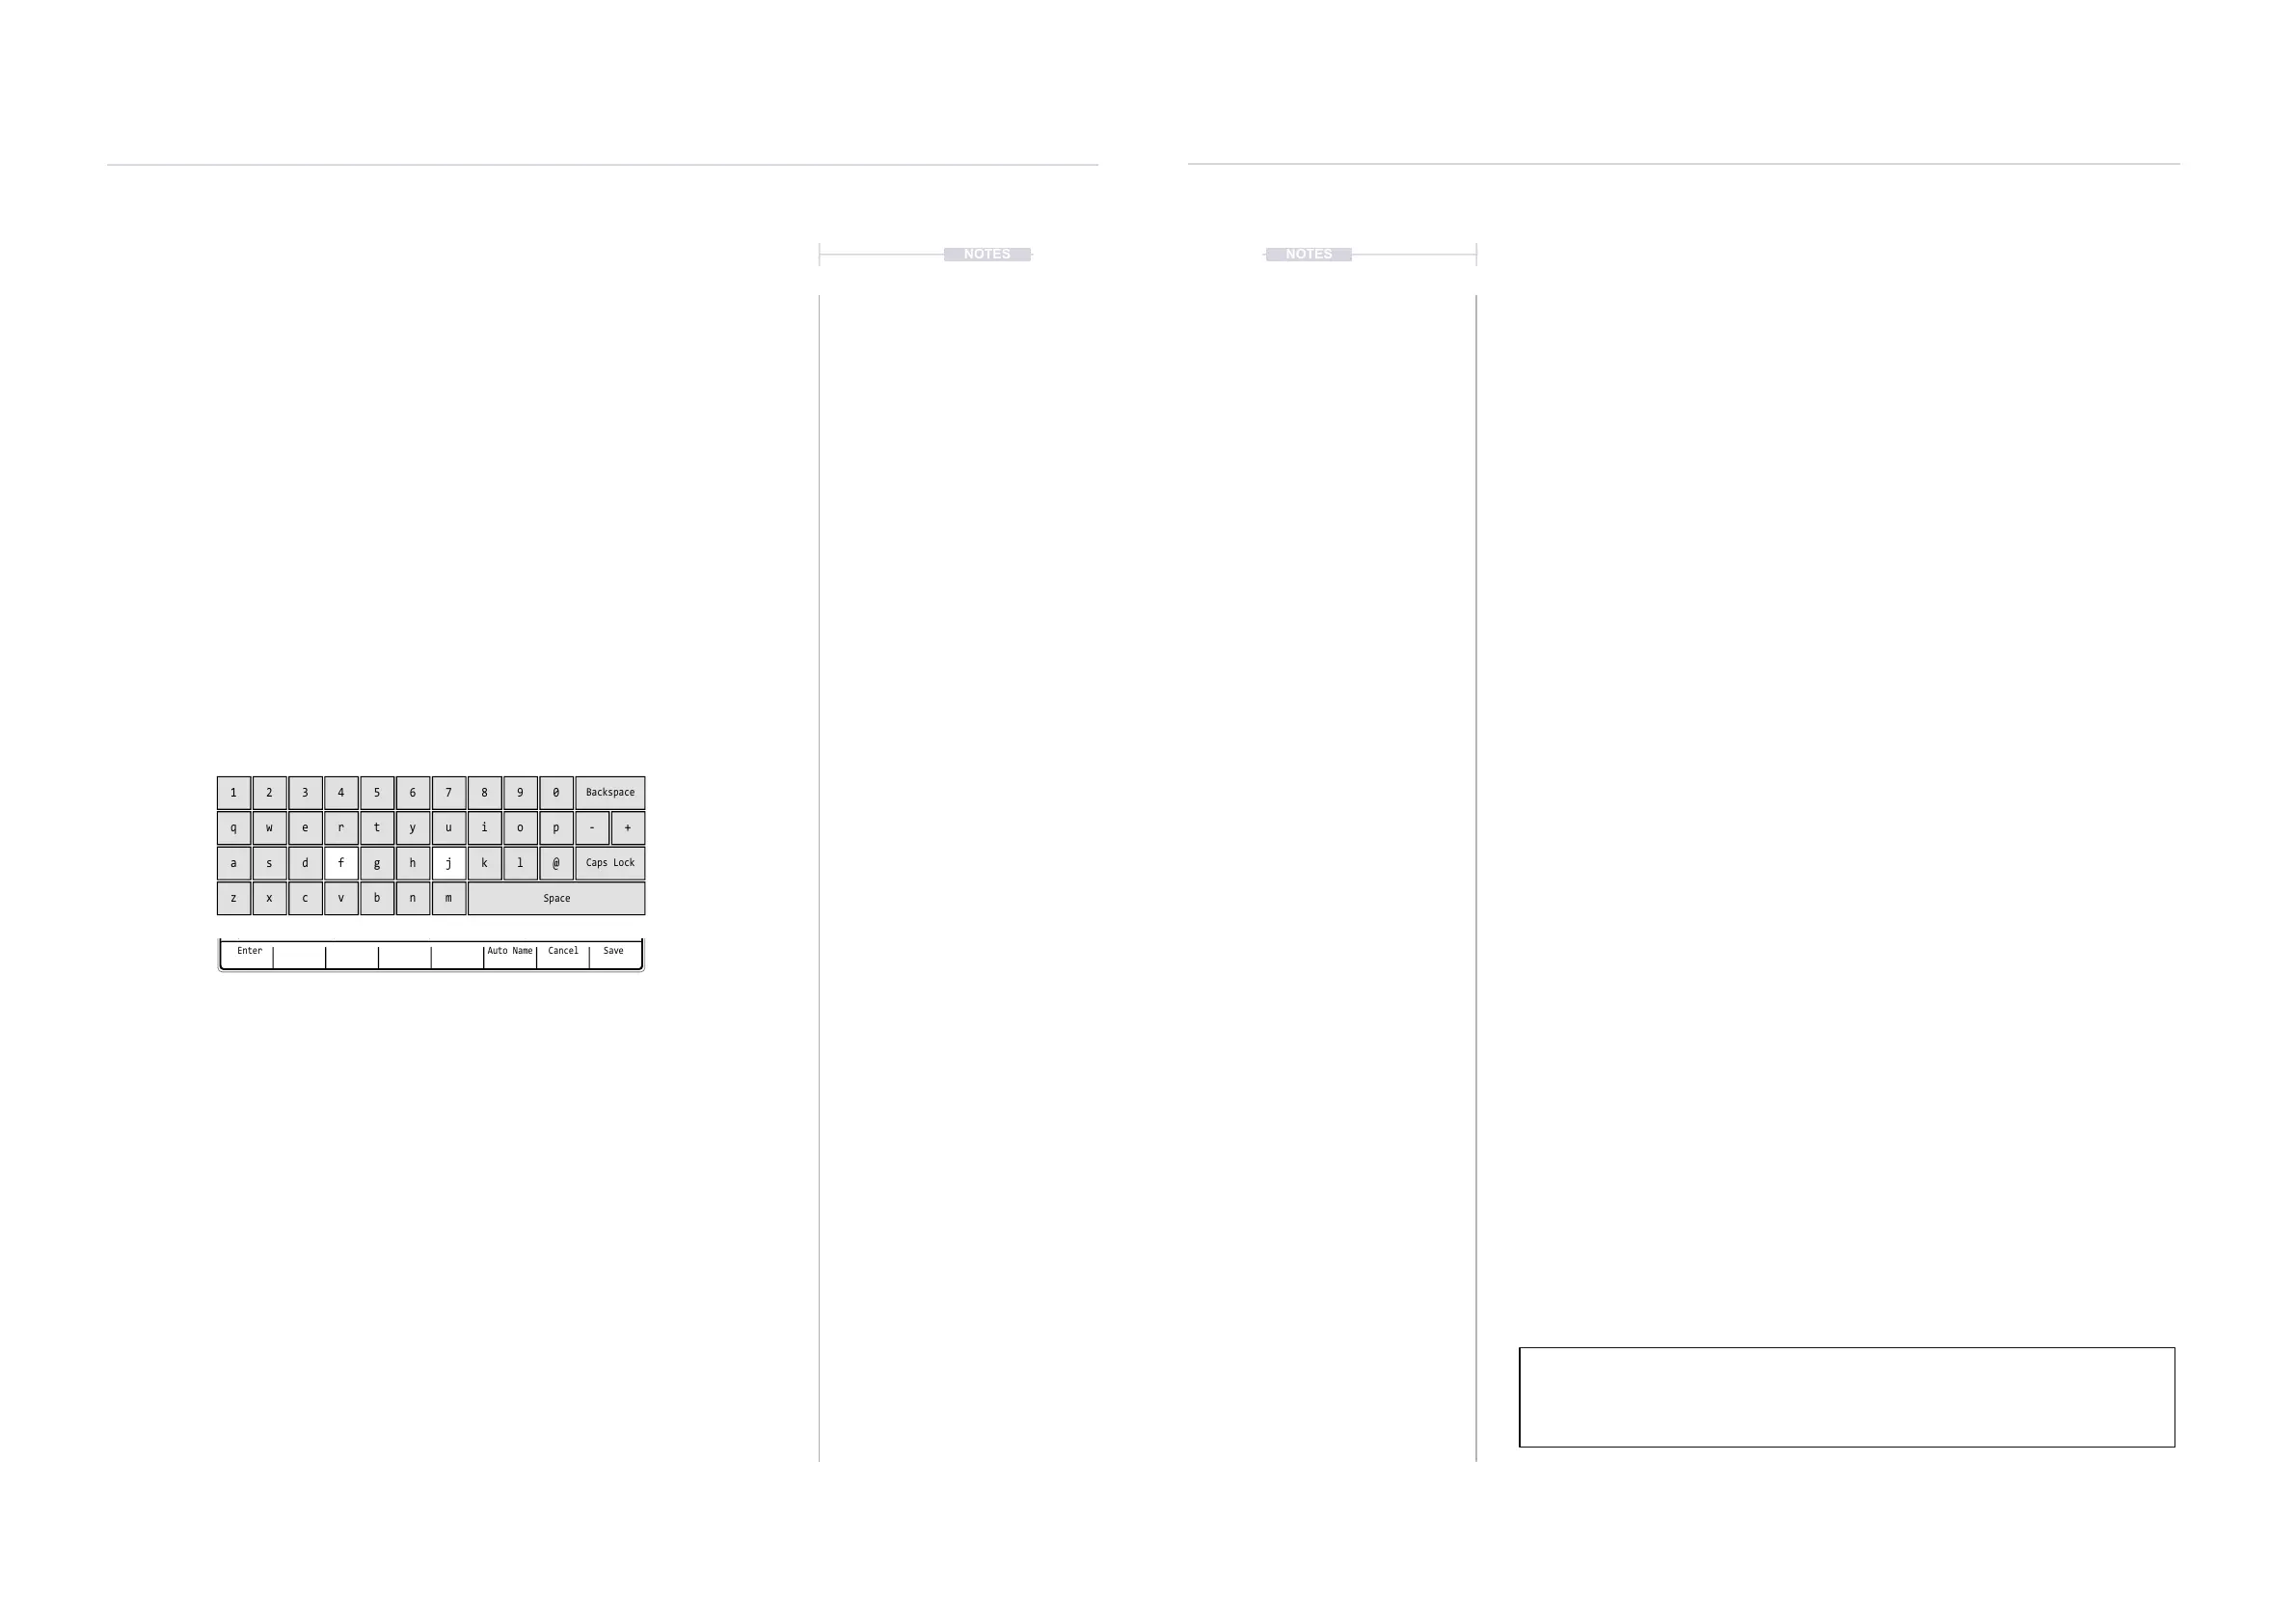
Enter
-- --- ---- ---- -- --- ---- ---- -- --- ---- ---- -- --- ---- ----
15 15
Auto Name Cancel Save
QWERTY Keyboard is represented by the 4 x 12 Grid Pads. The ‘f’ and
‘j’ keys are highlighted and lit on the pads to serve as a reference. The
Screen buttons offer the main commands in the context of the editor.
The following Tracker buttons also operate in the naming editor when
the naming screen is presented:-
• [Up], [Down], [Left], [Right] will navigate the selection across the
keyboard. Will navigate left / right in the text of the name when
the name is highlighted .
• [Insert / Home] will insert the currently highlighted character into
the name at the cursor position.
• [Backspace] to delete characters and backspace in the name
from the text cursor position.
3.3 Deleting a Project - File Menu.
The option to delete a project can be performed in the project browser. The
currently active project cannot be deleted. Change to another project to
delete. Note that deleting a project will also remove it from the SD Card.
▌ DELETING A PROJECT
1. Press [File] to open the le browser menu.
2. Press [Open] - 2
nd
screen button from left. The list of available (max
100) projects will be displayed on the left of the screen.
3. Turn (Jog) or Press [Up] or [Down] to navigate the list of projects. Also
press [Up] - 1
st
screen button or [Down] - 2
nd
screen button to scroll the
list selection. The highlighted option will show with a bounding box.
4. With the desired project highlighted, Press [Delete] - 3
rd
screen button
from the left.
5. A prompt ‘Do you want to delete project ‘xxxx’’ ?’ will be presented.
6. To conrm, Press [Delete] - 8
th
/ last screen button to conrm deletion.
Alternatively, Press [Cancel] - 7
th
screen button from left to exit without
deleting the project.
7. Project will be deleted from the SD Card and no longer visible in the
project list on Tracker *.
* Projects also manually deleted externally from the SD Card using a PC or Mac
will no longer be visible in Tracker.
1
q
a
z
4
r
f
v
7
u
j
m
0
p - +
@
2
w
s
x
5
t
g
b
8
i
k
Backspace
Caps Lock
Space
3
e
d
c
6
y
h
n
9
o
l
NOTESNOTES
Projects
3
Projects
3