9
Polyend Tracker Manual
8
Polyend Tracker Manual
LCD Display
7 Inch, LCD TFT 800 x 480 Display.
Screen Buttons
Dynamic [Screen buttons] are dependant on the
function displayed above each button.
Grid Pads
4 x 12 grid of silicon multifunctional [PADS].
Dedicated Note Button
Selection of the [Note] element of a step.
Jog Wheel
Rotary (Jog) wheel used for navigation and
parameter adjustment.
Dedicated Instrument Button
Selection of the [Instrument] for a step.
Dedicated FX1 Button
Effect selection for [FX1] of a step.
Instrument Parameter Button
Opens the [Instrument Parameter] options.
Cong Button
Opens the [Cong] options.
Play Button
Plays when pressing [Play] the pattern or song. Pressing
again stops playback. Play again restarts.
Insert / Home Button
Pressing [Insert/Home] will insert. Pressing [Shift] +
[Insert/Home] will return ‘home’, to the top of the pattern.
Rec Button
Pressing [Rec] will toggle the record mode on or off for
editing patterns and perform settings.
Navigation Buttons
Four navigation buttons [Up], [Down], [Left], [Right]. Used
to manoeuvre through menus and options.
Dedicated Pattern Button
[Pattern] mode / page selection.
Sample Loader Button
[Sample Loader] opens browser for
sample selection.
Sample Playback Button
[Sample Playback] opens playback
option menu.
Sample Editor Button
[Sample Editor] opens editor options.
Sample Recorder Button
[Sample Recorder] mode / page
selection.
Song Mode Button
[Song] mode / page selection.
Dedicated FX2 Button
Effect selection for [FX2] of a step.
Perform Mode Button
Selects the [Perform] mode / page.
File Button
Selects the [File] management options.
Master Button
Selects the [Master] mode / page containing master
effects and the mixer functions.
Copy / Paste Button
Pressing [Copy/Paste] will copy the selected item.
[Shift] + [Copy/Paste] will paste any copied item.
Delete / Backspace Button
Pressing [Delete/Backspace] will reset or step back.
[Shift] + [Delete/Backspace] will delete the selected item.
Shift Button
Pressing [Shift] + Another button will select its
secondary function.
Note that while the screen brightness is adjustable, the
command buttons are not backlit which may be an issue in dark
environments and during live gigs and performances.
Overview
1
Overview
1
Instrument
Parameters
Sample
Loader
Note
Play
Rec
Master
Song
Pattern
Backspace
Delete
File
Sample
Editor
FX1
Insert
Home
Perform
Sample
Playback
Instrument
Copy
Paste
Shift
Config
Sample
Recorder
FX2
1
4
5
10
15
20
24
5
7
15
16
18
20
24
22
26
9
10
11
12
13
14
6
11
16
21
25
7
12
17
22
8
13
18
26
9
14
19
23
8
17
19
21
23
25
6
4
2
2
3
3
1
NOTES
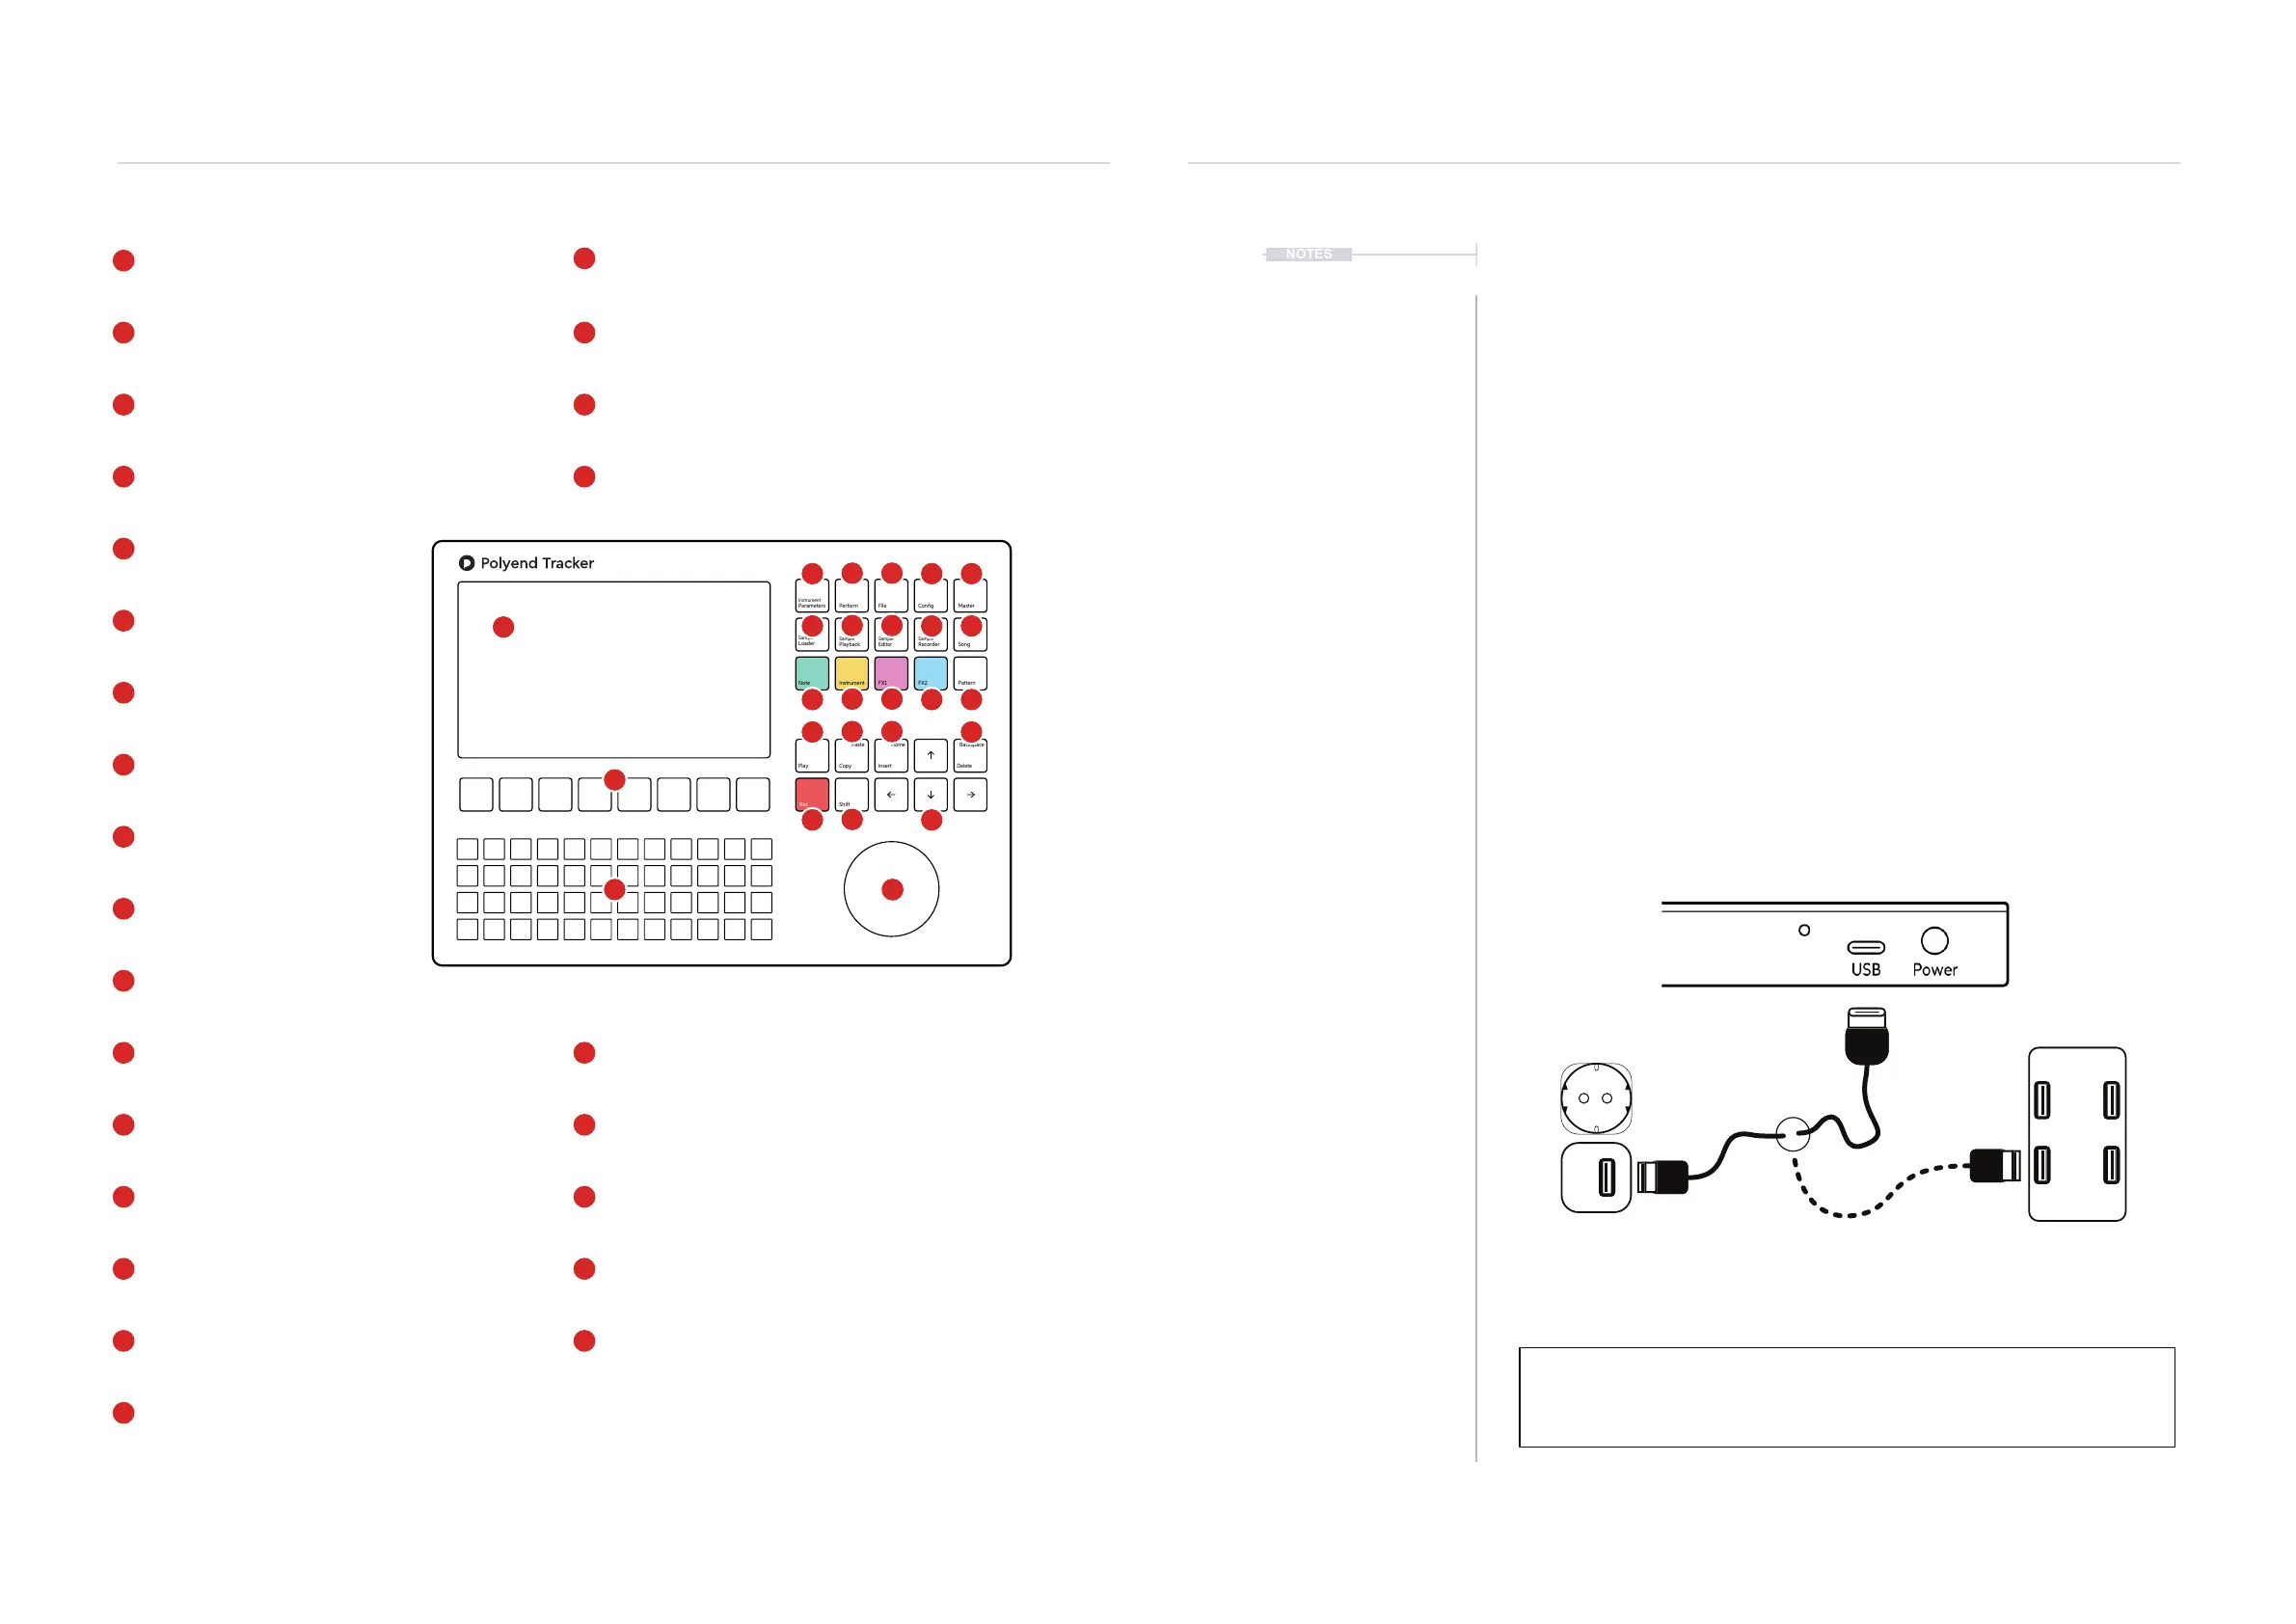
1.3 Start Up
Tracker is a low power user and can therefore be powered from the
supplied mains USB adapter or from a rechargeable battery power bank.
When restarting Tracker the previously open project will be be re-opened
▌ POWERING ON / OFF TRACKER
1. Connect the supplied USB-C Mains cable between Tracker and the
supplied USB plug. Also Tracker can operate with a portable USB
power bank*. Tracker uses a 5V, 1A rated supply.
2. Ensure the SD Card is installed correctly for Tracker to operate.
3. Quickly press the small power button located on the rear left (looking
from the top). Tracker will start up and the previous project reopened.
4. To power off, press and hold the small power button located on the rear
left (looking from the top) until the timer bar ends. Tracker will power off.
Supply is 5V, 1A from the supplied mains to USB adapter.
Alternatively use a battery power bank.
Start up instantaneous current is approx 1.2A with normal state around 0.5A
* It is recommended by Polyend to use a standard power bank without smart
features. Intelligent / smart power banks or PC / Mac power may have features
that interfere with the continuous supply required by Tracker. USC - C to USB - B
cable supplied. USB - C to USB - C is usable on later Tracker models.