121
Polyend Tracker Manual
120
Polyend Tracker Manual
NOTESNOTES
Instruments
6
Instruments
6
▌ REMOVING A SLICE
1. Press [Sample Playback] to select the playback mode pages.
2. Press the 7
th
or 8
th
Screen Button to navigate to ‘Slice’ or ‘Beat Slice’
Play mode depending on the function required.
3. Select a slice, Press [Slice], 1
st
Screen button. X of Y, Where X is the
selected slice and Y the total number of slices available.
4. Turn (Jog) to select the slice number to delete.
5. Press [Remove], 4
th
Screen Button. The selected slice is deleted
immediately (no prompt) and the currently active slice reverts to the
previous slice.
▌ ADJUSTING A SLICE POSITION
1. Press [Sample Playback] to select the playback mode pages.
2. Press the 7
th
or 8
th
Screen Button to navigate to ‘Slice’ or ‘Beat Slice’
Play mode depending on the function required.
3. Select a slice, Press [Slice], 1
st
Screen button. X of Y, Where X is the
selected slice and Y the total number of slices available.
4. Turn (Jog) to select the slice number to edit.
5. Press [Adjust], 2
nd
Screen Button. Zoom may help create precise edits.
6. Turn (Jog) or Press [Up] or [Down] to adjust the slice start position.
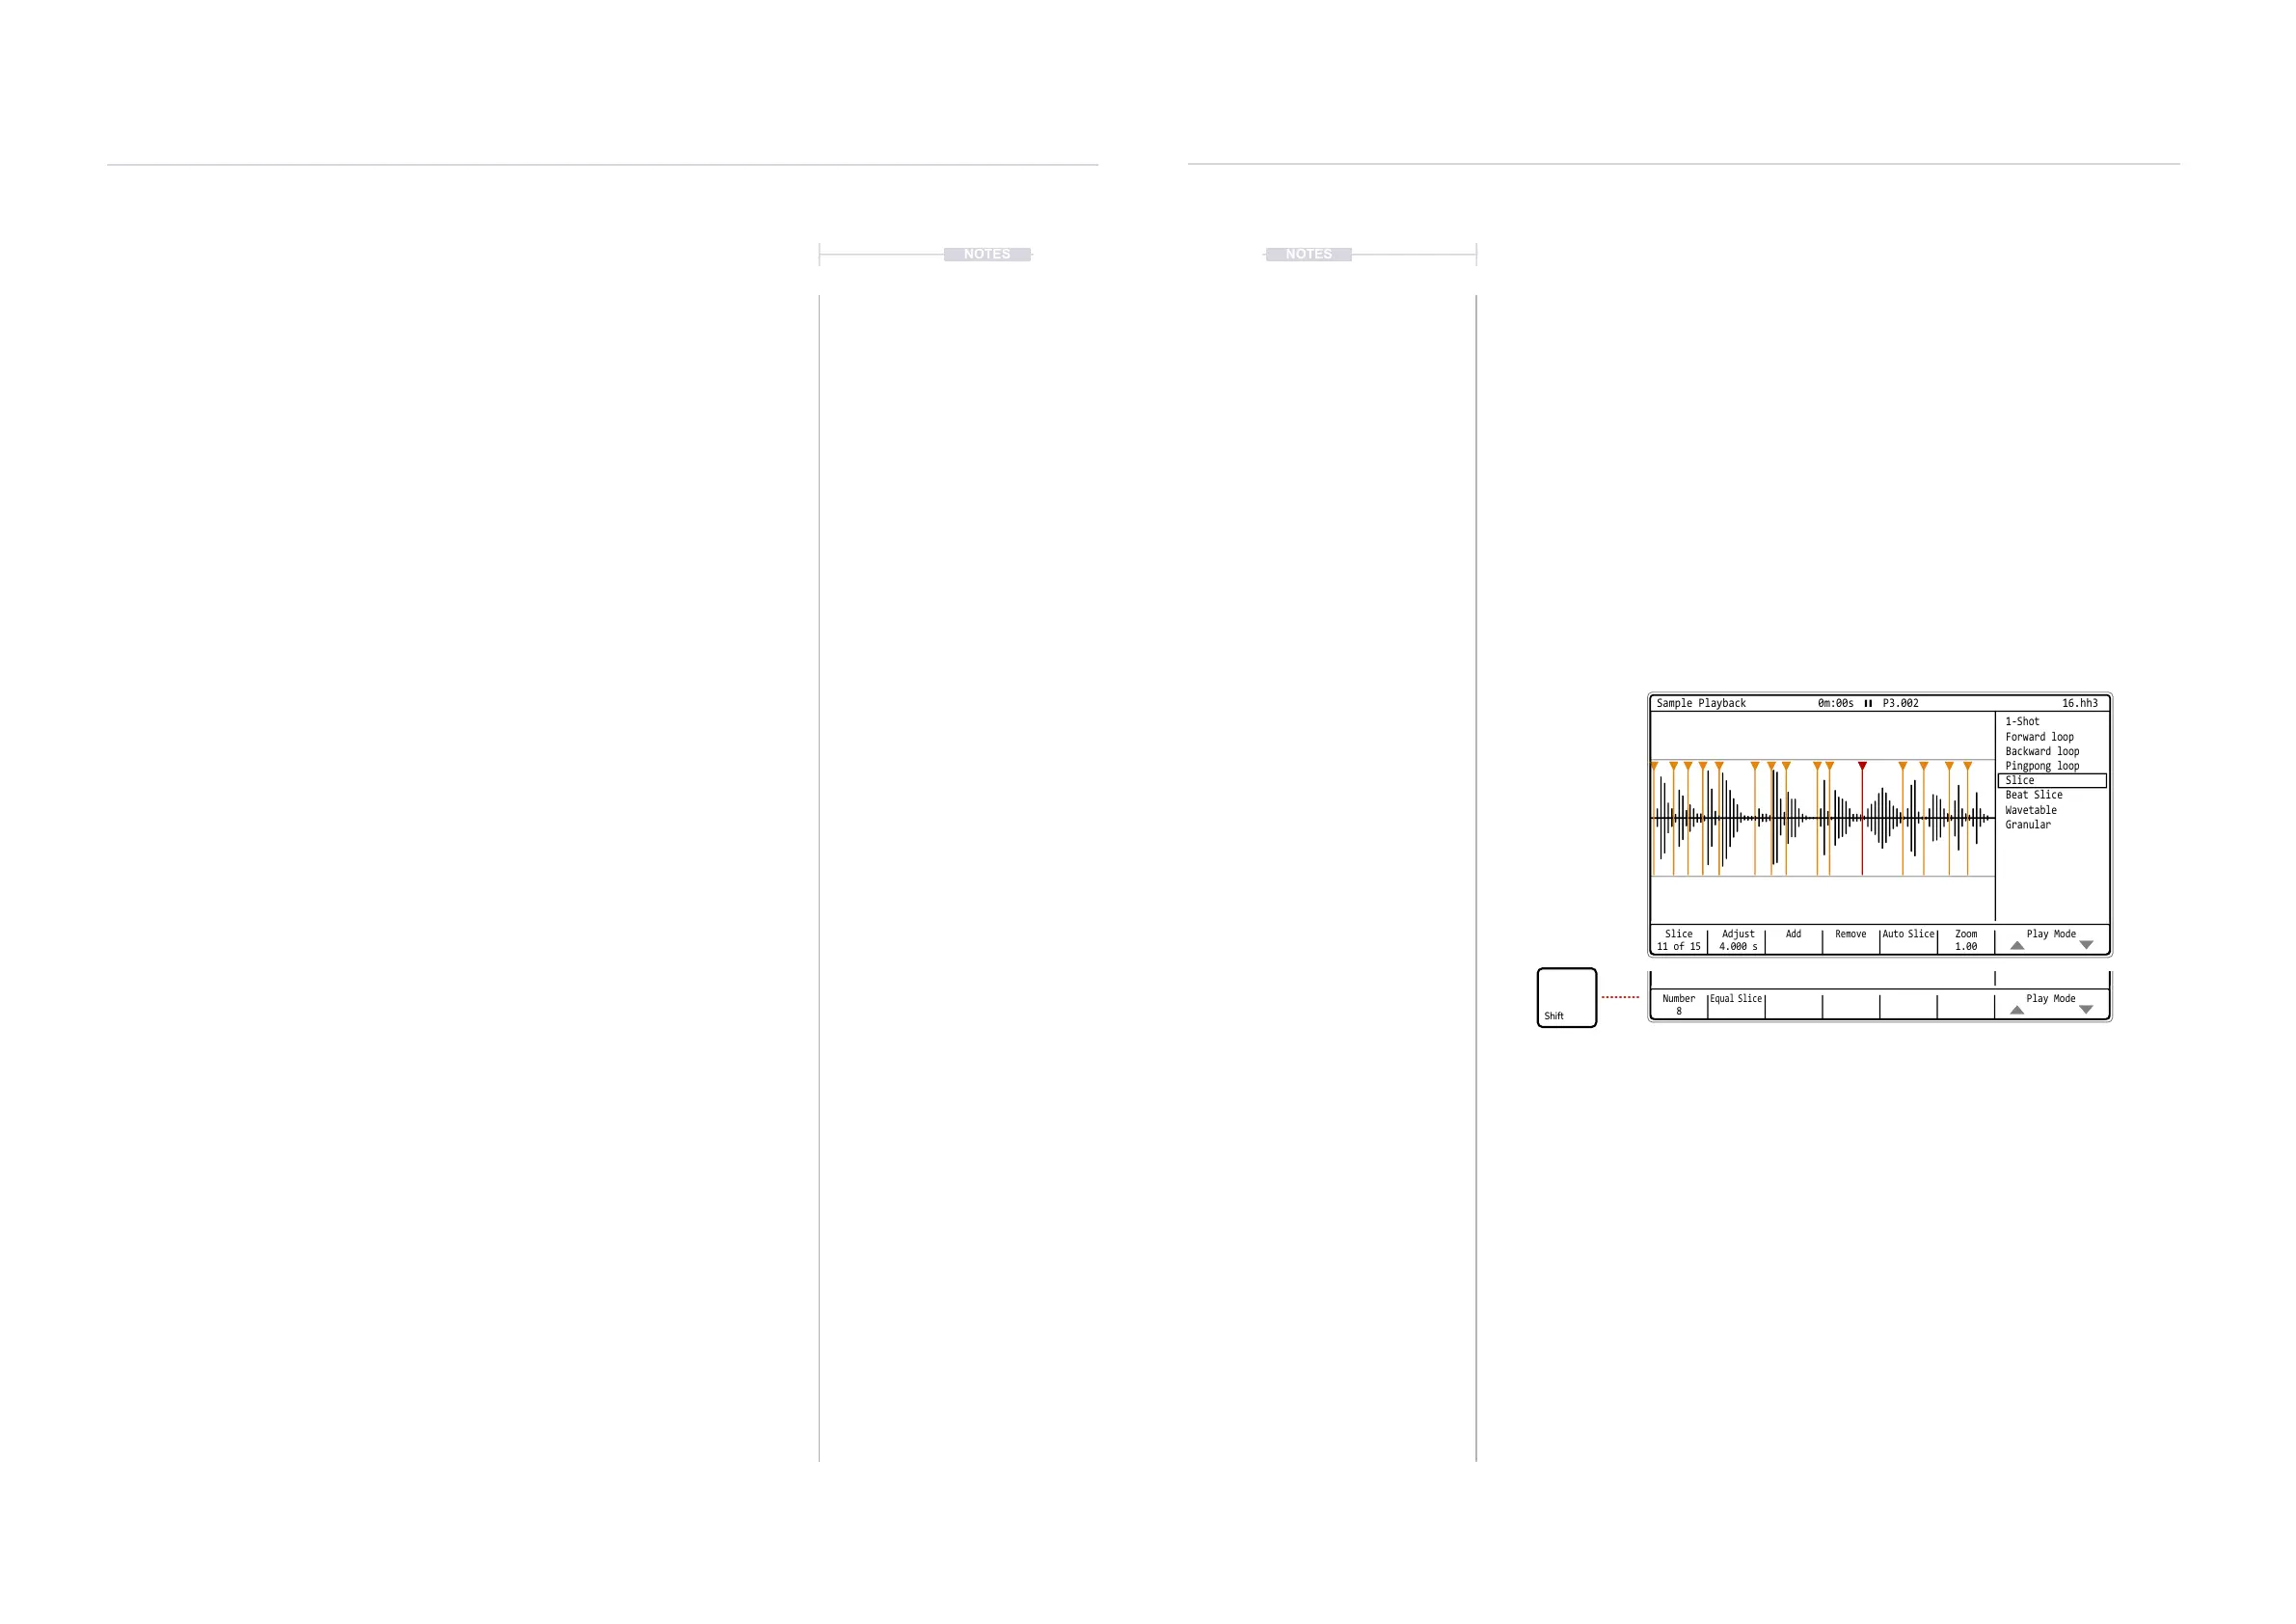
Slice
11 of 15
Adjust
4.000 s
Add Remove
Zoom
1.00
Auto Slice
Play Mode
Sample Playback 0m:00s P3.002
1-Shot
Slice
Forward loop
Beat Slice
Backward loop
Wavetable
Pingpong loop
Granular
16.hh3
Number
8
Equal Slice
Play Mode
Sample Playback 0m:00s P3.002
1-Shot
Slice
Forward loop
Beat Slice
Backward loop
Wavetable
Pingpong loop
Granular
16.hh3
▌ SLICING A SAMPLE
1. Ensure the desired instrument is selected with the sample to edit. This
will be shown top right of the screen.
2. Press [Sample Playback] to select the playback mode pages.
3. Press the 7
th
or 8
th
Screen Button to navigate to ‘Slice’ or ‘Beat Slice’
Play mode depending on the function required.
4. To slice the sample, follow one or a combination of the slicing
techniques. Up to 48 slices are possible:
a. Transient Slicing. Will automatically slice the sample into a number
of slices located at the points where a dynamic amplitude change is
detected. The number of slices is based on the number of transients
detected.
• Press [Auto Slice], 5
th
Screen Button and acknowledge when
prompted. Existing slices are cleared and new ones created.
b. Equal Slicing. This will slice the sample in a set number of equally
spaced positions. Amount of slices set by the ‘Number’ value. Hold
[Shift] to access this feature.
• Hold [Shift] + [Number], 1
st
Screen Button and Turn (Jog) to set
number of slices to create.
• Hold [Shift] + [Equal Slice], 2
nd
Screen Button while still holding
[Shift]. Acknowledge on prompt. Existing slices are cleared and
new equidistant slices are created.
c. Manual Slicing. This will add 1 slice at the central point between the
currently selected slice start marker and the following slice start.
• Select a slice, Press [Slice], X of Y, Where X is the selected slice
and Y the total number of slices available. This is the 1
st
Screen
button.
• Turn (Jog) to select the slice number.
• Press [Add], 3
rd
Screen Button. The new slice is added. If no
slices are present a new one is added at the sample start
position.
• Any new slice added automatically becomes the currently
selected slice.
Hold