Installing the Printer and the intelligent Paper Stacker
1-17
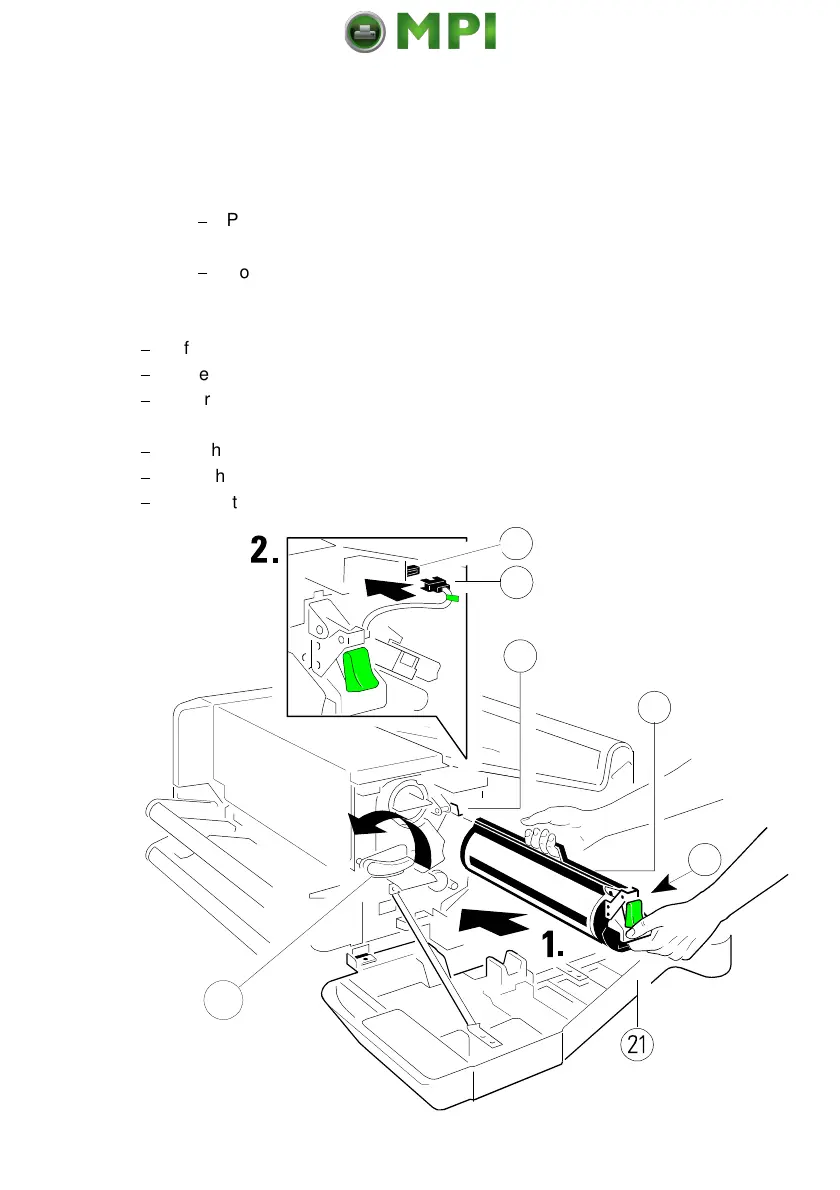
1.5.6 Installing the PC Cartridge
(OPC)
The Photoconductor (1) is in the Starter Kit package 2
Note: -
The Photoconductor is very light-sensitive, so it is wrapped in a
lightproof foil.
$
Please do not touch the green part of the Photoconductor with your
fingers. Oil and dirt degrade the print quality.
$
Do not expose the light-sensitive
Photoconductor to room lighting or
sunlight any longer than necessary.
$
Lift the lever (2) upwards to unlock the Developer Unit.
$
Carefully remove the drum from its foil container.
$
Insert the Photoconductor (1) by using the upper and lower iron band guides
and push it into the printer until you hear a
click
.
$
Attach the electrical connector (3) to position (4).
$
Find the orange adhesive tape (5) on the waste toner exit and remove it.
$
Secure the Developer Unit by pressing down the lever (2).
Mantenimiento Periféricos Informáticos SL C/Canteras, 15 28860 Paracuellos de Jarama Tel: 00 34 917481604 WEB: https://mpi.com.es