XLi EDGE Pinspotter
Section 4-2 4.2-18 Rev. Date: 10/2016
4.2.2.18 Respot Cell Operation & Adjustments
When the table lowers to pick up pins as in a first ball cycle, the respot cell fingers close on the
standing pins, lock, and then the table raises the pins high enough for the sweep to clear the lane
of fallen pins. The table then respots the pins.
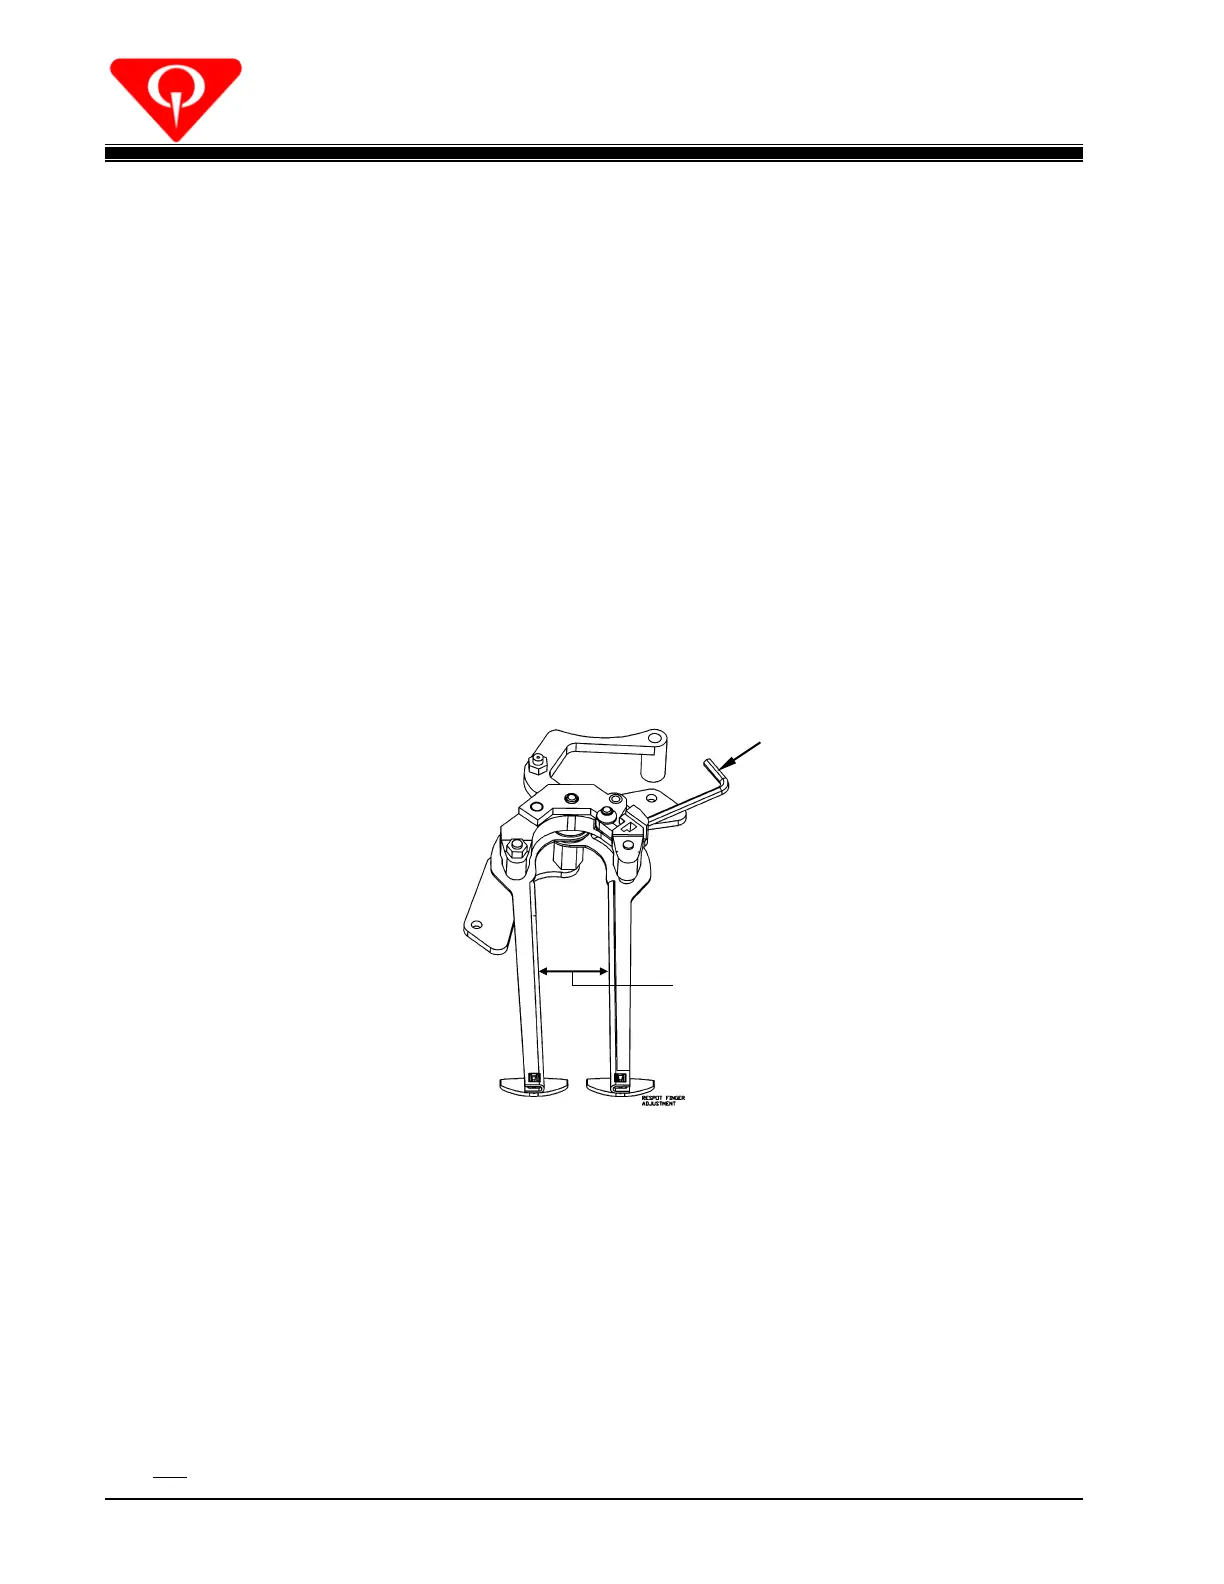
4.2.2.18.1 Finger Adjustment
1. Move the respot cell linkage to close the cell fingers.
2. Using a 1/8-inch hex wrench and the widest part of the respot cell gauge (070-006-519), adjust
each of the respot cells for a 2-inch opening between fingers approximately mid way along the
fingers (see Figure 4.2-19). This adjustment can be made with the respot cell either in or out
of the table.
Figure 4.2-19
4.2.2.18.2 Respot Cell Adjustment
1. Manually crank the table to the spotting position.
2. Disconnect the 6 body links that connect the respot cells to the #7, #8 & #9 connecting links
(see Figure 4.2-20).
3. Loosen the bolts that connect cells #8, #9 & #10 to the slotted ends of the connecting links. Do
not loosen the bolt at the #7 cell connecting link.
Use the respot cell
gauge to set opening
to 2.00 Inches.
 Loading...