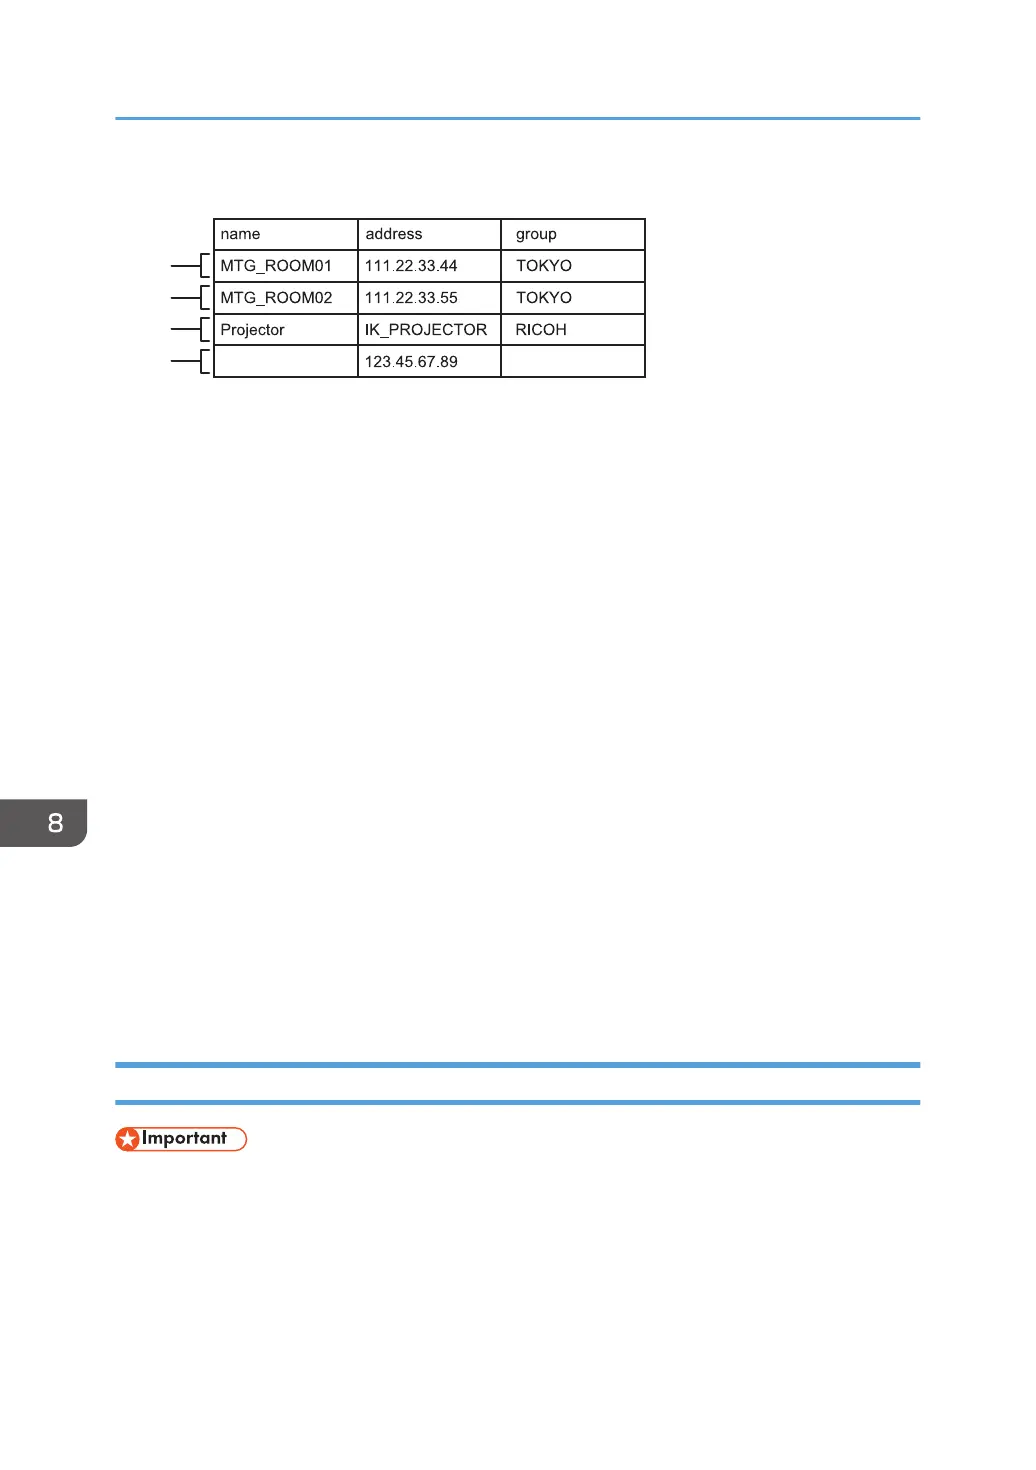
Using spreadsheet software such as Excel to create a contact list
1. First entry (2nd row)
The host whiteboard with an IP address of "111.22.33.44" is registered.
• Name column: The entry is named "MTG_ROOM01".
• Address column: "111.22.33.44" is entered.
• Group column: The entry is included in the group "TOKYO".
2. Second entry (3rd row)
The host whiteboard with an IP address of "111.22.33.55" is registered.
• Name column: The entry is named "MTG_ROOM02".
• Address column: "111.22.33.55" is entered.
• Group column: The entry is included in the group "TOKYO".
3. Third entry (4th row)
The host whiteboard with the host name "IK_PROJECTOR" is registered.
• Name column: The entry is named "Projector".
• Address column: "IK_PROJECTOR" is entered.
• Group column: The entry is included in the group "RICOH".
4. Fourth entry (5th row)
The host whiteboard with an IP address of "123.45.67.89" is registered.
• Name column: The entry is not named.
• Address column: "123.45.67.89" is entered.
• Group column: The entry is not included in a group.
Adding a Remote Contact List
• When the import is complete, the contact list is overwritten.
1. Create a contact list in the root directory (the topmost directory) of a USB flash memory.
2. Insert the USB flash memory device containing the contact list into a USB port.
Insert only one USB flash memory device.
8. Changing the Interactive Whiteboard Settings
180