3-5
Overview of Scan Operations
3
ComColor Series User’s Guide 09
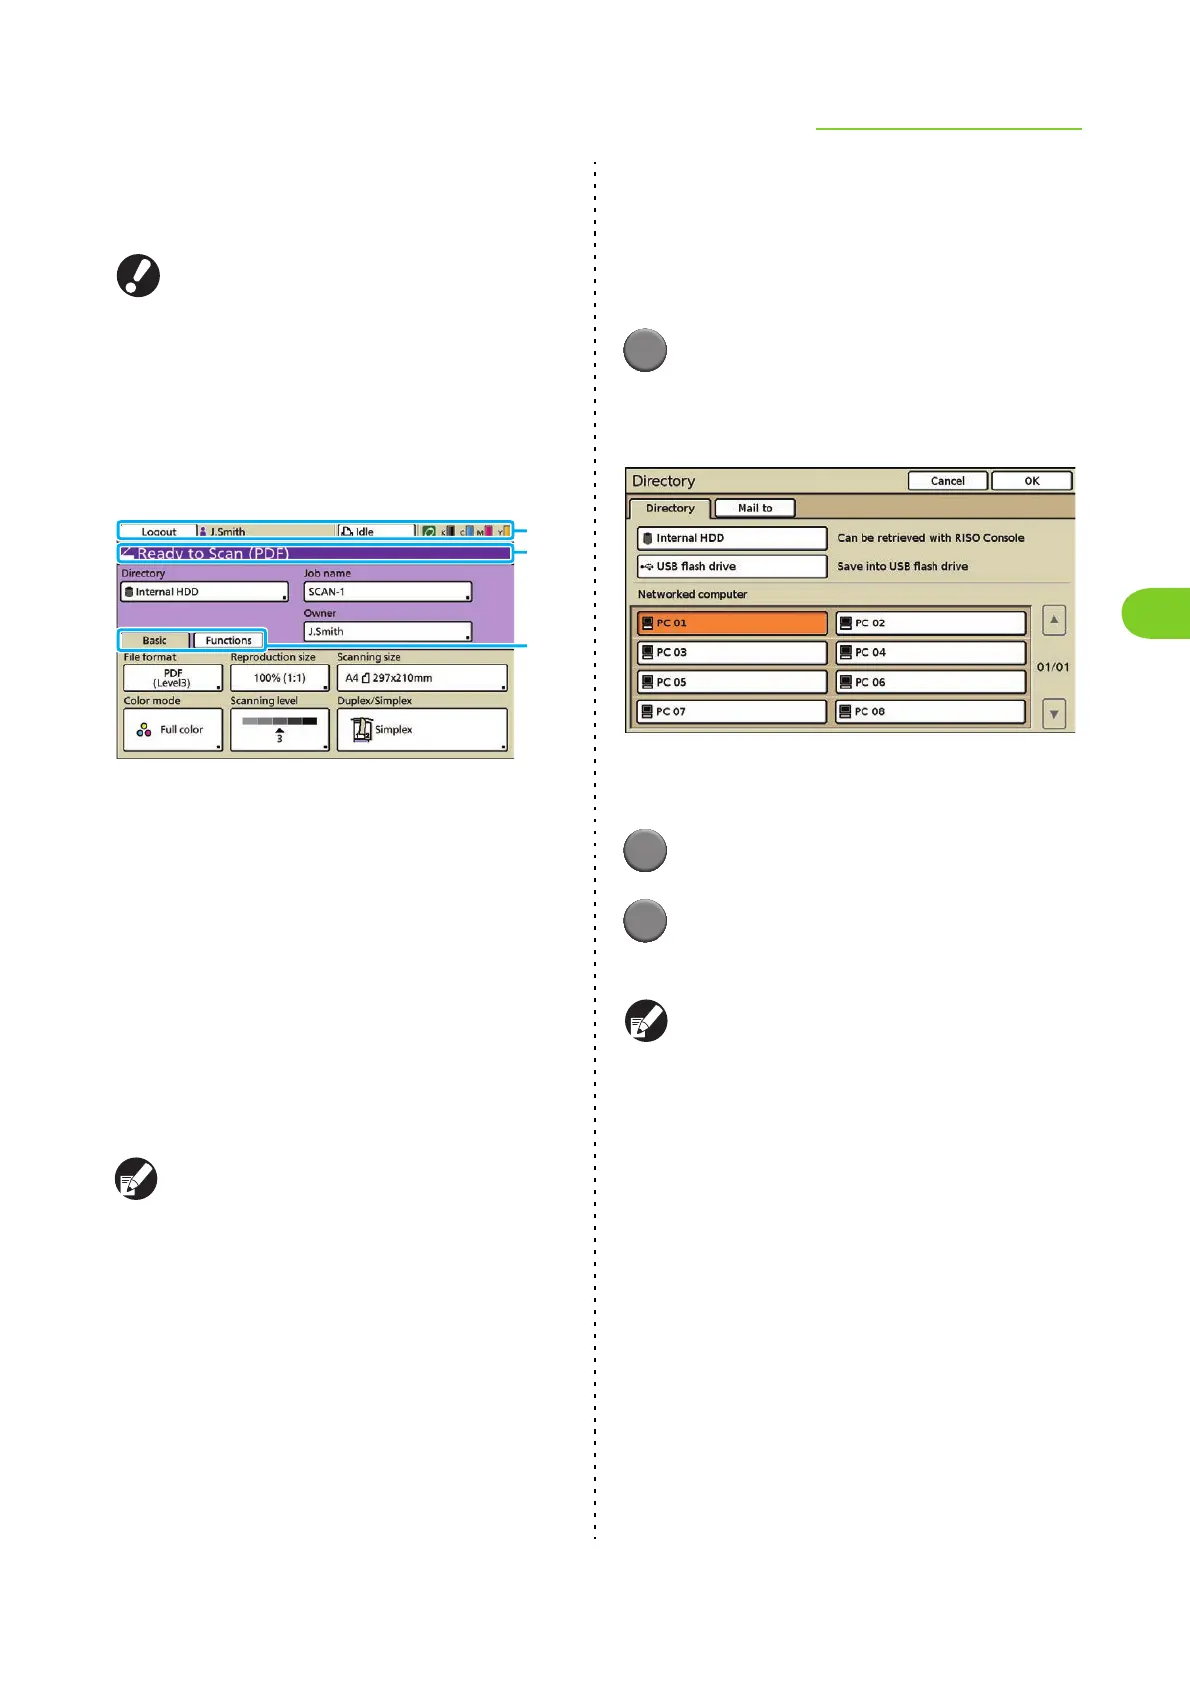
● 4 Selecting the Directory
Specify the directory for saving scanned data.
RISO KAGAKU CORPORATION is not
responsible for the loss of any data on the
machine's internal hard disk or on a USB flash
drive when used with this machine. For data
protection, it is recommended to back up data
in advance.
The currently specified directory, e-mail
destination, job name or owner is displayed in
[Directory] on the scanner mode screen.
a Status bar
Displays the login or logout button, user name, machine
status (Printer Status Button), and remaining ink
indicator.
b Message area
Displays the file format and any messages.
c Screen selection button
Displays the [Basic] or [Functions] screen.
Use the [Basic] screen to configure the basic scan
settings.
Use the [Functions] screen to configure the scanning
functions.
Press [Job name] or [Owner], and the text input
screen is displayed. You can perform the setting.
■ Save Data to the Internal Hard Disk
You can save scanned data to the internal hard disk
of this machine. You can then download the saved
data to a user's computer. See "[Scanner] Menu"
(p. 5-13) in "RISO Console".
1
Press [Directory] on the scanner
mode screen.
The [Directory] screen is displayed.
When the [Mail to] screen has been displayed,
press [Directory].
2
Press [Internal HDD].
3
Press [OK].
The previous screen is displayed.
You can use the console to download and use
data saved to the internal hard disk. (p. 5-14)
The storage period for scanned data is configured
by the administrator.
c
a
b