USB: By means of this button you can easily select
a USB data carrier (e.g. flash drive or external disk)
as storage location. This function is only available
if the operating system recognized a USB data
carrier being connected.
By means of button (1) you can also select a
subdirectory.
Figure 7.15: Storage location -
USB data carrier
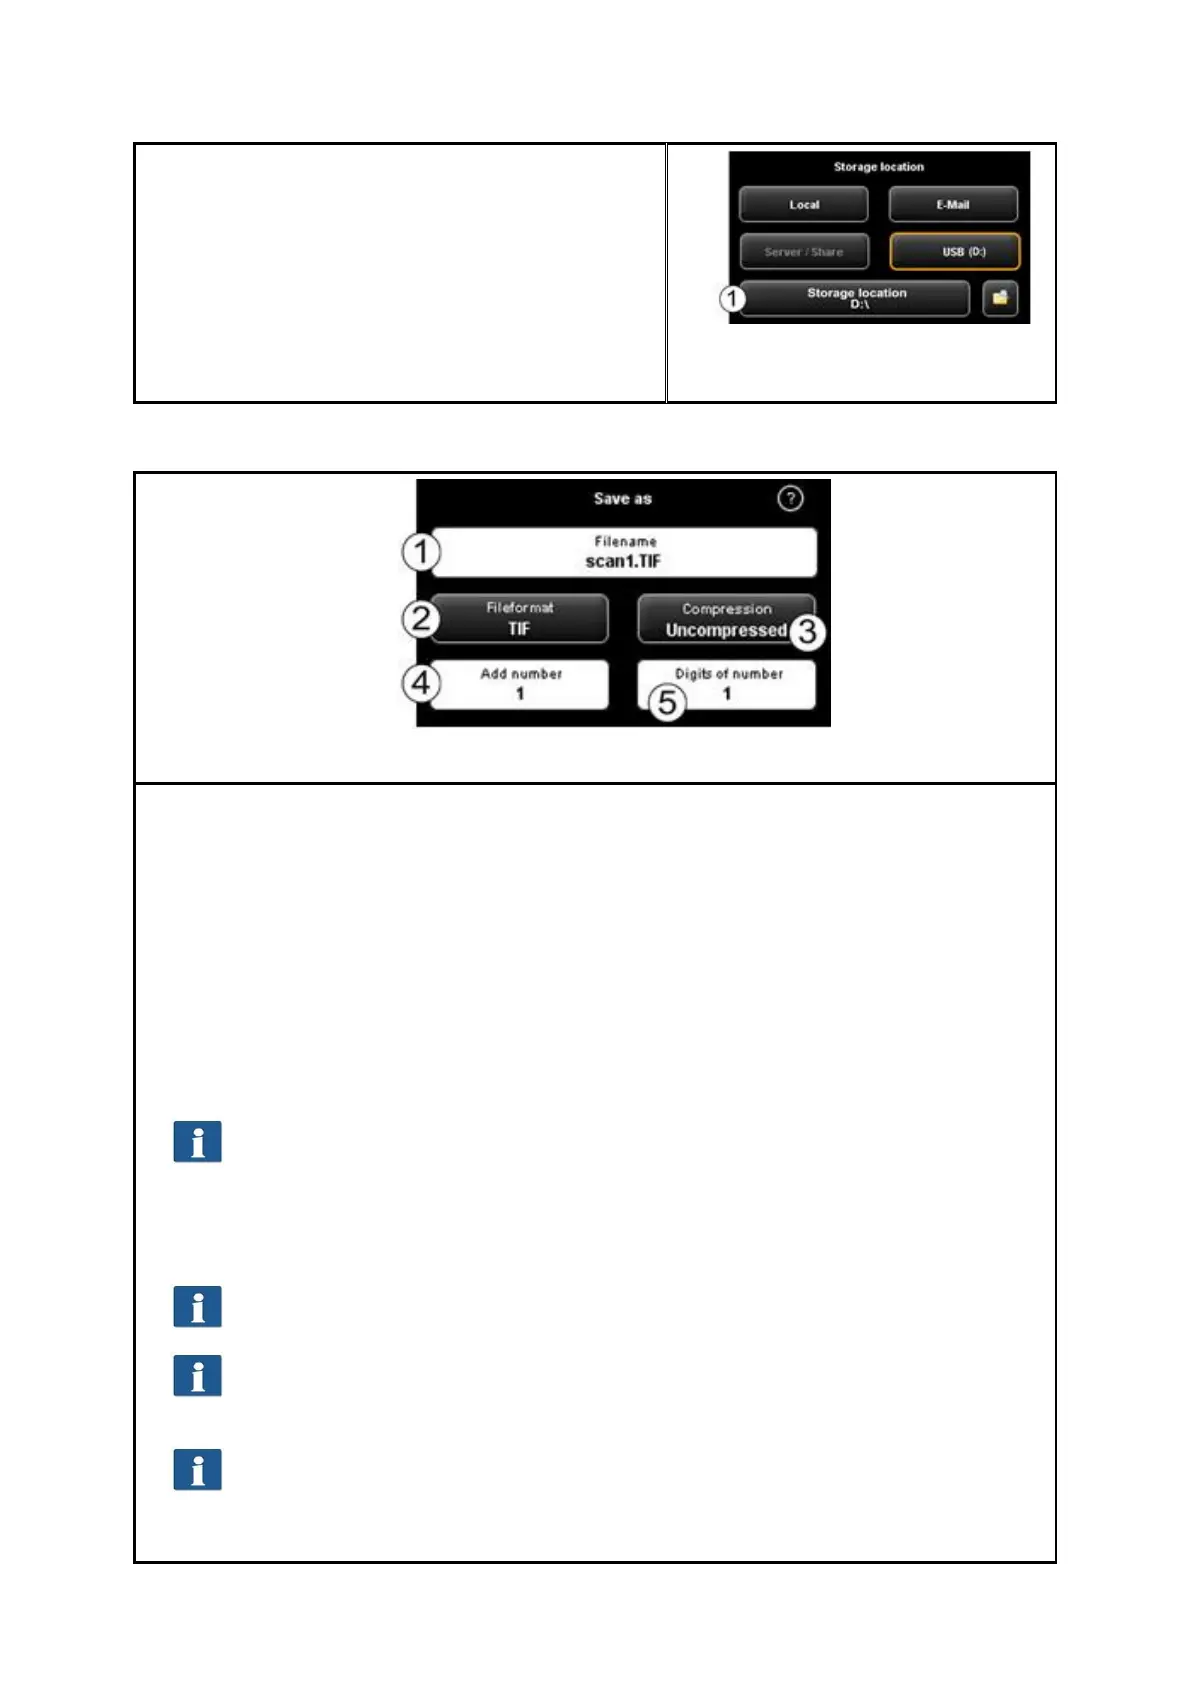
7.10.1.2 File Format
Figure 7.16: Settings - File format
1. File name: Text box where to enter the file name. The file extension is added
automatically on the basis of the selected file format (2).
2. File format: Type of file. The following formats are supported TIFF, JPEG, PDF(/A),
Multipage TIFF, Multipage PDF(/A), BMP, JP2 (JPEG2000), CALS, PNG, DWF.
3. File options: Depending on the selected file format (2), additional options are
available (e.g. compression type for TIFF).
4. Add number: Here, you can define whether files are to be numbered
automatically. In the text box you can define the start number. When saving a
new file, this number is incremented. In this way, you can save many scans in
one directory one after another without having to adjust the file name before
each scan.
You can place the number at any position in the file name. For this purpose,
enter the character "%" at the requested position in the file name.
5. Digits of number: Here, you can define the number of digits of automatic
numbering. Increase the number of digits if you need a correct sorting for
numerous scans.
If you do not want to use any numbering, enter 0.
Example: You entered "scan%test" in the field File name (1), selected "TIF" as
file format (2), and entered 3 under Digits of number (5). In this case, the
following file names would be created: "scan001test.tif", "scan002test.tif", etc.
You can enter further wildcards in the file name:
„{DATE}“: The date is added to the file name.
„{TIMESTAMP}“: The time is added to the file name.
 Loading...