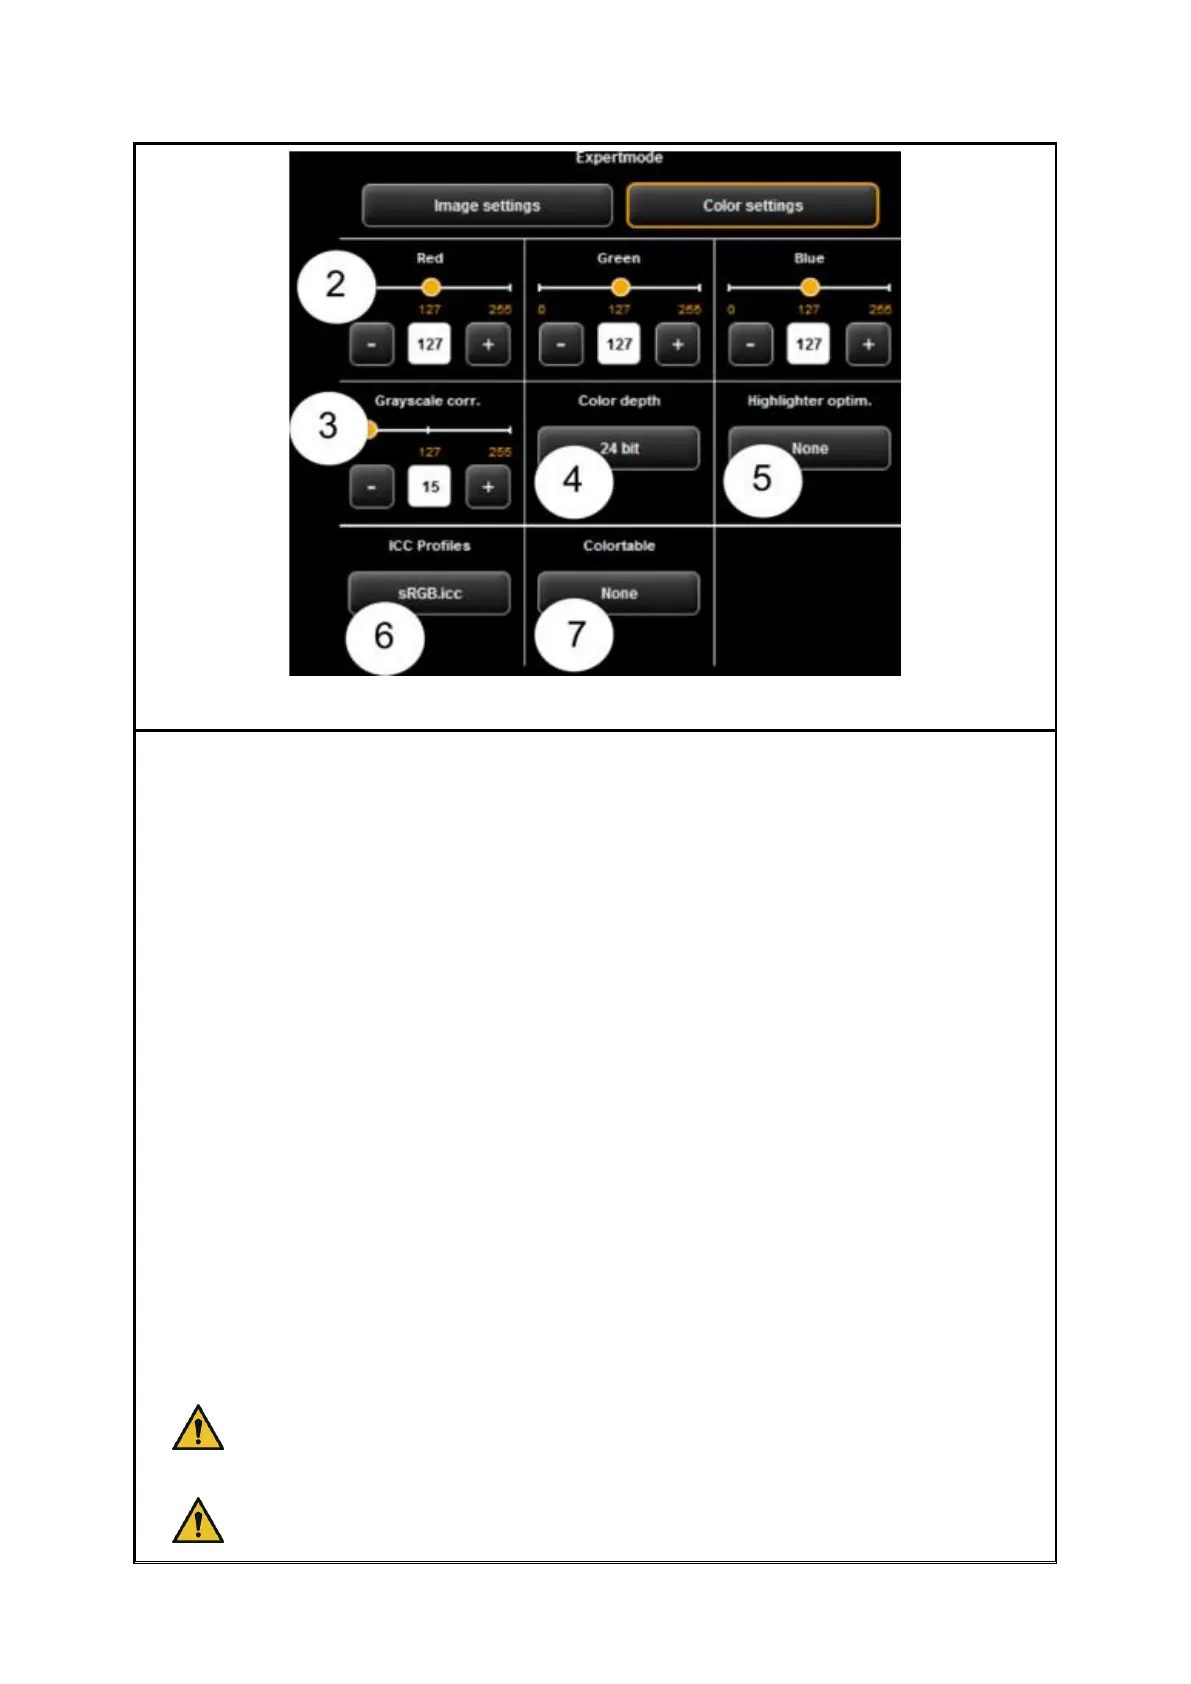
1. Image settings/Color settings: If you switch to "Image setting", you see the
submenu depicted in Fehler! Verweisquelle konnte nicht gefunden
werden..
2. Red/ Green/Blue: By means of these three slide controls, you can shift the
weighting of the three color channels red, green, and blue (R, G, B). E.g., if you
want to reduce the red share in the image, reduce the setting of slide control
"Red" (setting range 0...255, 127: neutral).
3. Gray scale correction: If there are any gray scales in an image which cannot be
presented in a color neutral way (e.g. greenish cast), you can compensate this
deviation by means of this slide control. When setting a higher value, colors
which are almost gray are switched to the next shade of gray. If the value is very
high, also those colors are shifted to gray which are quite far away from a gray
scale. (setting range 0...255, 0: neutral).
4. Color depth: In color mode (RGB), the color information is usually coded with 8
bits per color channel (R, G, and B), i.e. 24 bits per pixel. This may result in
relatively large files. In particular for originals with only a few colors (e.g. CAD
drawings), it may be reasonable to reduce the color depth. This can be achieved
by selecting the option "Indexed color". The color depth is then reduced from 24
to 8 bits per pixel so that 256 colors can be displayed.
5. Highlighter optimization: When scanning originals which are marked with
permanent markers, it may occur that these marks are not shown properly. In
order to enhance the presentation, special optimizations can be enabled. Three
degrees of intensity can be selected (normal, medium, and high). In most cases,
the reproduction of markings with permanent markers should be ok without any
optimization.