Section 07 ENGINE MANAGEMENT (DI)
Subsection 02 (COMPONENT INSPECTION AND ADJUSTMENT)
When attaching connecting rod to “crankpin”,
strictly follow this procedure:
– Block counterbalance shaft to prevent any rota-
tion.
– Install the “crankpin” (bushing) so that its
grooved end is on the screw head side.
1
F18R0CA
1. Groove here
– Install a NEW screwandtorqueto6.5N•m
(58 lbf•in). Do not apply any thread locker prod-
uct.
– Turn the screw clockwise an additional 80 de-
grees ± 5 degrees.
CAUTION: Failure to strictly follow this pro-
cedure may cause screw to loosen and lead
to engine damage. The bushing grooved end
must be against the screw head. Besides, as
the “crankpin” screw has been stretched from
the previous installation, it is very important
to use a new screw at assembly.Also,the
new screw will have the proper threadlocking
coating.
Ensure to correctly position O-ring on access cov-
er and install cover.
Reinstall remaining removed parts. Ensure to
check engine alignment.
FUEL DELIVERY
FUEL PRESSURE REGULATOR
Pressure Test
The pressure test will show the available pressure
at the air/fuel rail. It validates the pressure regula-
tor and leaks in the system.
IMPORTANT: Before checking air/fuel rail pres-
sure, make sure the fuel pressure from the fuel
pump and the air pressure from the air compres-
sor are within specifications. See the procedures
elsewhere in this section.
Also ensure there is no leak from hoses and fit-
tings. Repair any leak.
Ensure there is enough gas in fuel tank.
Release the fuel pressure in the system.
NOTE: Remove seat and rubber plug underneath
to gain access to fuel pump and hoses.
Disconnect outlet hose (the one with the fuel fil-
ter) from fuel pump using tool (P/N 529 035 714).
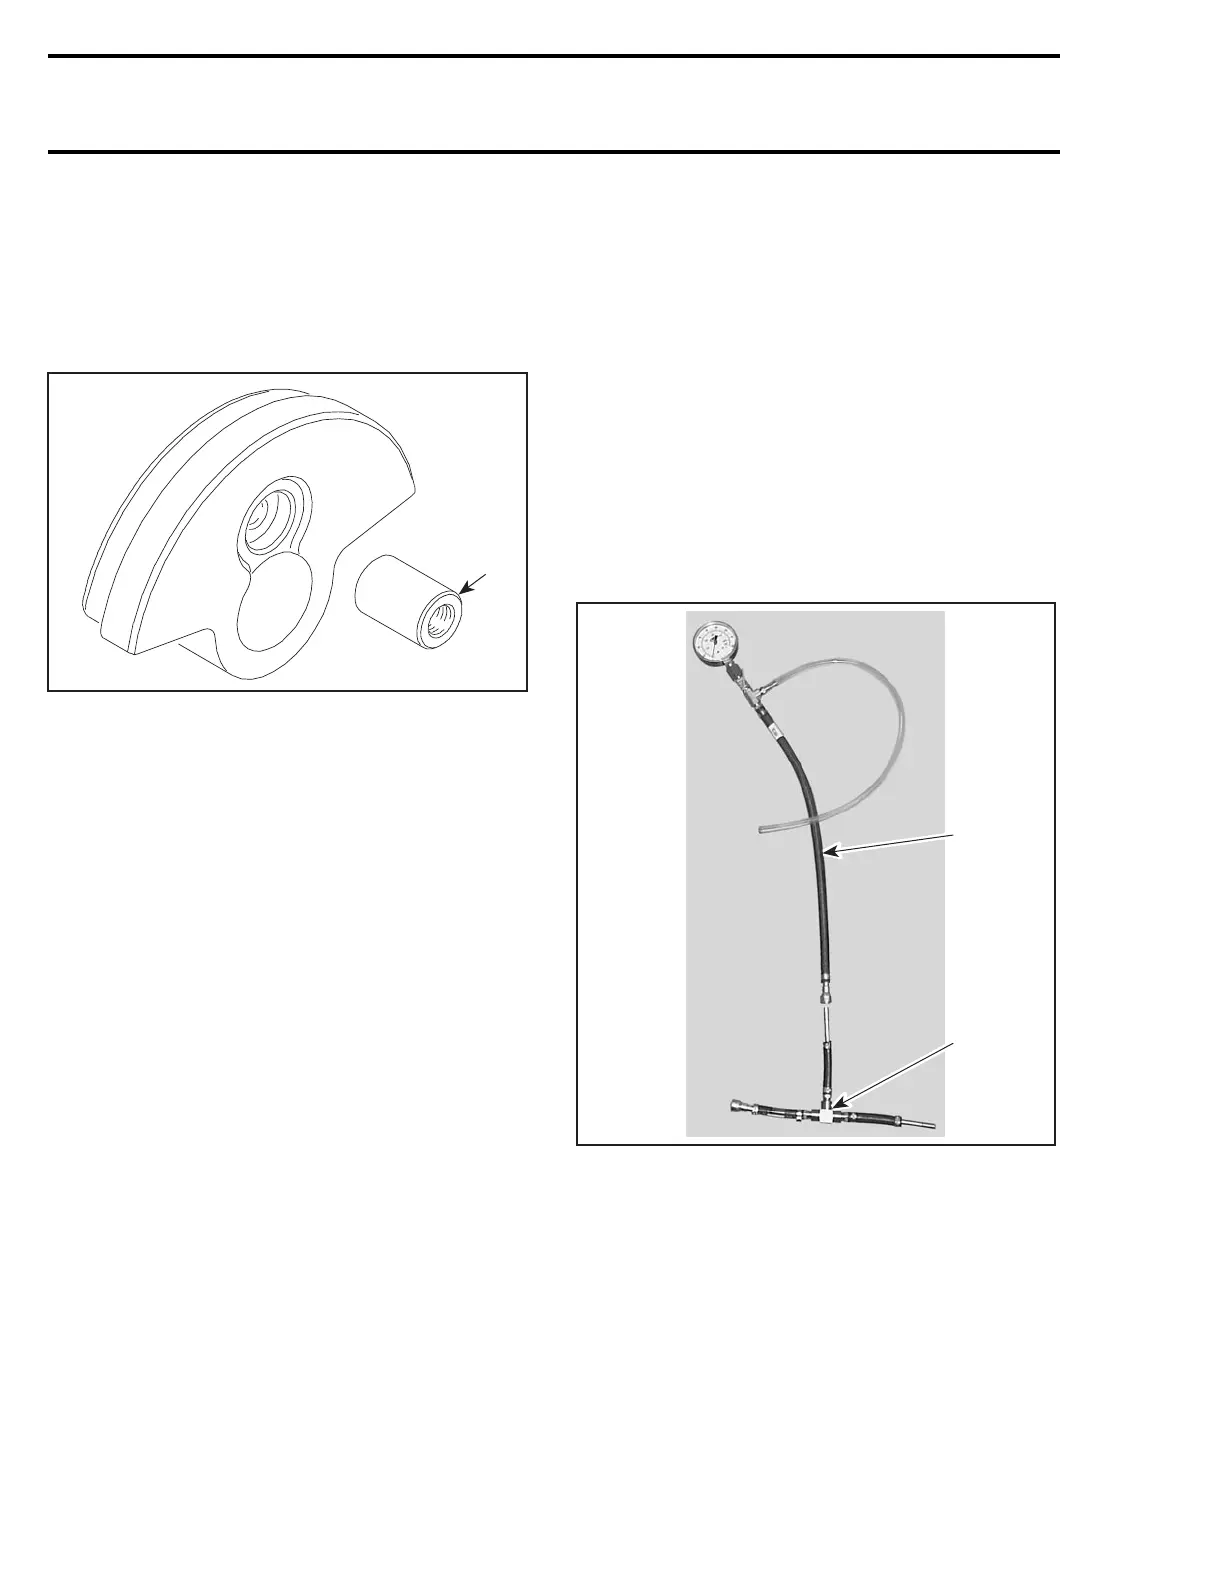
Connect T-adapter to pressure gauge as shown.
F12R08A
1
2
1. Pressure gauge (P/N 529 035 709)
2. T-adapter (P/N 529 035 710)
Install pressure gauge between disconnected
ends (in-line installation).
346 smr2004-Complete Line Up
 Loading...


