Section10FUELSYSTEM
Subsection 03 (CARBURETOR)
CAUTION: Heavy duty carburetor cleaner may
be harmful to the rubber parts, O-rings, etc.
Therefore, it is recommended to remove these
parts prior to cleaning.
Inspect O-rings, diaphragms and gaskets.
DISASSEMBLY AND INSPECTION
Inspect parts for corrosion damage (shaft, throttle
plate, spring, screw, check valve housing, etc.).
Needle Valve
Inspect the tip of needle valve no. 3 for a grooved
condition. If worn, needle and seat must be re-
placed as a matched set.
Diaphragm
Pump Diaphragm Leak Test
Using a suitable pump gauge tester, perform the
following test proceeding as follows:
– Install pump gauge tester (P/N 295 000 114) on
pulse nipple.
– Pump tester until it reaches 28 kPa (4 PSI).
F01F0XA
1
2
TYPICAL
1. Pump gauge tester
2. Install on pulse nipple
Diaphragm no. 4 must stand pressure for 10 sec-
onds. If pressure drops, replace diaphragm .
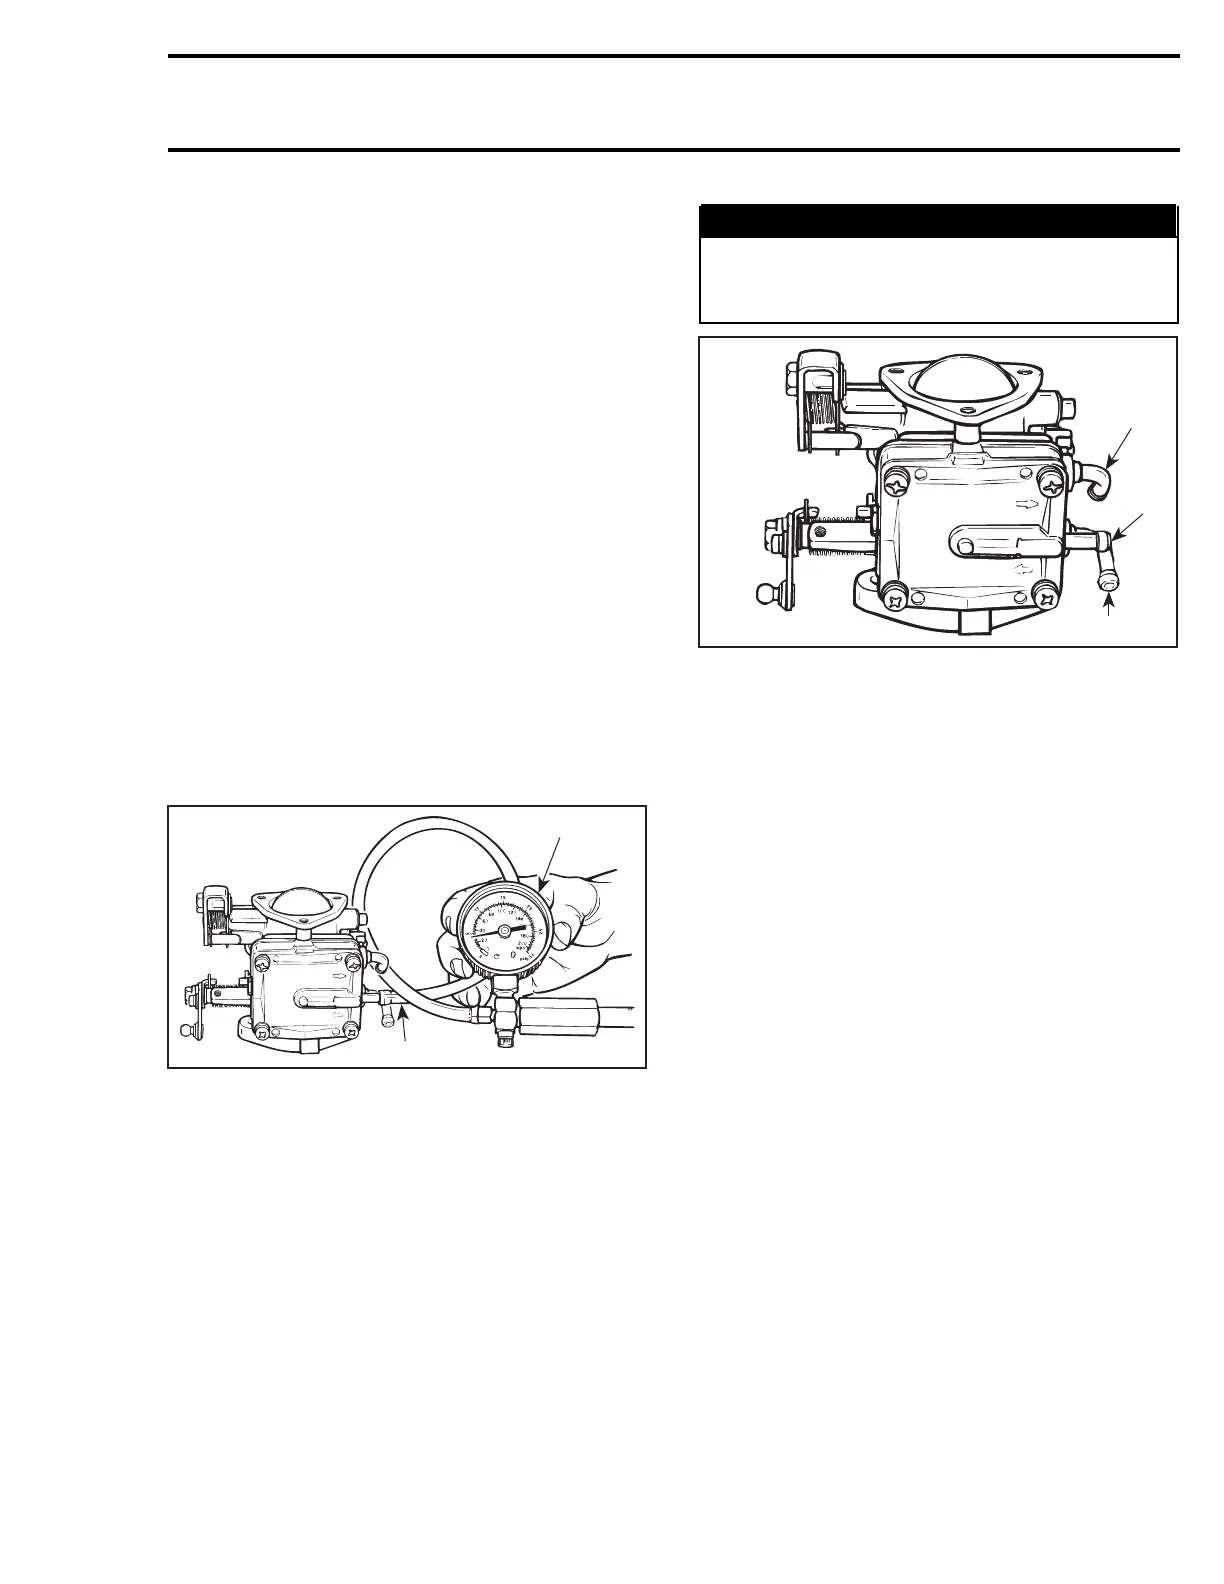
Fuel Pump Valve
Check fuel pump valve operation as follows:
Connect a clean plastic tubing to the inlet nipple
of the fuel pump body no. 5 and alternately apply
pressure and vacuum with the mouth. The inlet
valve should release with pressure and hold under
vacuum.
WARNING
Some fuel may be present in fuel pump. Be
careful not to swallow fuel when under vacu-
um.
F01F0WA
1
2
3
TYPICAL
1. Fuel outlet nipple
2. Pulse nipple
3. Inlet nipple
Repeat the same procedure at the outlet nipple
of the fuel pump body. This time the outlet valve
should hold with pressure and release under vac-
uum.
Inspect valves. The pumping area should be free
of holes, tears or imperfections. Replace as need-
ed.
Internal Fuel Filter
To verify condition of filter no. 6, proceed as fol-
lows:
Remove pump cover no. 7, gasket no. 8,di-
aphragm no. 4 andthenpumpbodyno. 5 and
diaphragm no. 9.
Remove filter no. 6 from carburetor body then
clean filter and blow carefully with compressed air
(low pressure).
smr2004-Complete Line Up 521
 Loading...


