Section 16 HULL/BODY
Subsection 01 (ADJUSTMENT AND REPAIR)
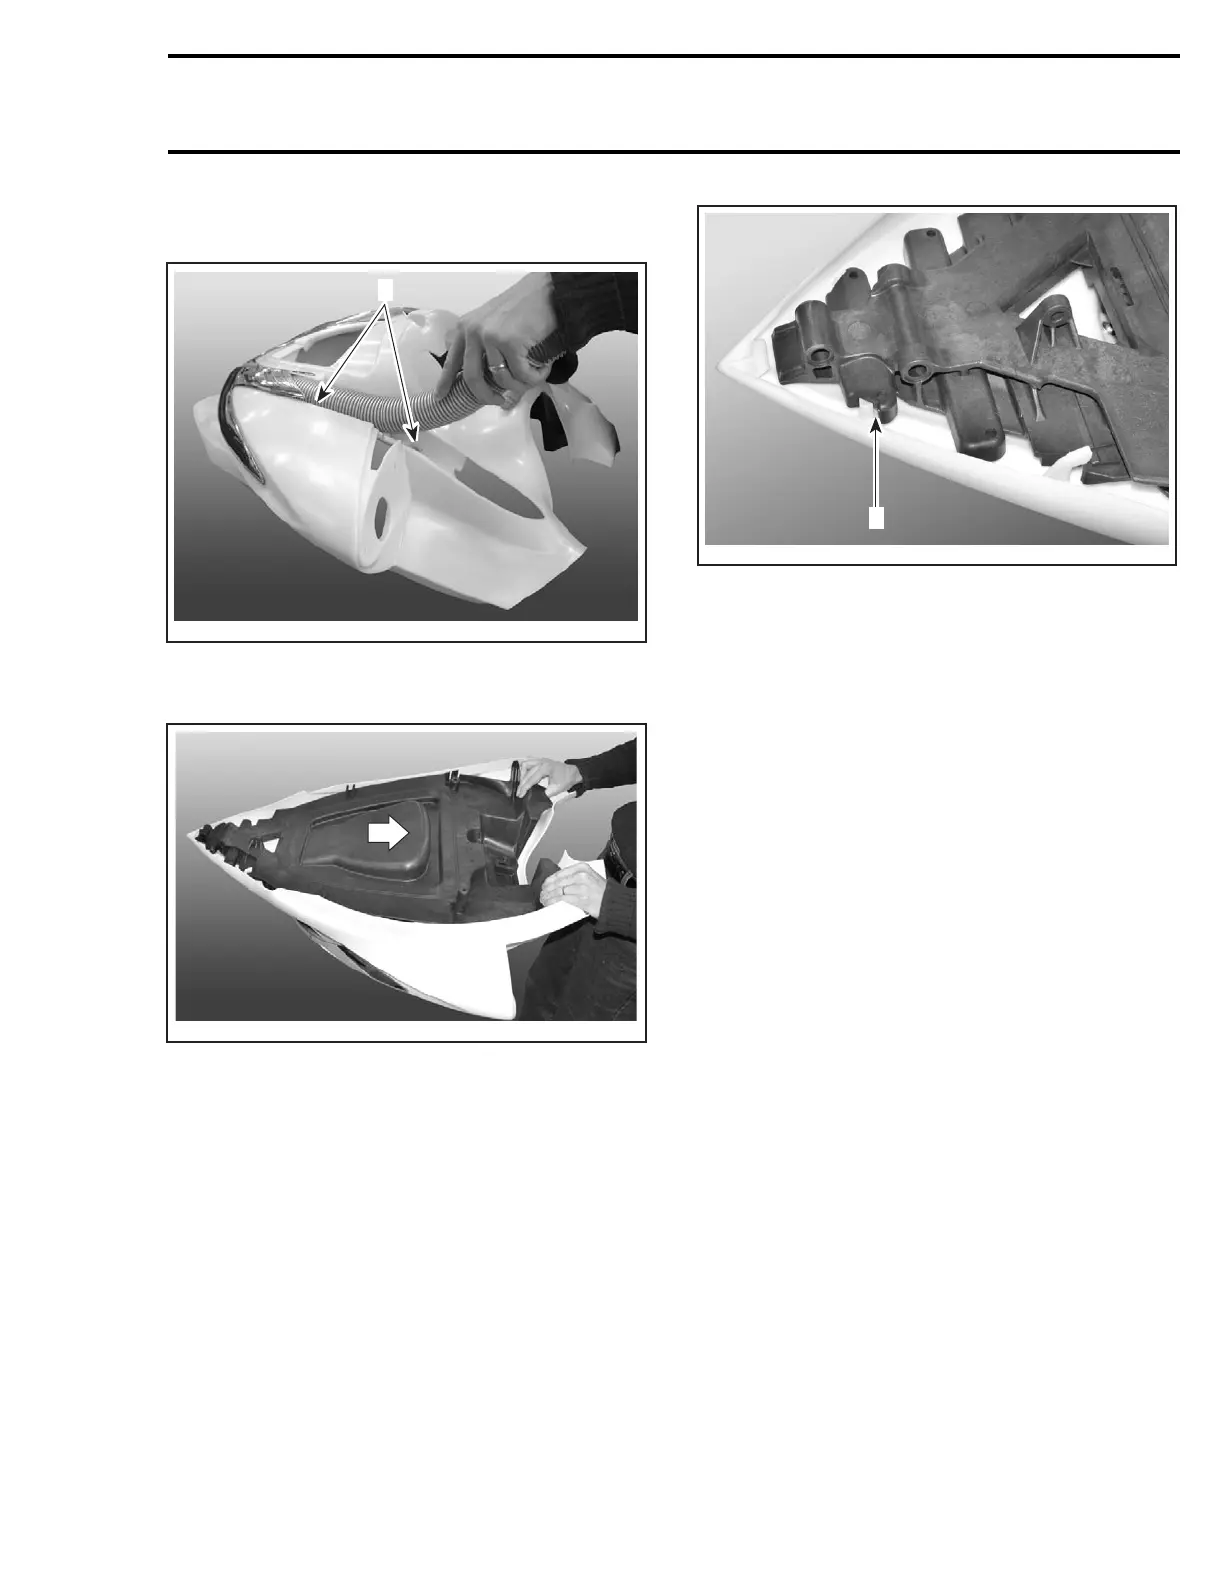
Lift the end of top tubes and remove retaining
screws.
F19L1PA
1
1. Retaining screws
Slide inner shell out as shown.
F19L1QA
SLIDE OUT
Installation is the reverse of removal procedure.
However, pay attention to the following.
Lay down inner shell in storage cover. Align inner
shell slot with cover tab. Do not force inner shell
forward.
F19L1RA
1
1. Align cover tab with inner shell slot.
Install front screws. This will properly move inner
shell forward and lock it into cover tabs.
Install top retaining screws (those located un-
der the top tubes). Torque screws to 11 N•m
(97 lbf•in).
Install remaining retaining screws of inner shell.
Front Grill
Remove inner shell.
Remove retaining screws of grill.
Carefully release the locking tabs.
CAUTION: Proceed with caution. Damaging
the locking part of the storage cover will pre-
vent proper retaining of the front grill after
reinstallation.
smr2004-Complete Line Up 743
 Loading...


