6-11
4007ES Panel Programmer Manual (579-1167)
Editing Standard Component Properties, Continued
Editing the Zone/
Relay Card
The 4007-9801 Zone/Relay card allows monitoring of up to eight Class B zones or four Class
A zones, or control up to eight relay contacts. Up to four cards can be used. The card has two
main tabs to edit. The Card Properties tab and the Point Editing tab.
To edit the Card Properties tab:
1. The panel assigns an address when a Zone/Relay card is added. Set the card address to match
the programmer assigned address.
2. Enter the card’s custom label. This label should make the card easily identifiable.
3. Select the location for each Zone/Relay card. By default, the selected block is F (bottom left
corner). The other choices are block E, block G, and block H.
The following fields in the tab are filled by the programmer and cannot be edited:
• Card description
• Card default label
• Annunciator address
• Unit number
• Box number
• Bay number
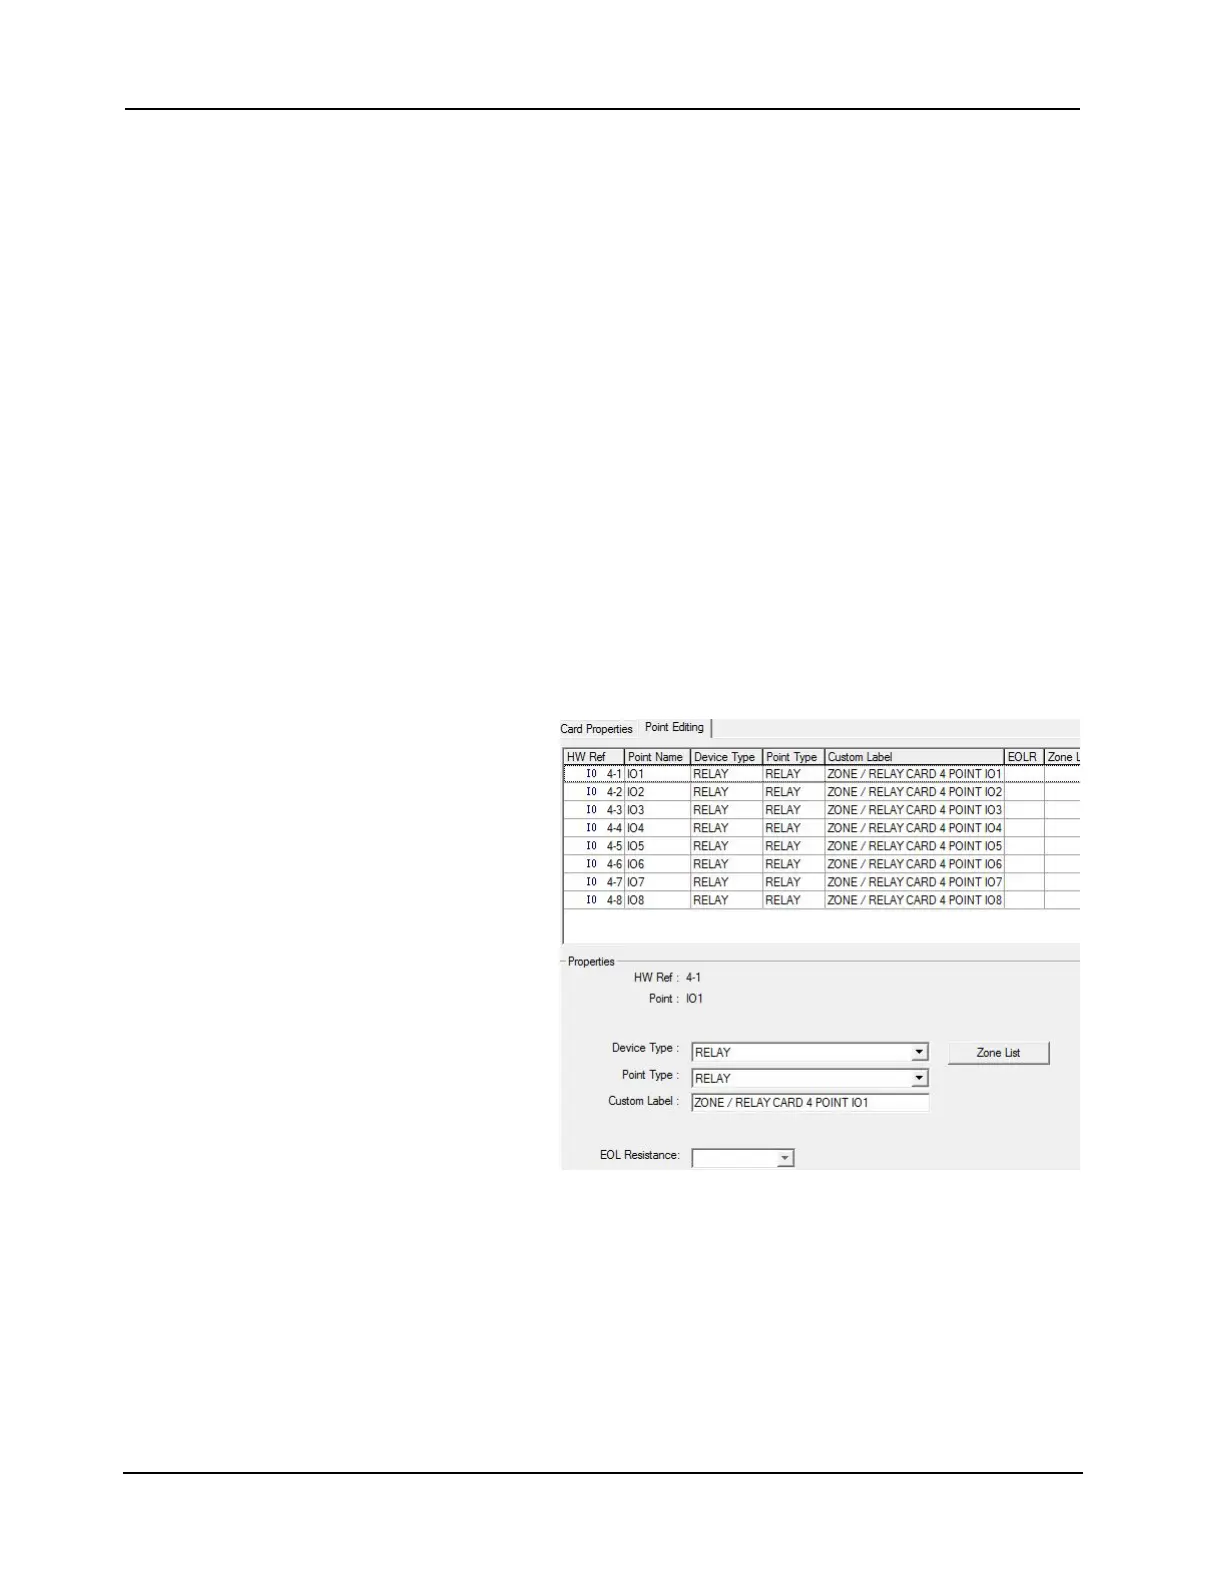
To edit the Point Editing tab (Figure 6-17):
1. Select the device type. The choices are:
• MONA Class A Monitoring Device
Note: If MONA is selected for a point, a confirmation window is displayed explaining that the next point is
reserved for the system and the next point’s device type, point type, and labels change automatically
change. These fields then become non-editable.
• MONB Class B
Monitoring Device
• Relay device
2. Select the point type.
3. Enter the card’s custom
label. This label should
make the card easily
identifiable.
4. Select the EOL resistance
from the EOL Resistance
drop-down list.
5. Click Apply > OK to
confirm the edits.
Figure 6-17. Zone / Relay Card / Point Editing Tab
6. Tag each point to a Zone by clicking on Zone List. The TagList window is displayed (Figure
6-12).
a. Scroll through the list and select the zone to populate.
b. Press the space key. A “>>” symbol appears to the left of the point to indicate that it is
selected. Click OK. If an error message is displayed, click OK and make the
appropriate modifications.
7. Click Apply > OK to confirm the edits.