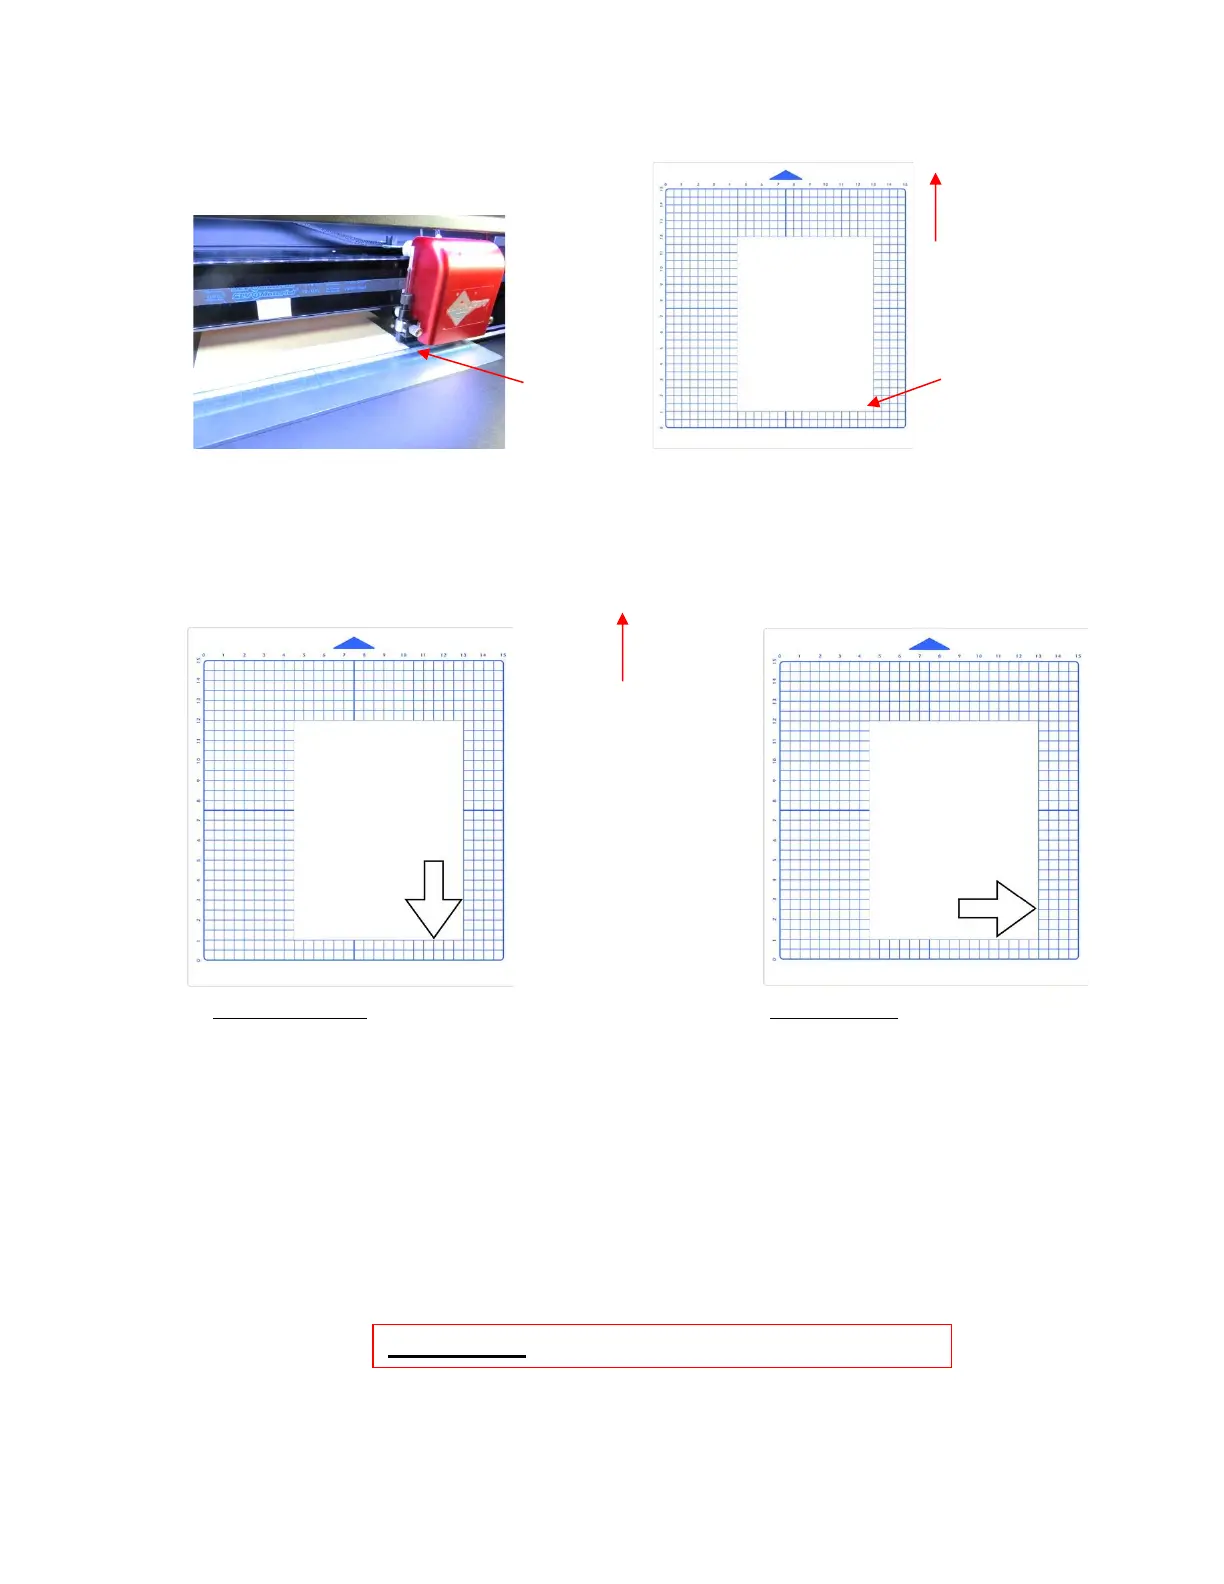
Once the pen tip is in the lower right corner, you are ready to proceed with the test.
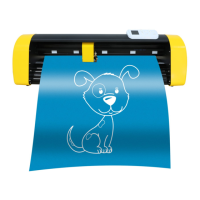
(15) Click on the Cut button at the bottom of the Cut Settings window and the arrow will be drawn to align with
the origin you set. After the cut is complete, the cut window will close. Your arrow will be drawn as shown,
with the direction related to whether you originally chose Landscape or Portrait for your Cutting Mat:
(16) To draw again, return to the cut window and choose a different origin. Practice moving the origin to different
locations. This is how Origin Point mode works.
(17) If you wish to change to a different shape or add more shapes, remember to change the Cut Line Type to
Draw (Pen), as you did in Step (9) and change the Holder to Pen in the Cut Settings window. Again,
these two changes won’t be needed when you are cutting with the blade holder.
(18) If you want the image to draw where you have it located on the virtual Cutting Mat in SCAL, then you need
to switch to WYSIWYG mode. Set the origin in the lower right corner of the mat’s grid and then place the
paper in the correct location on the mat to correspond to where the shape is positioned on the Cutting Mat
in SCAL. Refer to Section 12.07 for more details on controlling where images will cut.


 To Next Page