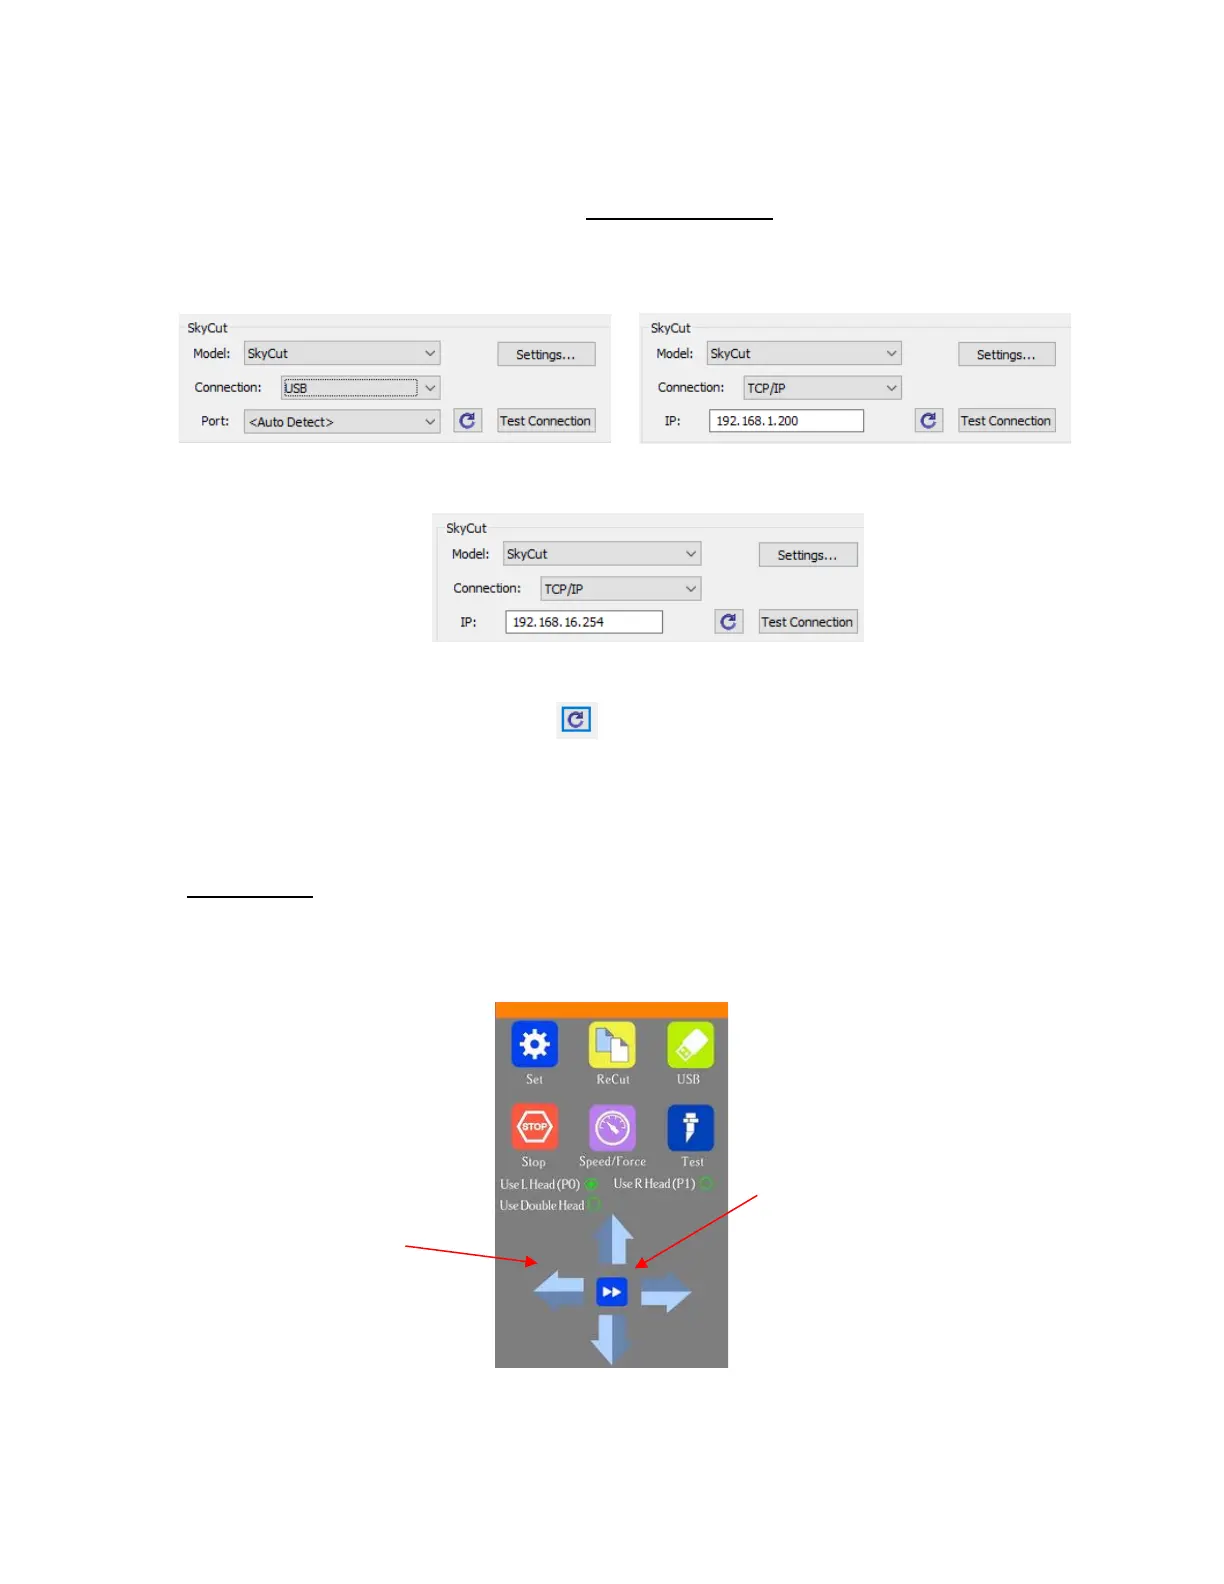
Model: Verify that Model reads Skycut. If not, return to Cutter>My Cutter>Manage Cutters and add
the Skycut to the menu.
Connection, select USB or TCP/IP (for Wi-Fi or Stand-Alone). If using USB, leave Auto-Detect
selected. If using Wi-Fi, enter the IP address you previously chose in Section 1.12.2. If using Stand-
Alone, enter 192.168.16.254. If you plan to save the file as a PLT file on a flash drive, you can skip this
step.
USB: Wi-Fi:
Stand-Alone:
Click on Test Connection to verify that the head will do a quick jog to the left and back again. If the test
connection fails, click on the Reload icon and try again. If it still fails after several attempts, refer
to Appendix A, first question.
Cut Mode: Set to Origin Point. Later you can test WYSIWG mode, as well.
Change the remaining settings to match the prior screenshot. More details about these settings will be
covered in other sections.
IMPORTANT! The preview of the arrow will not appear until Pen is selected under Holder. The default,
Blade, would have been used if the Cut Line Type on the Style Panel had been left at the default of
Cut.
(14) The arrow keys on the Skycut’s control panel will always be used to set the origin for cutting:
Click on the buttons or the arrow keys on your keyboard to move the head left or right and the mat in
and out. The goal is to have the tip of the pen close to the lower right corner of the paper:


 To Next Page