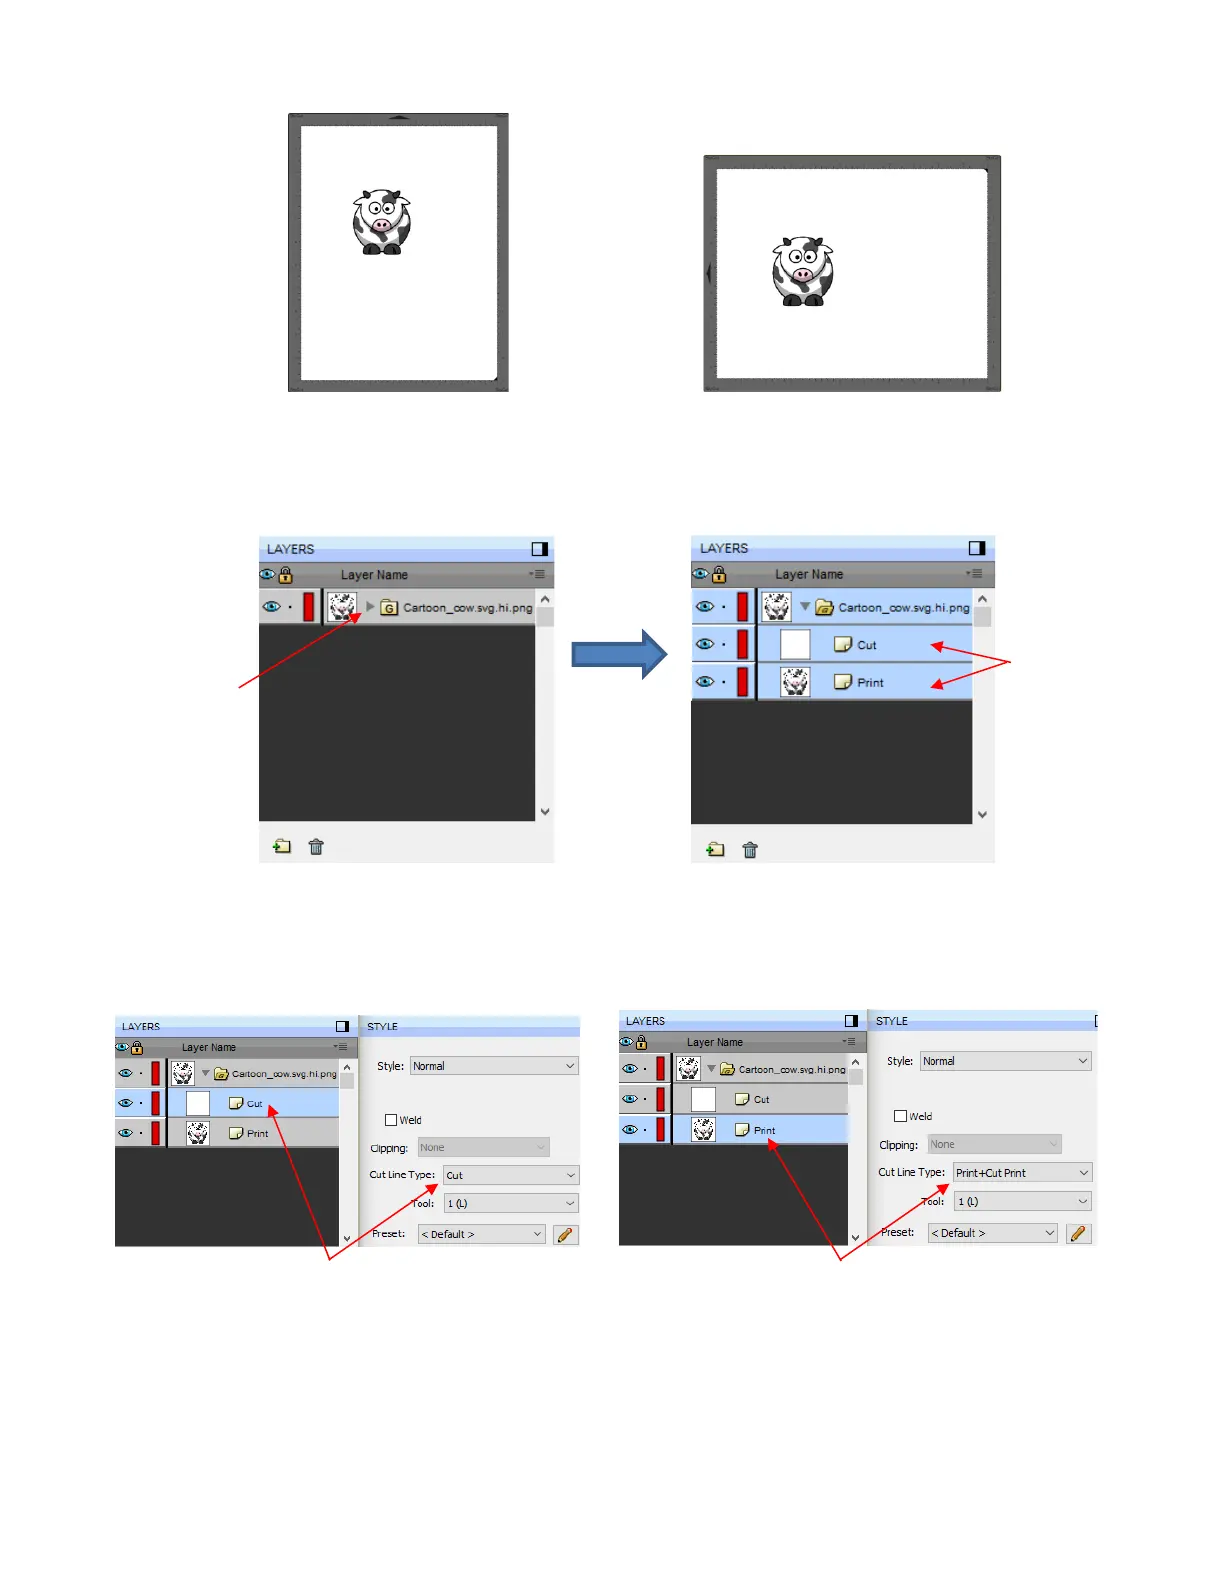
(6) Open up the Layers Panel. As mentioned earlier, PNG files with a transparent background import and have
cut lines added. Click on the down arrow to open up the grouped layer to see that there is both a cut layer
and a print layer within that group:
(7) When you select just one of the two layers and look at the assignment on the Style Panel, you’ll see that
the Cut layer is assigned as Cut and the Print layer is assigned as Print + Cut Print. This is typically what
you want for this type of PNC application (note that the Cut layer will not print because it doesn’t have a Fill
or Stroke color assigned. For more details on Fill and Stroke, refer to Sections 7.14 and 7.15):
(8) Before printing, mark the options on the Document Panel for Show Print Margins and Show Reg Marks.
The Cutting Mat will now indicate the boundaries for your currently select printer and the registration marks
based on their current settings. (Refer to Section 3.05.1 to learn about adjusting these settings.)


 To Next Page