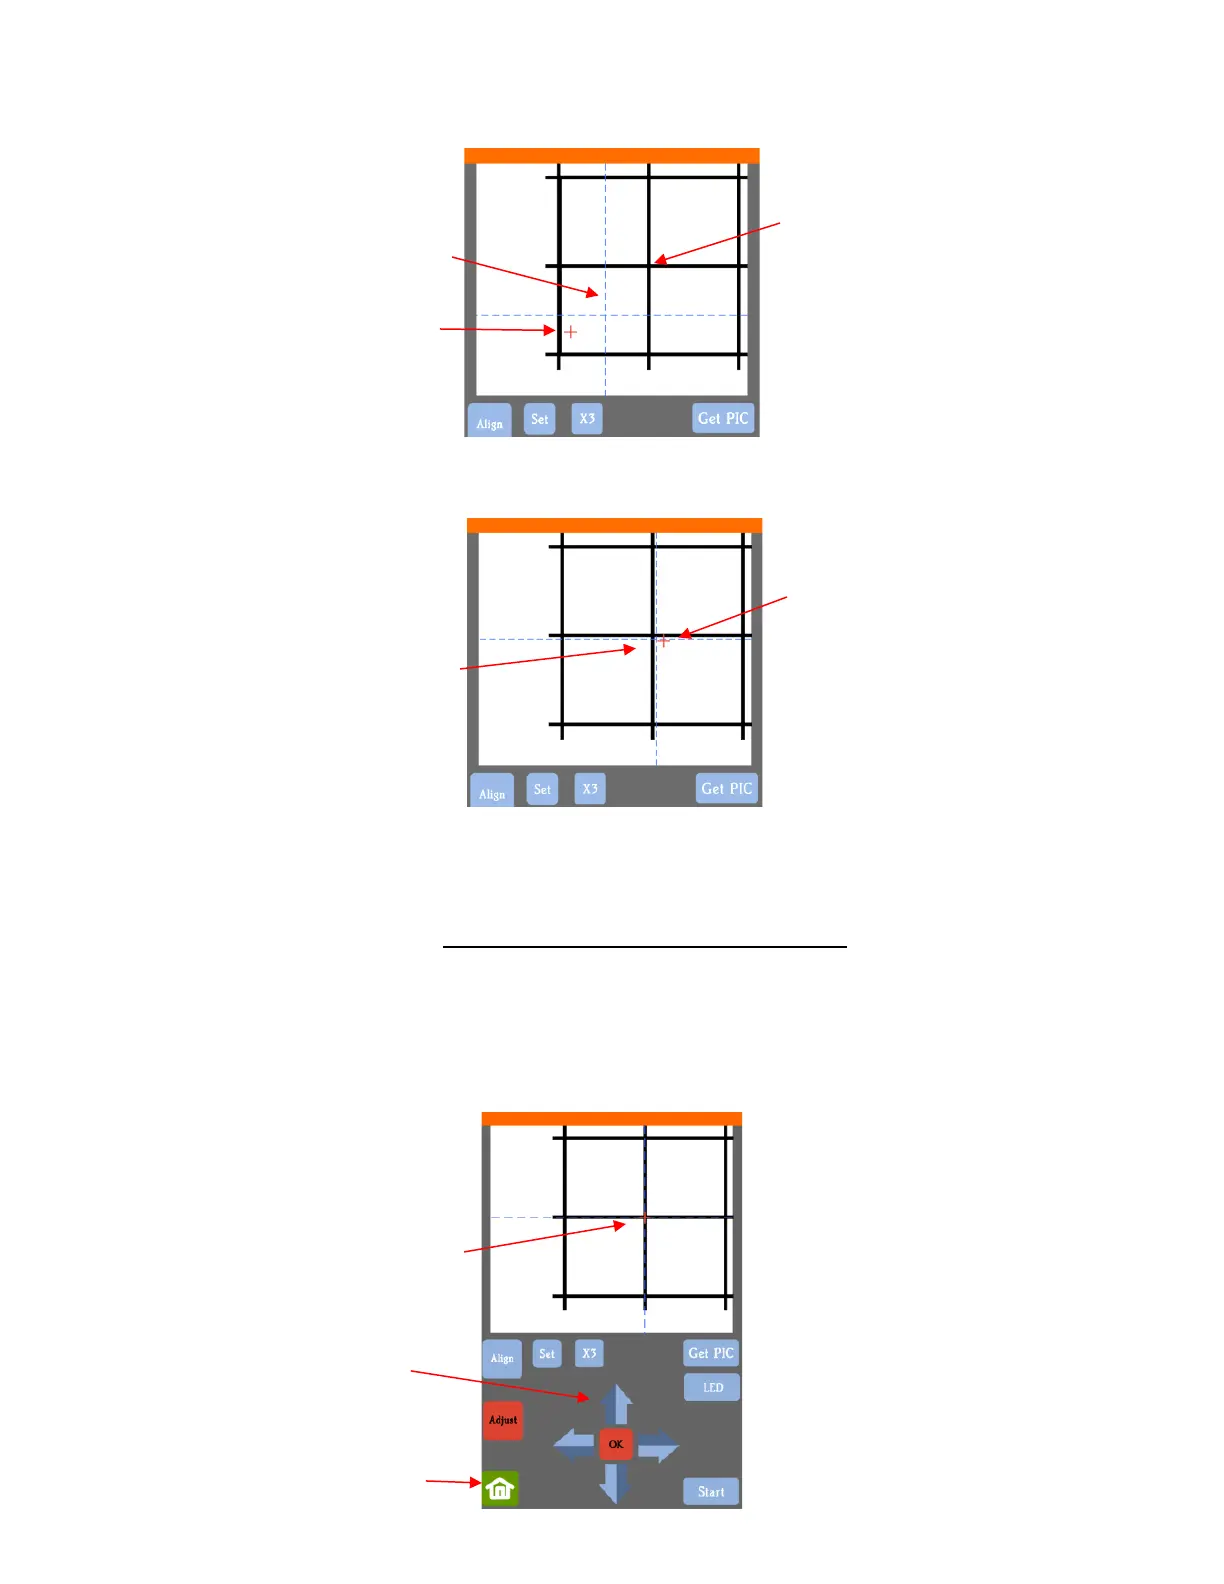
(8) Tap your finger near the middle of the drawn test shape on the screen. This will move the red + close to that
location:
(9) Press OK. A new photo will be taken and one of two things will happen:
The red + is so close to the center that the Skycut will now take over and find the true center on its own.
You will see the red + and the blue dashed + aligned in the center and the arrows (only) will return to
their blue color. Additionally, the camera will now move over to the left side test shape and take a photo.
The red + and the blue dashed + are still not aligned and the arrows around the OK button are still red.
You will need to tap the center again and press OK. Continue, as needed, until the center is identified
and the camera moves to the left side test shape and takes a photo.
(10) Once the camera has taken a photo on the left side, tap the center of the test shape on the screen and
press OK. The camera will take over and locate the center on its own. The arrows (only) will turn blue:


 To Next Page